[et_pb_section fb_built=”1″ _builder_version=”4.21.0″ custom_margin_tablet=”|40px||40px|false|true” custom_margin_phone=”|30px||30px|false|true” custom_margin_last_edited=”on|desktop” da_disable_devices=”off|off|off” global_colors_info=”{}” da_is_popup=”off” da_exit_intent=”off” da_has_close=”on” da_alt_close=”off” da_dark_close=”off” da_not_modal=”on” da_is_singular=”off” da_with_loader=”off” da_has_shadow=”on”][et_pb_row _builder_version=”4.27.0″ _module_preset=”default” hover_enabled=”0″ global_colors_info=”{}” background_enable_color=”off” sticky_enabled=”0″][et_pb_column type=”4_4″ _builder_version=”4.21.0″ _module_preset=”default” global_colors_info=”{}”][et_pb_text _builder_version=”4.27.0″ text_text_color=”#000000″ text_font_size=”15px” text_line_height=”1.8em” global_colors_info=”{}”]
This recipe was contributed by Mordechai Schram: owner of hamutzim, ordained kosher chef, and champion of the Mt. Airy local food economy. Mordechai is enthusiastic about cooking local, seasonal, and organic food using ancient preservation methods through the lens of Jewish Diaspora and Israeli cuisine.
[/et_pb_text][/et_pb_column][/et_pb_row][et_pb_row column_structure=”3_5,2_5″ _builder_version=”4.21.0″ _module_preset=”default” width=”100%” global_colors_info=”{}”][et_pb_column type=”3_5″ _builder_version=”4.21.0″ _module_preset=”default” global_colors_info=”{}”][et_pb_text _builder_version=”4.21.0″ _module_preset=”default” text_text_color=”#000000″ text_line_height=”1.8em” global_colors_info=”{}”]
What is Lacto-Fermentation?
The process of lacto-fermentation creates an environment for naturally occurring bacteria found in vegetables to convert naturally occurring sugar into lactic acid. Lactic acid functions as a preservative and inhibits the growth of other harmful bacteria. Salt and water are the medium in which this amazing transformation takes place. In addition to its amazing taste and preservation benefits, lacto-fermentation increases the vitamin and enzyme levels of vegetables and is also high in probiotics, which are essential to good gut health.
[/et_pb_text][et_pb_text _builder_version=”4.21.0″ text_text_color=”#000000″ text_line_height=”1.8em” global_colors_info=”{}”]
Today we are sharing a lacto-fermentation recipe that’s perfect for pickling carrots, radishes, and turnips! These crunchy, tangy veggies are great on salads, sandwiches, dips, or straight out of the jar. And best of all, they’re right from your garden!
[/et_pb_text][/et_pb_column][et_pb_column type=”2_5″ _builder_version=”4.21.0″ _module_preset=”default” global_colors_info=”{}”][et_pb_image src=”https://backyard-eats.com/wp-content/uploads/2023/06/Hamutzim-Screenshot.png” title_text=”Hamutzim Screenshot” _builder_version=”4.21.0″ _module_preset=”default” border_width_all=”2px” border_color_all=”#000000″ global_colors_info=”{}”][/et_pb_image][/et_pb_column][/et_pb_row][et_pb_row _builder_version=”4.21.0″ _module_preset=”default” background_color=”gcid-3b5ac83a-684c-4379-a559-60b2aa9e8157″ width=”100%” custom_margin=”20px||20px||false|false” global_colors_info=”{%22gcid-3b5ac83a-684c-4379-a559-60b2aa9e8157%22:%91%22background_color%22%93}”][et_pb_column type=”4_4″ _builder_version=”4.21.0″ _module_preset=”default” global_colors_info=”{}”][et_pb_text _builder_version=”4.21.0″ _module_preset=”default” text_font=”|600|||||||” text_text_color=”#FFFFFF” header_font=”|600|||||||” header_text_color=”#FFFFFF” header_font_size=”36px” global_colors_info=”{}”]
Equipment
[/et_pb_text][/et_pb_column][/et_pb_row][et_pb_row _builder_version=”4.21.0″ _module_preset=”default” width=”100%” global_colors_info=”{}”][et_pb_column type=”4_4″ _builder_version=”4.21.0″ _module_preset=”default” global_colors_info=”{}”][et_pb_text _builder_version=”4.21.0″ _module_preset=”default” header_3_line_height=”2em” header_4_line_height=”1.5em” header_5_line_height=”1.5em” custom_margin=”-10px||||false|false” global_colors_info=”{}”]
At the end of the day, pickling can be as simple as submerging vegetables in salt water! You can experiment with whatever heat-safe jars you have to start; the equipment linked below will help make the process easier for fans of fermentation or large-scale production.
[/et_pb_text][et_pb_text _builder_version=”4.21.0″ _module_preset=”default” text_text_color=”#000000″ text_line_height=”1.8em” global_colors_info=”{}”]
A Mason Jar
This recipe is for a Quart Mason Jar. You can find mason jars at most grocery and hardware stores, or you can order them online.
You can adjust this recipe up or down depending on how many vegetables you have. Double for a ½ gallon (or 2 quarts), or halve for a pint. For larger quantities, say 1 gallon or 3.5 gallons, I recommend purchasing a crock from Ohio Stoneware.
[/et_pb_text][/et_pb_column][/et_pb_row][et_pb_row column_structure=”1_2,1_2″ _builder_version=”4.21.0″ _module_preset=”default” width=”100%” custom_margin=”-20px||||false|false” global_colors_info=”{}”][et_pb_column type=”1_2″ _builder_version=”4.21.0″ _module_preset=”default” global_colors_info=”{}”][et_pb_text _builder_version=”4.21.0″ _module_preset=”default” text_text_color=”#000000″ text_line_height=”1.8em” global_colors_info=”{}”]
A Weight & Burping Lid
If you don’t have a burping lid, just remember to manually burp the jar every day. Although the weight is recommended, I have made a bunch of ferments without the weight: just make sure the water covers the top of the vegetables. Or find something around the house, perhaps a stone, that could serve the same purpose (just make sure to clean it first)
[/et_pb_text][et_pb_text _builder_version=”4.21.0″ _module_preset=”default” text_text_color=”#000000″ text_line_height=”1.8em” global_colors_info=”{}”]
A Kitchen Scale
A kitchen scale helps provide more accurate measurements based on weight (grams) instead of volume (cups). Here is one kitchen scale that you could order online.
[/et_pb_text][et_pb_text _builder_version=”4.21.0″ _module_preset=”default” global_colors_info=”{}”]
Canning Funnel
A canning funnel helps pack vegetables into mason jars, especially regular or narrow-mouth jars. Here are some examples of canning funnels that you could order online.
[/et_pb_text][/et_pb_column][et_pb_column type=”1_2″ _builder_version=”4.21.0″ _module_preset=”default” global_colors_info=”{}”][et_pb_image src=”https://backyard-eats.com/wp-content/uploads/2023/06/6x6_1_Gallon_Weights_1__02700.png” title_text=”6x6_1_Gallon_Weights_1__02700″ show_bottom_space=”off” align=”center” _builder_version=”4.21.0″ _module_preset=”default” height=”350px” custom_margin=”-40px||||false|false” global_colors_info=”{}”][/et_pb_image][et_pb_text _builder_version=”4.21.0″ _module_preset=”default” width=”75%” module_alignment=”center” global_colors_info=”{}”]
I recommend buying a dedicated fermentation weight if you plan to do a lot of pickling. You can also buy a fermentation kit, such as this one from Cultures For Health.
[/et_pb_text][/et_pb_column][/et_pb_row][et_pb_row _builder_version=”4.21.0″ _module_preset=”default” background_color=”gcid-3b5ac83a-684c-4379-a559-60b2aa9e8157″ width=”100%” custom_margin=”20px||20px||false|false” global_colors_info=”{%22gcid-3b5ac83a-684c-4379-a559-60b2aa9e8157%22:%91%22background_color%22,%22background_color%22%93}”][et_pb_column type=”4_4″ _builder_version=”4.21.0″ _module_preset=”default” global_colors_info=”{}”][et_pb_text _builder_version=”4.21.0″ _module_preset=”default” text_font=”|600|||||||” text_text_color=”#FFFFFF” header_font=”|600|||||||” header_text_color=”#FFFFFF” header_font_size=”36px” global_colors_info=”{}”]
Ingredients
[/et_pb_text][/et_pb_column][/et_pb_row][et_pb_row _builder_version=”4.21.0″ _module_preset=”default” width=”100%” custom_padding=”||0px||false|false” global_colors_info=”{}”][et_pb_column type=”4_4″ _builder_version=”4.21.0″ _module_preset=”default” global_colors_info=”{}”][et_pb_text _builder_version=”4.21.0″ _module_preset=”default” text_text_color=”#000000″ text_line_height=”1.8em” header_6_line_height=”1.5em” global_colors_info=”{}”]
1-1.25 lb Radish, Carrot, and/or Turnip
425 grams of Water (about 2 cups)
- Depending on how much veggies and other ingredients you use, there may be some leftover brine. Better to have more than less, and you can keep the extra brine in the fridge in a mason jar to use for the next batch.
13 grams Celtic and/or Himalayan Sea Salt (3% Salinity)
- Celtic and Himalayan salts have the best flavor, and they contain the rich mineral and trace elements naturally occurring in salt.
- When measuring salt and water use weight instead of volume, as it is more precise. This recipe calls for a 3% Salinity. 13 grams of salt is 3% of 425 grams of water.
1-2 Bay Leaves
- Bay leaves have tannins which are good for naturally preserving the crunch of your ferments.
Optional Additions
- A splash of Raw Unfiltered Apple Cider Vinegar (e.g.: Bragg’s). Just a splash as too much vinegar will impede the lacto-fermentation process
- A few Cloves of Garlic (Especially for Carrots)
- A few slices of Fresh Ginger (Especially for Carrots)
- A few slices of Onion
- Star Anise
[/et_pb_text][et_pb_cta title=”Spice Ideas” button_text=”Spices for Cucumbers” _builder_version=”4.27.0″ _module_preset=”default” body_font_size=”15px” background_color=”gcid-c8781551-ca60-42c8-ba6c-c1e000785908″ custom_margin=”0px||0px||false|false” custom_padding=”40px||20px||false|false” global_colors_info=”{%22gcid-c8781551-ca60-42c8-ba6c-c1e000785908%22:%91%22background_color%22%93}”]
For cucumbers I use a different spice mix than for radishes or carrots.
Try a shake of yellow & brown mustard seed, coriander seed, and black & white pepper. Add a pinch of allspice, clove, or juniper berry. Or stick with a classic bay leaf, a few sprigs of fresh dill, and garlic!
[/et_pb_cta][/et_pb_column][/et_pb_row][et_pb_row column_structure=”1_3,1_3,1_3″ _builder_version=”4.21.0″ _module_preset=”default” width=”100%” global_colors_info=”{}”][et_pb_column type=”1_3″ _builder_version=”4.21.0″ _module_preset=”default” global_colors_info=”{}”][et_pb_image src=”https://backyard-eats.com/wp-content/uploads/2023/05/pickles.jpeg” title_text=”pickles” _builder_version=”4.21.0″ _module_preset=”default” width_tablet=”50%” width_phone=”50%” width_last_edited=”on|tablet” module_alignment=”center” global_colors_info=”{}”][/et_pb_image][/et_pb_column][et_pb_column type=”1_3″ _builder_version=”4.21.0″ _module_preset=”default” global_colors_info=”{}”][et_pb_image src=”https://backyard-eats.com/wp-content/uploads/2023/04/29_crop.jpg” title_text=”29_crop” _builder_version=”4.21.0″ _module_preset=”default” width_tablet=”50%” width_phone=”50%” width_last_edited=”on|tablet” module_alignment_tablet=”center” module_alignment_phone=”center” module_alignment_last_edited=”on|tablet” global_colors_info=”{}”][/et_pb_image][/et_pb_column][et_pb_column type=”1_3″ _builder_version=”4.21.0″ _module_preset=”default” global_colors_info=”{}”][et_pb_image src=”https://backyard-eats.com/wp-content/uploads/2023/04/Untitleddesign17.jpg” title_text=”Untitled+design+(17)” _builder_version=”4.21.0″ _module_preset=”default” width_tablet=”50%” width_phone=”50%” width_last_edited=”on|tablet” module_alignment_tablet=”center” module_alignment_phone=”center” module_alignment_last_edited=”on|tablet” global_colors_info=”{}”][/et_pb_image][/et_pb_column][/et_pb_row][et_pb_row _builder_version=”4.21.0″ _module_preset=”default” background_color=”gcid-3b5ac83a-684c-4379-a559-60b2aa9e8157″ width=”100%” custom_margin=”20px||20px||false|false” global_colors_info=”{%22gcid-3b5ac83a-684c-4379-a559-60b2aa9e8157%22:%91%22background_color%22,%22background_color%22,%22background_color%22%93}”][et_pb_column type=”4_4″ _builder_version=”4.21.0″ _module_preset=”default” global_colors_info=”{}”][et_pb_text _builder_version=”4.21.0″ _module_preset=”default” text_font=”|600|||||||” text_text_color=”#FFFFFF” header_font=”|600|||||||” header_text_color=”#FFFFFF” header_font_size=”36px” global_colors_info=”{}”]
Recipe Directions
[/et_pb_text][/et_pb_column][/et_pb_row][et_pb_row _builder_version=”4.21.0″ _module_preset=”default” width=”100%” custom_margin=”-5px||||false|false” global_colors_info=”{}”][et_pb_column type=”4_4″ _builder_version=”4.21.0″ _module_preset=”default” global_colors_info=”{}”][et_pb_text _builder_version=”4.21.0″ _module_preset=”default” text_text_color=”#000000″ text_line_height=”1.8em” header_6_line_height=”1.5em” global_colors_info=”{}”]
Veggie Prep
- Wash and trim the vegetables. Keep the skins on! Depending on the size of your vegetables, you can choose to pickle them whole or slice them to fit your jar.
- For Radish and Turnip: slice by hand. For quicker and more consistent results, use a mandolin or the slicing attachment on your food processor or stand mixer. The slices should be about a ¼ inch thick. If using a mandolin, be very careful because they are super sharp. I recommend using a chain mail glove to protect your hand.
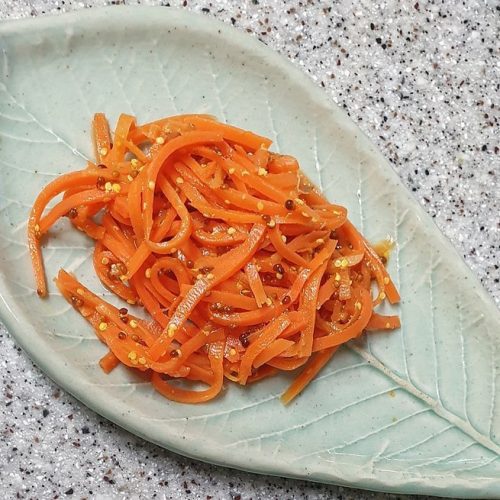
- For Carrots: cut into julienne (thin strips).
Salt Brine
- Using a kitchen scale set to grams, place your jar on the scale and tare – meaning bring the weight to “0” with the jar on the scale.
- Fill the jar until you get to 425 grams.
- Tare the scale again and add the 13g of salt. (A few grams more is fine too.)
- Cover the jar and give it a good shake to help the salt dissolve.
Assembly
- In a quart jar alternately add your vegetables, bay leaf, and any other veggies/spices.
- Add the brine. Leave a little room on top for the water that will exude from the veggies and cover. You may have some leftover brine if you add some extra ingredients.
Stewardship
- Let the ferments sit anywhere from 5-10 days. The longer you ferment the tangier and more probiotic the pickles will become.
- If you don’t have a burping lid, open and close the jar once or twice a day depending on how much “action” you start to get. As you see bubbling in the liquid you will know that fermentation is happening.
- Taste along the way, and when the veggies taste good to you, store them in the fridge for 4-6 months.
[/et_pb_text][/et_pb_column][/et_pb_row][et_pb_row _builder_version=”4.27.0″ _module_preset=”default” background_color=”#88667B” width=”100%” global_colors_info=”{}”][et_pb_column type=”4_4″ _builder_version=”4.21.0″ _module_preset=”default” global_colors_info=”{}”][et_pb_text _builder_version=”4.27.0″ _module_preset=”default” text_font=”|600|||||||” text_text_color=”#FFFFFF” text_font_size=”15px” global_colors_info=”{}”]
For more information on traditional fermentation practices, you can find Mordechai Schram at hamutzim.com
[/et_pb_text][/et_pb_column][/et_pb_row][/et_pb_section]