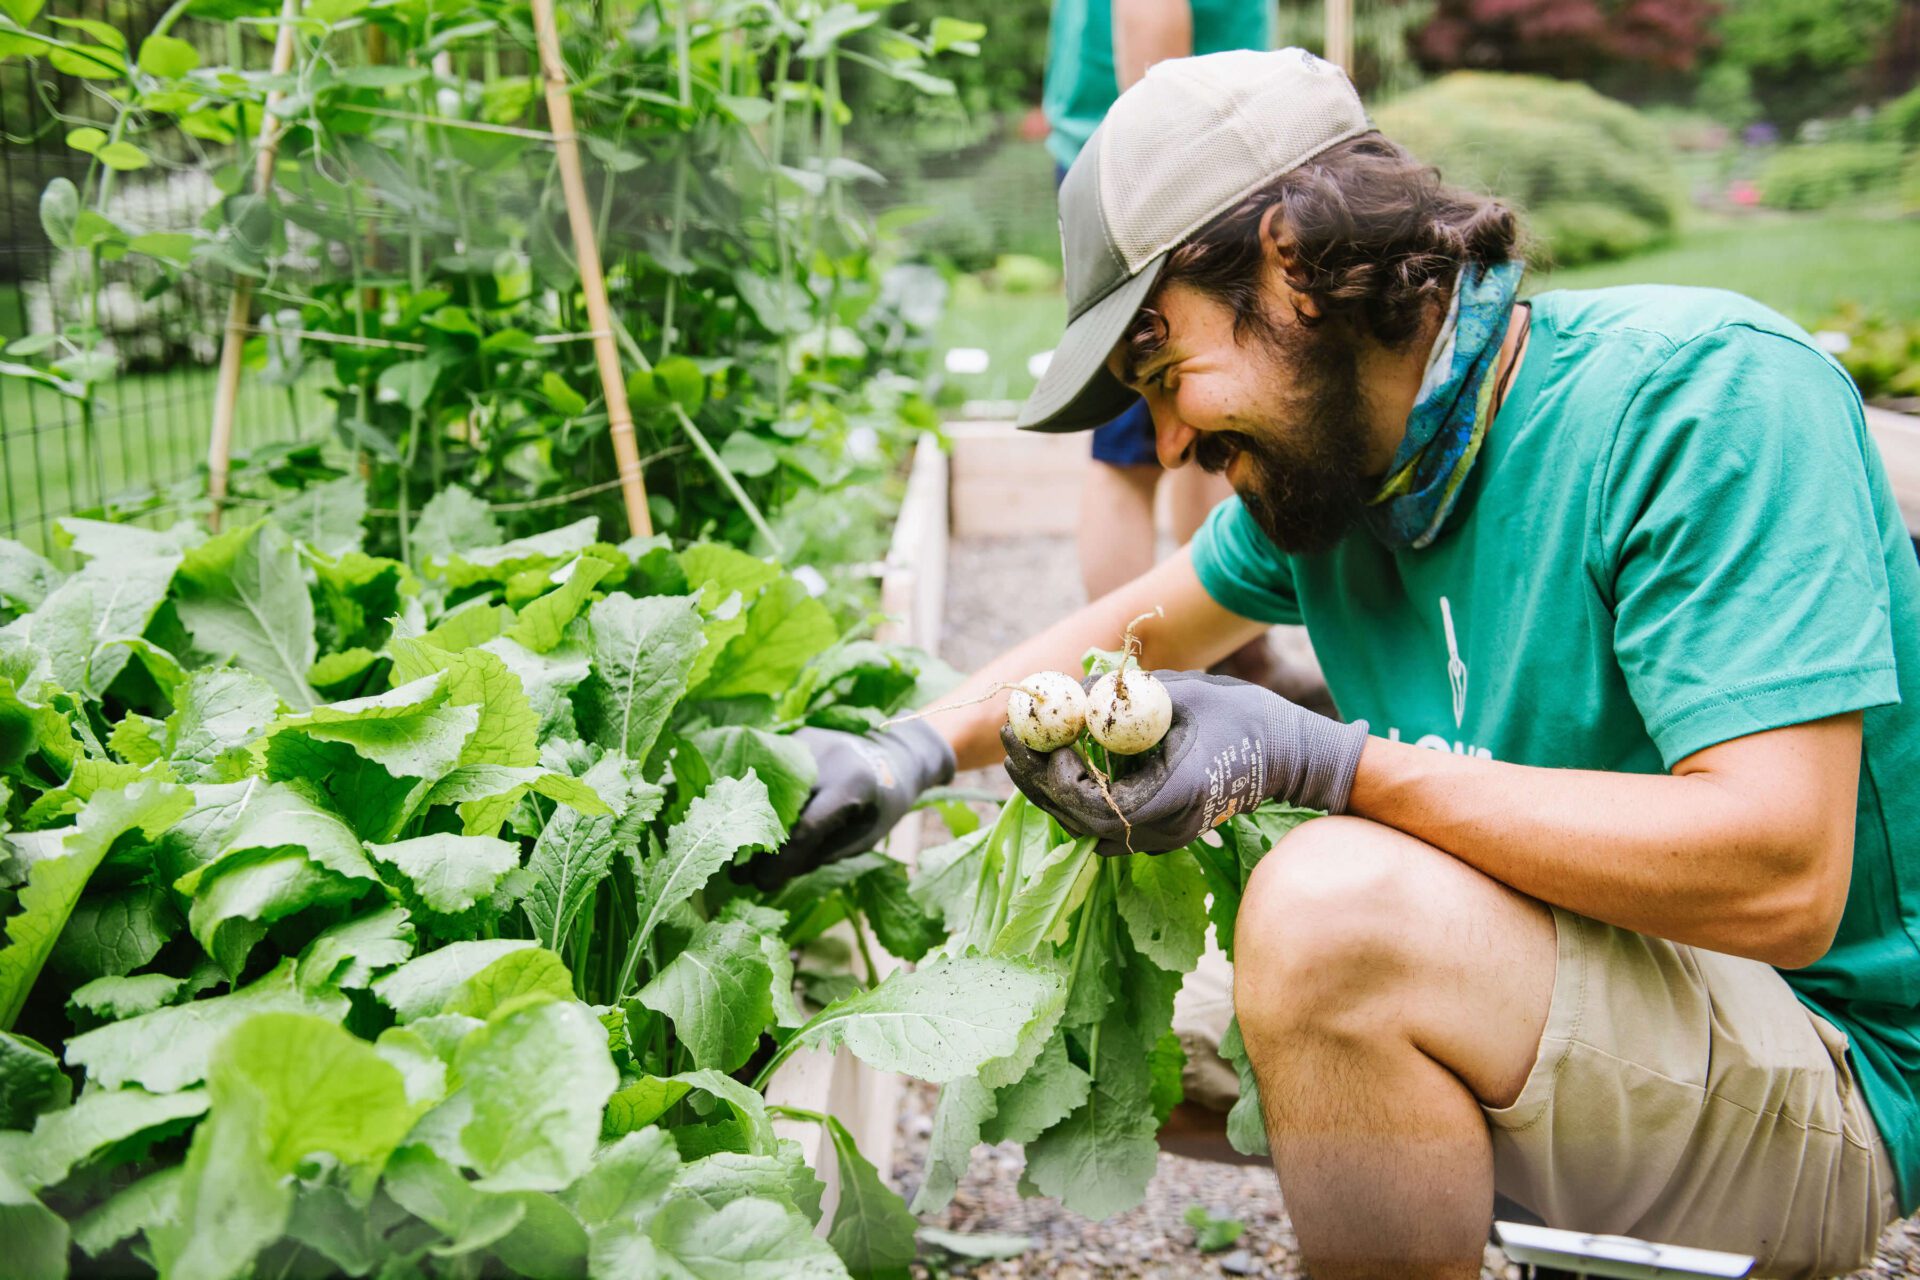
How to Dry Woody Perennial Herbs at Home

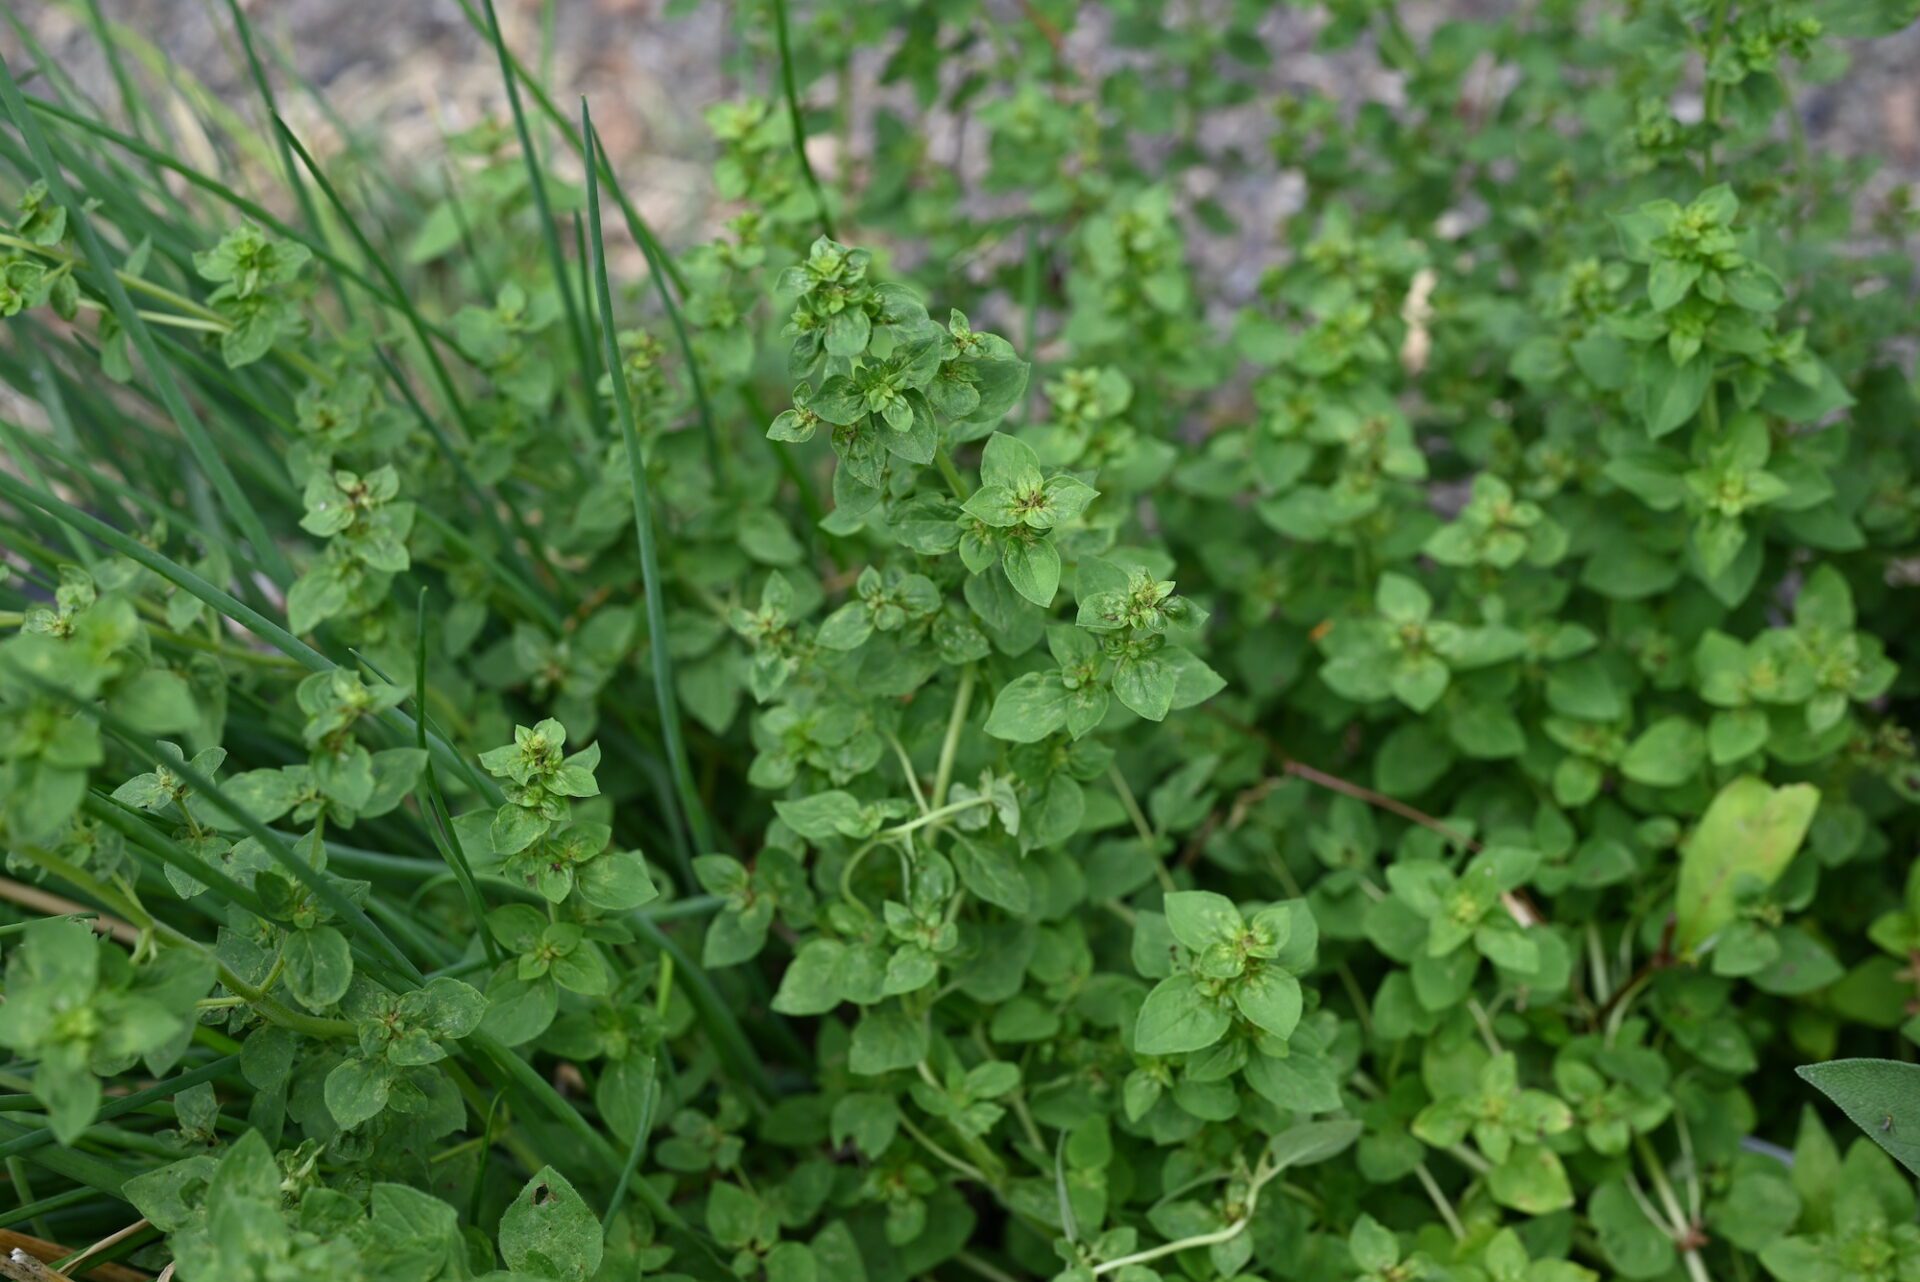
A close-up photo of oregano in a raised bed

[et_pb_section fb_built=”1″ admin_label=”section” _builder_version=”4.16″ da_disable_devices=”off|off|off” global_colors_info=”{}” da_is_popup=”off” da_exit_intent=”off” da_has_close=”on” da_alt_close=”off” da_dark_close=”off” da_not_modal=”on” da_is_singular=”off” da_with_loader=”off” da_has_shadow=”on”][et_pb_row admin_label=”row” _builder_version=”4.16″ background_size=”initial” background_position=”top_left” background_repeat=”repeat” global_colors_info=”{}”][et_pb_column type=”4_4″ _builder_version=”4.16″ custom_padding=”|||” global_colors_info=”{}” custom_padding__hover=”|||”][et_pb_text _builder_version=”4.27.2″ _module_preset=”default” text_text_color=”#000000″ link_font=”|700|||on|||#000000|” link_text_color=”#000000″ header_2_line_height=”1.5em” hover_enabled=”0″ header_2_font_size_tablet=”” header_2_font_size_phone=”23px” header_2_font_size_last_edited=”on|phone” global_colors_info=”{}” sticky_enabled=”0″]

Introduction

Woody perennial herbs like sage, rosemary, and thyme are prized for their earthy aromas and robust flavors. As fall approaches, it’s important to harvest and preserve these herbs before winter frost sets in, which can damage or kill the plants. Drying your herbs now allows you to enjoy their magic long after the growing season ends. The best part? Drying woody herbs is easy and doesn’t require any special equipment. Here’s a simple, beginner-friendly guide to harvesting and drying your favorite woody herbs this fall.

[/et_pb_text][et_pb_text _builder_version=”4.27.2″ _module_preset=”default” text_text_color=”#000000″ link_font=”|700|||on|||#000000|” link_text_color=”#000000″ header_2_line_height=”1.5em” hover_enabled=”0″ header_2_font_size_tablet=”” header_2_font_size_phone=”23px” header_2_font_size_last_edited=”on|phone” global_colors_info=”{}” sticky_enabled=”0″]

Understanding Woody Herbs

In the gardening world, herbs like sage, rosemary, and thyme are considered “woody perennials.” Unlike tender herbs such as dill, these plants have sturdier stems that contain lower moisture levels, making them ideal for drying. Their resilience allows for easy, long-term preservation with minimal risk of mold.

[/et_pb_text][et_pb_text _builder_version=”4.27.2″ _module_preset=”default” text_text_color=”#000000″ link_font=”|700|||on|||#000000|” link_text_color=”#000000″ header_2_line_height=”1.5em” hover_enabled=”0″ header_2_font_size_tablet=”” header_2_font_size_phone=”23px” header_2_font_size_last_edited=”on|phone” global_colors_info=”{}” sticky_enabled=”0″]

When and How to Harvest Herbs

Timing is everything when it comes to harvesting. For the best flavor and aroma, plan to harvest your woody herbs in late summer to early fall, just before they enter dormancy for the winter. Here’s how to ensure peak freshness:

  • Choose a dry day, preferably in the morning. Harvesting after the morning dew has evaporated helps retain the herbs’ essential oils.
  • Look for healthy, vibrant leaves and avoid cutting stems with flowers, as flowering can diminish flavor.
  • For sage, rosemary, and thyme, trim no more than one-third of the plant at a time to avoid stress and encourage regrowth.

[/et_pb_text][et_pb_image src=”https://backyard-eats.com/wp-content/uploads/2024/06/10-1.jpg” title_text=”Project1J_BYE” show_bottom_space=”off” _builder_version=”4.27.2″ _module_preset=”default” custom_margin=”20px||20px||true|false” hover_enabled=”0″ global_colors_info=”{}” sticky_enabled=”0″][/et_pb_image][et_pb_text _builder_version=”4.27.2″ _module_preset=”default” text_text_color=”#000000″ link_font=”|700|||on|||#000000|” link_text_color=”#000000″ header_2_line_height=”1.5em” header_2_font_size_tablet=”” header_2_font_size_phone=”23px” header_2_font_size_last_edited=”on|phone” global_colors_info=”{}”]

Preparing Perennial Herbs for Drying

Before drying your herbs, give them a quick rinse under cold water to remove any dust or insects. Gently pat them dry with a towel to remove excess moisture. Unlike delicate herbs, woody perennials can withstand a little handling, but they still benefit from careful preparation.

[/et_pb_text][et_pb_text _builder_version=”4.27.2″ _module_preset=”default” text_text_color=”#000000″ link_font=”|700|||on|||#000000|” link_text_color=”#000000″ header_2_line_height=”1.5em” hover_enabled=”0″ header_2_font_size_tablet=”” header_2_font_size_phone=”23px” header_2_font_size_last_edited=”on|phone” global_colors_info=”{}” sticky_enabled=”0″]

Three Easy Methods for Drying Herbs at Home

Drying woody herbs like sage, rosemary, and thyme can be done using one of these beginner-friendly methods:

1. Air Drying (Traditional and Simple)
Woody herbs dry easily with minimal effort. Here’s how:

  • Bundle several stems together and tie them with a piece of string or a rubber band.
  • Hang the bundles upside down in a dry, dark place with good airflow—like a garage, basement, or pantry. Make sure they’re out of direct sunlight to preserve their color and essential oils.
  • Herbs will typically dry within 1-2 weeks, depending on the humidity. Check them periodically; they should crumble easily once fully dry.

2. Oven Drying (For Faster Results)
If you’re looking to speed up the drying process, your oven is a great option:

  • Set your oven to its lowest setting (usually between 180°F and 200°F).
  • Spread the herb stems in a single layer on a baking sheet lined with parchment paper.
  • Dry for 2-4 hours, checking periodically to ensure they don’t burn. When dry, the leaves should be brittle and crumble easily.

3. Using a Dehydrator (For Consistency)
If you own a dehydrator, drying herbs can be even more efficient:

  • Set the dehydrator to a low heat setting (around 95-115°F) and spread the herbs in a single layer.
  • Dry for 4-8 hours, depending on your machine and the herb’s moisture content.
  • Always refer to your dehydrator’s manual for specific guidance.

[/et_pb_text][et_pb_image src=”https://backyard-eats.com/wp-content/uploads/2024/10/DSC_7426-scaled.jpg” title_text=”DSC_7426″ show_bottom_space=”off” _builder_version=”4.27.2″ _module_preset=”default” custom_margin=”20px||20px||true|false” hover_enabled=”0″ global_colors_info=”{}” sticky_enabled=”0″][/et_pb_image][et_pb_text _builder_version=”4.27.2″ _module_preset=”default” text_text_color=”#000000″ link_font=”|700|||on|||#000000|” link_text_color=”#000000″ header_2_line_height=”1.5em” header_2_font_size_tablet=”” header_2_font_size_phone=”23px” header_2_font_size_last_edited=”on|phone” global_colors_info=”{}”]

Storing Dried Herbs for Maximum Freshness

Proper storage ensures your dried herbs maintain their flavor and aroma throughout the winter. Once fully dried, remove the leaves from the stems by gently running your fingers along the stems. Store the leaves in airtight containers—glass jars, vacuum-sealed bags, or tins work best. Label your jars with the harvest date to keep track of freshness. Stored in a cool, dark place, dried herbs will last up to 12 months.

[/et_pb_text][et_pb_text _builder_version=”4.27.2″ _module_preset=”default” text_text_color=”#000000″ link_font=”|700|||on|||#000000|” link_text_color=”#000000″ header_2_line_height=”1.5em” hover_enabled=”0″ header_2_font_size_tablet=”” header_2_font_size_phone=”23px” header_2_font_size_last_edited=”on|phone” global_colors_info=”{}” sticky_enabled=”0″]

How to Use Your Dried Woody Herbs

Once your herbs are dried and stored, the possibilities are endless! Here are a few creative ways to use them during the colder months:

  • Add dried sage and rosemary to roasted vegetables or meats for extra warmth and depth of flavor.
  • Sprinkle thyme into hearty soups and stews for a comforting touch.
  • Create herbal gifts by mixing dried herbs into DIY spice blends, infused oils, or bath salts.

[/et_pb_text][et_pb_text _builder_version=”4.27.2″ _module_preset=”default” text_text_color=”#000000″ link_font=”|700|||on|||#000000|” link_text_color=”#000000″ header_2_line_height=”1.5em” header_2_font_size_tablet=”” header_2_font_size_phone=”23px” header_2_font_size_last_edited=”on|phone” global_colors_info=”{}”]

Learn More

By harvesting and drying your woody herbs this fall, you can continue to enjoy the flavors of your homegrown garden all year long. It’s an easy way to preserve your garden’s bounty—and even a little piece of summer—for winter’s cozy meals. Whether you’re a seasoned gardener or just getting started with your raised bed, drying woody herbs is an accessible and rewarding project.

Ready to keep your garden thriving year-round? Don’t forget to subscribe to our newsletter for more tips on how to make the most of your homegrown produce!

[/et_pb_text][et_pb_button button_url=”@ET-DC@eyJkeW5hbWljIjp0cnVlLCJjb250ZW50IjoicG9zdF9saW5rX3VybF9wYWdlIiwic2V0dGluZ3MiOnsicG9zdF9pZCI6IjU4MjY0In19@” url_new_window=”on” button_text=”BOOK A CONSULTATION” button_alignment=”left” button_alignment_tablet=”left” button_alignment_phone=”left” button_alignment_last_edited=”on|tablet” disabled_on=”off|off|off” _builder_version=”4.27.0″ _dynamic_attributes=”button_url” _module_preset=”737bea5a-e063-4b24-af3f-21ce28f0bf38″ button_bg_color=”gcid-3b5ac83a-684c-4379-a559-60b2aa9e8157″ button_border_color=”gcid-3b5ac83a-684c-4379-a559-60b2aa9e8157″ button_letter_spacing=”1px” button_font=”Roboto|700||on|||||” z_index=”90″ custom_margin=”0px|0px|30px|0px|false|false” custom_margin_tablet=”0px|0px|0px|0px|false|false” custom_margin_phone=”0px|0px|0px|0px|false|false” custom_margin_last_edited=”on|desktop” locked=”off” global_colors_info=”{%22gcid-3b5ac83a-684c-4379-a559-60b2aa9e8157%22:%91%22button_border_color__hover%22,%22button_bg_color%22,%22button_border_color%22%93}” button_text_color__hover_enabled=”on|hover” button_text_color__hover=”#844B67″ button_bg_enable_color__hover=”on” button_border_color__hover=”#88667b” button_border_color__hover_enabled=”on|desktop”][/et_pb_button][/et_pb_column][/et_pb_row][/et_pb_section]

Compost and Fall Soil Care for Your Annual Vegetable Garden

Edamame plants growing in a raised bed

[et_pb_section fb_built=”1″ admin_label=”section” _builder_version=”4.27.0″ da_disable_devices=”off|off|off” global_colors_info=”{}” da_is_popup=”off” da_exit_intent=”off” da_has_close=”on” da_alt_close=”off” da_dark_close=”off” da_not_modal=”on” da_is_singular=”off” da_with_loader=”off” da_has_shadow=”on”][et_pb_row admin_label=”row” _builder_version=”4.16″ background_size=”initial” background_position=”top_left” background_repeat=”repeat” global_colors_info=”{}”][et_pb_column type=”4_4″ _builder_version=”4.16″ custom_padding=”|||” global_colors_info=”{}” custom_padding__hover=”|||”][et_pb_text _builder_version=”4.27.2″ _module_preset=”default” text_text_color=”#000000″ link_font=”|700|||on|||#000000|” link_text_color=”#000000″ header_2_line_height=”1.5em” header_2_font_size_tablet=”” header_2_font_size_phone=”23px” header_2_font_size_last_edited=”on|phone” global_colors_info=”{}”]

Introduction

As the growing season comes to a close, it’s time to turn your attention to an often-overlooked aspect of gardening: soil care. Proper end-of-season soil maintenance is crucial for ensuring a thriving spring garden, and composting plays a vital role in this process. Whether you’re a seasoned gardener or just starting, following these key practices will help prepare your raised bed vegetable garden for success in the coming year.

[/et_pb_text][et_pb_text _builder_version=”4.27.2″ _module_preset=”default” text_text_color=”#000000″ link_font=”|700|||on|||#000000|” link_text_color=”#000000″ header_2_line_height=”1.5em” header_2_font_size_tablet=”” header_2_font_size_phone=”23px” header_2_font_size_last_edited=”on|phone” global_colors_info=”{}”]

Fall Veggie Garden Clean-Up

Before diving into soil care, it’s essential to start with a clean slate. Begin your fall garden clean-up by removing any spent annual plants, particularly those with visible signs of pests or disease. Leaving behind decaying plants can create a haven for pests and diseases, which may overwinter in your soil and wreak havoc come spring. Disposing of this debris not only keeps your garden tidy but also minimizes the risk of problems in the next growing season.

[/et_pb_text][et_pb_text _builder_version=”4.27.2″ _module_preset=”default” text_text_color=”#000000″ link_font=”|700|||on|||#000000|” link_text_color=”#000000″ header_2_line_height=”1.5em” header_2_font_size_tablet=”” header_2_font_size_phone=”23px” header_2_font_size_last_edited=”on|phone” global_colors_info=”{}”]

Composting for Nutrients and Weed Suppression

One of the best practices you can implement this fall is adding a layer of compost to your raised beds. Compost replenishes essential nutrients, enriches soil structure, and helps suppress weeds. Unlike traditional in-ground gardens, raised beds require regular nutrient replenishment. As plants absorb nutrients from the soil, they are also harvested for our meals, leaving the soil depleted.

Compost is a fantastic way to replenish these nutrients, providing vital elements like nitrogen that are essential for healthy plant growth. Its thick texture improves soil volume and structure, countering the compaction that can occur over the growing season. Plus, a thick layer of compost blocks sunlight, helping to reduce weed growth from any dormant seeds lurking in your soil. You can easily find bags of compost at your local garden center.

[/et_pb_text][et_pb_image src=”https://backyard-eats.com/wp-content/uploads/2024/06/8-3.jpg” title_text=”8″ show_bottom_space=”off” _builder_version=”4.27.2″ _module_preset=”default” custom_margin=”20px||20px||true|false” global_colors_info=”{}”][/et_pb_image][et_pb_text _builder_version=”4.27.2″ _module_preset=”default” text_text_color=”#000000″ link_font=”|700|||on|||#000000|” link_text_color=”#000000″ header_2_line_height=”1.5em” header_2_font_size_tablet=”” header_2_font_size_phone=”23px” header_2_font_size_last_edited=”on|phone” global_colors_info=”{}”]

Other Soil Amendments

In addition to compost, refreshing your soil with other organic materials can significantly enhance its fertility. While specific amendments may vary, using well-aged or treated organic matter can improve nutrient content and microbial activity, both of which are crucial for healthy plant growth.

Adding these materials in the fall allows them to break down over winter, ensuring that nutrients are readily available for your plants when spring arrives. Aim to work these amendments into the top few inches of soil to maximize their effectiveness.

[/et_pb_text][et_pb_text _builder_version=”4.27.2″ _module_preset=”default” text_text_color=”#000000″ link_font=”|700|||on|||#000000|” link_text_color=”#000000″ header_2_line_height=”1.5em” header_2_font_size_tablet=”” header_2_font_size_phone=”23px” header_2_font_size_last_edited=”on|phone” global_colors_info=”{}”]

Mulching Perennials in Fall

If you have in-ground garden beds, especially those containing perennial plants, adding mulch can be incredibly beneficial during the fall. Mulch helps regulate moisture and temperature in the soil. By blocking sunlight, it not only suppresses weeds but also slows evaporation, keeping your soil moist longer.

Mulch can also trap heat in the soil, preventing the warmth accumulated during the summer from escaping too quickly. This is especially important for perennial plants that need some warmth to survive the winter months.

Moreover, during periods of heavy rain, mulch can slow down soil erosion, protecting the integrity of your garden beds. Organic mulches, such as straw or shredded leaves, can also break down over time, adding more organic matter to your soil as they decompose.

[/et_pb_text][et_pb_image src=”https://backyard-eats.com/wp-content/uploads/2024/06/14-2.jpg” title_text=”14″ show_bottom_space=”off” _builder_version=”4.27.2″ _module_preset=”default” custom_margin=”20px||20px||true|false” global_colors_info=”{}”][/et_pb_image][et_pb_text _builder_version=”4.27.2″ _module_preset=”default” text_text_color=”#000000″ link_font=”|700|||on|||#000000|” link_text_color=”#000000″ header_2_line_height=”1.5em” header_2_font_size_tablet=”” header_2_font_size_phone=”23px” header_2_font_size_last_edited=”on|phone” global_colors_info=”{}”]

Assessing Fall Garden Performance

Fall and winter are excellent times to reflect on your growing season. Take a moment to assess what crops thrived and what challenges you faced. This evaluation is essential for adjusting your gardening strategies in the coming year. If you experienced pest or disease pressure, proper soil care can help mitigate these issues next season.

Consider your crop rotation plans as well. For example, if you grew nightshades like tomatoes and peppers in one location this year, it’s essential to rotate them every three years to prevent nutrient depletion and disease buildup. Thoughtful planning now can lead to a more productive and healthy garden in the future.

[/et_pb_text][et_pb_text _builder_version=”4.27.2″ _module_preset=”default” text_text_color=”#000000″ link_font=”|700|||on|||#000000|” link_text_color=”#000000″ header_2_line_height=”1.5em” header_2_font_size_tablet=”” header_2_font_size_phone=”23px” header_2_font_size_last_edited=”on|phone” global_colors_info=”{}”]

Conclusion

As you prepare for the changing seasons, remember that end-of-season soil care is a vital step toward a successful spring garden. By focusing on composting, refreshing your soil with organic materials, mulching, and reflecting on your growing practices, you set the stage for healthy plants and bountiful harvests in the upcoming year.

Contact us today to book a consultation with one of our garden designers and start building your edible garden. And sign up for our newsletter for more expert gardening advice!

[/et_pb_text][et_pb_button button_url=”@ET-DC@eyJkeW5hbWljIjp0cnVlLCJjb250ZW50IjoicG9zdF9saW5rX3VybF9wYWdlIiwic2V0dGluZ3MiOnsicG9zdF9pZCI6IjU4MjY0In19@” url_new_window=”on” button_text=”BOOK A CONSULTATION” button_alignment=”left” button_alignment_tablet=”left” button_alignment_phone=”left” button_alignment_last_edited=”on|tablet” disabled_on=”off|off|off” _builder_version=”4.27.0″ _dynamic_attributes=”button_url” _module_preset=”737bea5a-e063-4b24-af3f-21ce28f0bf38″ button_bg_color=”gcid-3b5ac83a-684c-4379-a559-60b2aa9e8157″ button_border_color=”gcid-3b5ac83a-684c-4379-a559-60b2aa9e8157″ button_letter_spacing=”1px” button_font=”Roboto|700||on|||||” z_index=”90″ custom_margin=”0px|0px|30px|0px|false|false” custom_margin_tablet=”0px|0px|0px|0px|false|false” custom_margin_phone=”0px|0px|0px|0px|false|false” custom_margin_last_edited=”on|desktop” locked=”off” global_colors_info=”{%22gcid-3b5ac83a-684c-4379-a559-60b2aa9e8157%22:%91%22button_border_color__hover%22,%22button_bg_color%22,%22button_border_color%22%93}” button_text_color__hover_enabled=”on|hover” button_text_color__hover=”#844B67″ button_bg_enable_color__hover=”on” button_border_color__hover=”#88667b” button_border_color__hover_enabled=”on|desktop”][/et_pb_button][/et_pb_column][/et_pb_row][/et_pb_section]

Harvesting Tomatoes Early and Ripening Them Indoors

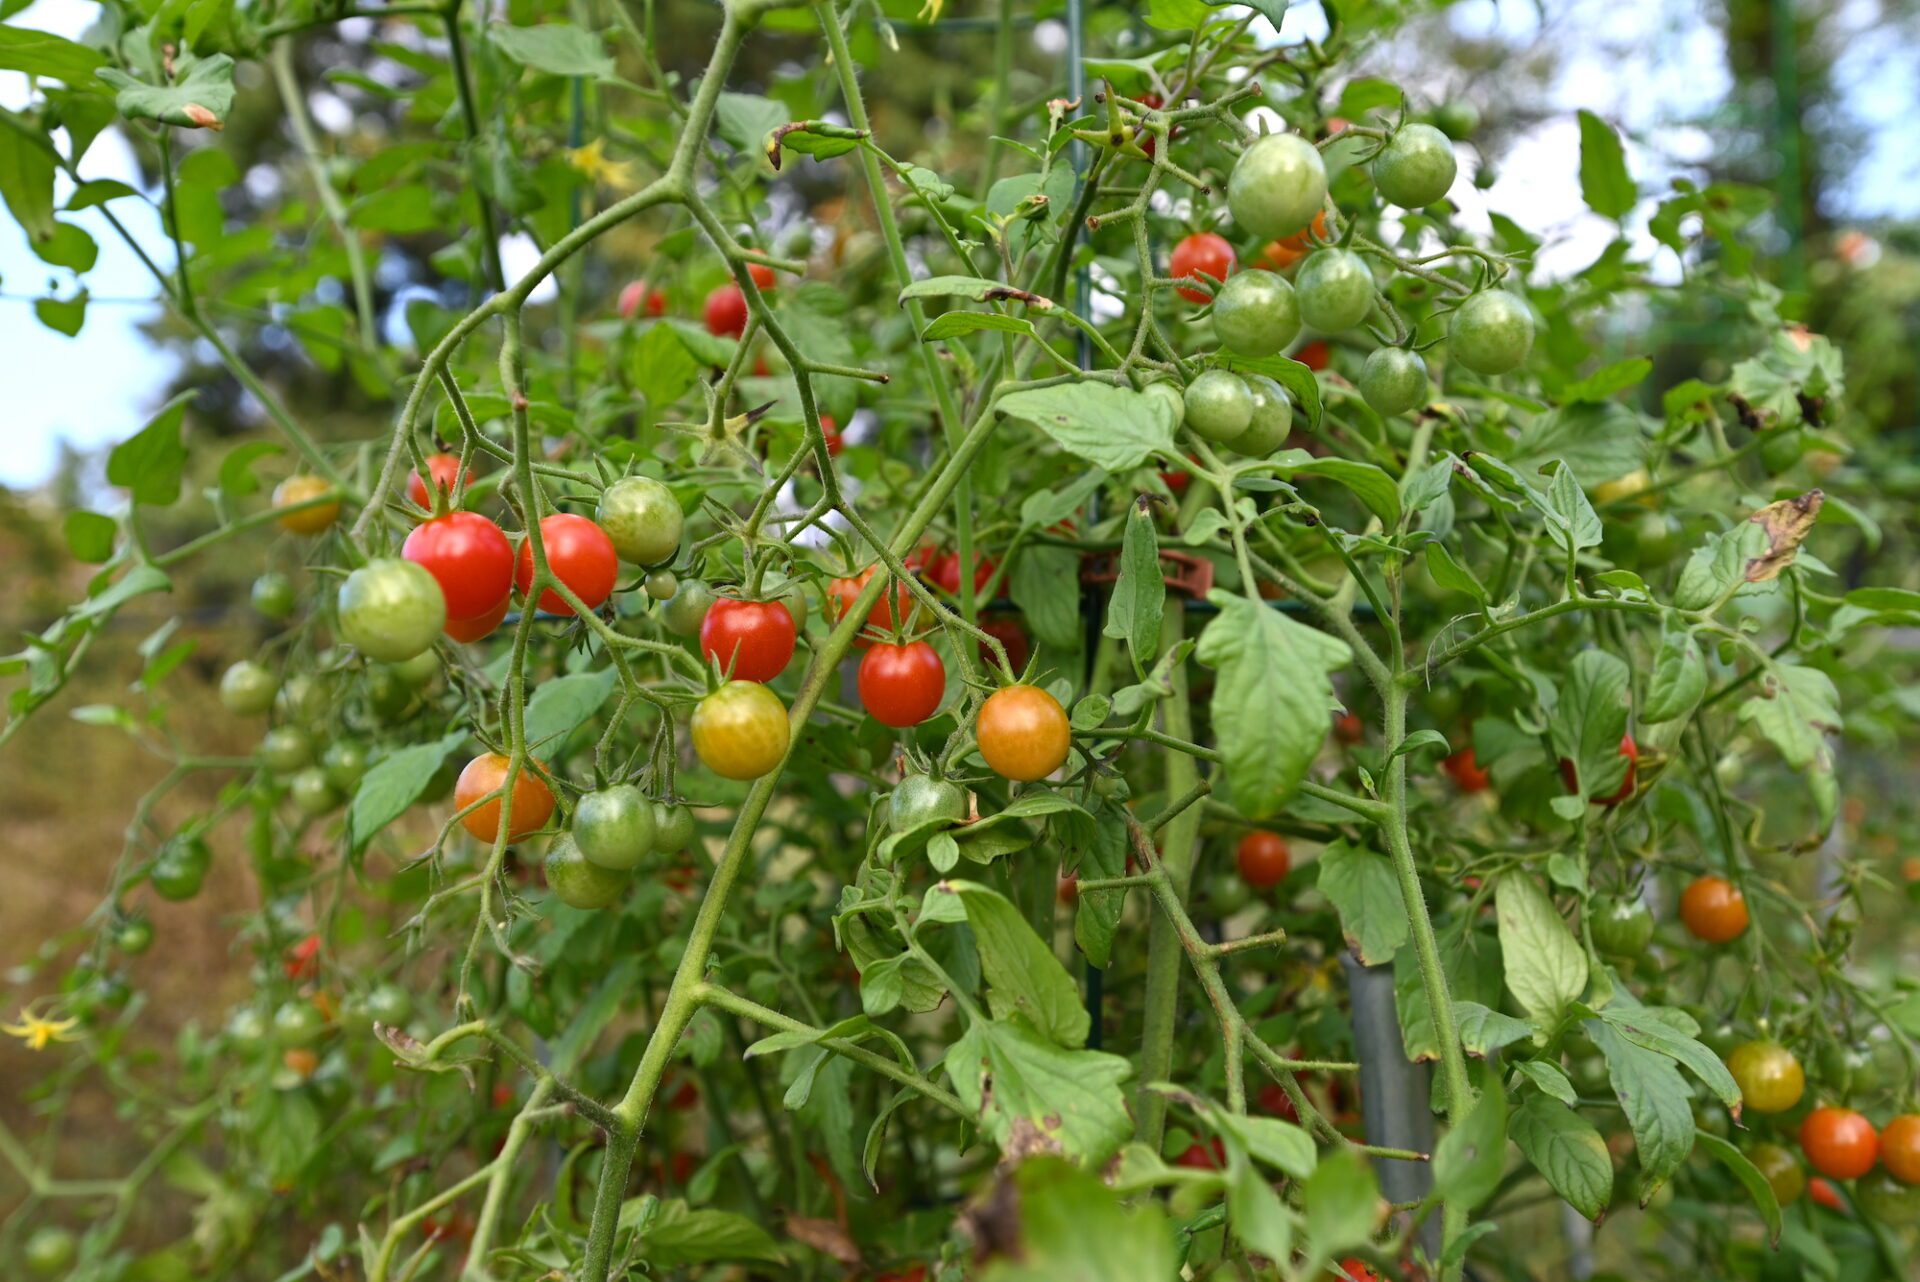
A photo of cherry tomatoes at different stages of ripening on a metal cage tower

[et_pb_section fb_built=”1″ admin_label=”section” _builder_version=”4.27.0″ da_disable_devices=”off|off|off” global_colors_info=”{}” da_is_popup=”off” da_exit_intent=”off” da_has_close=”on” da_alt_close=”off” da_dark_close=”off” da_not_modal=”on” da_is_singular=”off” da_with_loader=”off” da_has_shadow=”on”][et_pb_row admin_label=”row” _builder_version=”4.16″ background_size=”initial” background_position=”top_left” background_repeat=”repeat” global_colors_info=”{}”][et_pb_column type=”4_4″ _builder_version=”4.16″ custom_padding=”|||” global_colors_info=”{}” custom_padding__hover=”|||”][et_pb_text _builder_version=”4.27.2″ _module_preset=”default” text_text_color=”#000000″ link_font=”|700|||on|||#000000|” link_text_color=”#000000″ header_2_line_height=”1.5em” hover_enabled=”0″ header_2_font_size_tablet=”” header_2_font_size_phone=”23px” header_2_font_size_last_edited=”on|phone” global_colors_info=”{}” sticky_enabled=”0″]

Introduction

For many gardeners, enjoying homegrown tomatoes during the summer is a big reason to cultivate a garden. While larger varieties, like heirloom and beefsteak tomatoes, can keep ripening into early fall, the season eventually winds down. To make the most of your harvest, you should pick tomatoes before the first frost hits. In this guide, you’ll find tips on when and how to harvest and store your late-season tomatoes to help them ripen indoors.

[/et_pb_text][et_pb_text _builder_version=”4.27.2″ _module_preset=”default” text_text_color=”#000000″ link_font=”|700|||on|||#000000|” link_text_color=”#000000″ header_2_line_height=”1.5em” hover_enabled=”0″ header_2_font_size_tablet=”” header_2_font_size_phone=”23px” header_2_font_size_last_edited=”on|phone” global_colors_info=”{}” sticky_enabled=”0″]

Understand Frost and Its Impact on Tomatoes

First, let’s talk about how frost affects your plants. Frost forms a thin layer of ice crystals when temperatures drop below freezing. Knowing the difference between “light frost” and “hard frost” is essential for home gardeners.

A light frost occurs when nighttime temperatures dip to or just below 32°F (0°C). On the other hand, a hard freeze happens when temperatures stay below 28°F (–2°C) for four consecutive hours. A light frost might allow your plants to recover, but a hard frost will typically kill annual tomatoes, especially because they are high in water content.

Freezing temperatures will cause the water inside the plant to expand, damaging cells and leaving your tomatoes mushy and inedible. Common signs of frost damage on your tomato plants include brown or wilted leaves and brown spots on the fruit. To keep your harvest safe, aim to pick your tomatoes before frost arrives.

[/et_pb_text][et_pb_text _builder_version=”4.27.2″ _module_preset=”default” text_text_color=”#000000″ link_font=”|700|||on|||#000000|” link_text_color=”#000000″ header_2_line_height=”1.5em” hover_enabled=”0″ header_2_font_size_tablet=”” header_2_font_size_phone=”23px” header_2_font_size_last_edited=”on|phone” global_colors_info=”{}” sticky_enabled=”0″]

When to Harvest Tomatoes Early

You don’t have to wait for your tomatoes to reach full ripeness before harvesting, especially if freezing temperatures are approaching. Start picking when you notice the tomatoes changing color from green. They typically show a yellow or blush hue first on the blossom end, which is the side opposite the stem.

It’s perfectly fine to harvest early, but do so in moderation to avoid stressing the plant too much. Keep an eye on your local weather forecasts to find out when the first frost is expected in your area. Plan to harvest your last tomatoes about 1-2 weeks before that frost hits.

[/et_pb_text][et_pb_image src=”https://backyard-eats.com/wp-content/uploads/2024/10/DSC_7039-1-scaled.jpg” title_text=”DSC_7039″ show_bottom_space=”off” _builder_version=”4.27.2″ _module_preset=”default” custom_margin=”20px||20px||true|false” global_colors_info=”{}”][/et_pb_image][et_pb_text _builder_version=”4.27.2″ _module_preset=”default” text_text_color=”#000000″ link_font=”|700|||on|||#000000|” link_text_color=”#000000″ header_2_line_height=”1.5em” hover_enabled=”0″ header_2_font_size_tablet=”” header_2_font_size_phone=”23px” header_2_font_size_last_edited=”on|phone” global_colors_info=”{}” sticky_enabled=”0″]

Techniques for Harvesting Tomatoes Early

When you’re ready to harvest early, grab your pruners and gloves. Use the pruners to clip the stem about 1-2 inches above where the fruit connects to the vine. Handle the tomatoes carefully to minimize bruising. Ripe tomatoes should feel firm, not squishy, and be close to their mature size. For example, if a beefsteak tomato is only the size of a ripe cherry tomato, it’s not ready to be picked. However, if your tomatoes have reached their mature size—regardless of being green—they are worth harvesting before a frost.

Keep in mind that completely green tomatoes usually do not ripen well indoors. Some varieties, especially smaller ones like cherry tomatoes and certain heirlooms, tend to ripen better off the vine than others. Trust your judgment when selecting tomatoes; you can always sort through them later to separate the stubborn green ones.

[/et_pb_text][et_pb_text _builder_version=”4.27.2″ _module_preset=”default” text_text_color=”#000000″ link_font=”|700|||on|||#000000|” link_text_color=”#000000″ header_2_line_height=”1.5em” hover_enabled=”0″ header_2_font_size_tablet=”” header_2_font_size_phone=”23px” header_2_font_size_last_edited=”on|phone” global_colors_info=”{}” sticky_enabled=”0″]

Prepare Tomatoes for Indoor Ripening

After you harvest your tomatoes, clean and sort them properly to prevent mold and other problems. Discard any fruit that shows signs of damage, pests, or disease. Remove any overripe or frost-damaged tomatoes that are already mushy. Sort your tomatoes by ripeness and variety to help with the ripening process. Larger varieties take longer to mature, so you wouldn’t want to miss ripe cherry tomatoes hiding beneath green ones. This organization also helps you know when each batch is ready for cooking.

Store your tomatoes in a dark, well-ventilated area with moderate temperature and humidity. Direct sunlight can cause overheating, while excessive moisture can lead to rot. Keep tomatoes in a single layer to avoid moisture buildup. Shallow, breathable containers like cardboard boxes, baskets, or paper bags work well for this purpose. Stay away from plastic bags, as they can trap moisture and promote mold.

[/et_pb_text][et_pb_image src=”https://backyard-eats.com/wp-content/uploads/2024/05/Copy-of-DSC_2367.jpg” title_text=”Copy of DSC_2367″ show_bottom_space=”off” _builder_version=”4.27.2″ _module_preset=”default” custom_margin=”20px||20px||true|false” global_colors_info=”{}”][/et_pb_image][et_pb_text _builder_version=”4.27.2″ _module_preset=”default” text_text_color=”#000000″ link_font=”|700|||on|||#000000|” link_text_color=”#000000″ header_2_line_height=”1.5em” hover_enabled=”0″ header_2_font_size_tablet=”” header_2_font_size_phone=”23px” header_2_font_size_last_edited=”on|phone” global_colors_info=”{}” sticky_enabled=”0″]

Ripening Tomatoes Indoors and Troubleshooting

As tomatoes begin to ripen, they produce ethylene gas, which helps speed up the process. You can encourage ripening by placing them in a paper bag with an ethylene-producing fruit, like an apple or banana. Check your tomatoes daily for readiness and any signs of over-ripening. Ripe tomatoes should display their usual vibrant colors—typically red, orange, or yellow—and feel firm to the touch.

If your tomatoes don’t ripen despite the right conditions, don’t worry. You can still make good use of unripe tomatoes. Try cooking with them by making dishes like fried green tomatoes or adding them to salsas. Unripe tomatoes are also great for pickling, giving you a tangy, flavorful addition to salads and sandwiches.

[/et_pb_text][et_pb_text _builder_version=”4.27.2″ _module_preset=”default” text_text_color=”#000000″ link_font=”|700|||on|||#000000|” link_text_color=”#000000″ header_2_line_height=”1.5em” header_2_font_size_tablet=”” header_2_font_size_phone=”23px” header_2_font_size_last_edited=”on|phone” global_colors_info=”{}”]

Conclusion

Harvesting tomatoes early and ripening them indoors can extend your gardening success well into the fall. By understanding frost and knowing when and how to harvest, you can protect your crop and enjoy delicious homegrown tomatoes long after the growing season has ended. With a little care and attention, your indoor ripening efforts can yield a rewarding harvest that enhances your culinary creations. Enjoy your gardening journey!

Contact us today to book a consultation with one of our garden designers and start building your perfect pest-proof garden. Be sure to sign up for our newsletter for more gardening tips and advice!

[/et_pb_text][et_pb_button button_url=”@ET-DC@eyJkeW5hbWljIjp0cnVlLCJjb250ZW50IjoicG9zdF9saW5rX3VybF9wYWdlIiwic2V0dGluZ3MiOnsicG9zdF9pZCI6IjU4MjY0In19@” url_new_window=”on” button_text=”BOOK A CONSULTATION” button_alignment=”left” button_alignment_tablet=”left” button_alignment_phone=”left” button_alignment_last_edited=”on|tablet” disabled_on=”off|off|off” _builder_version=”4.27.0″ _dynamic_attributes=”button_url” _module_preset=”737bea5a-e063-4b24-af3f-21ce28f0bf38″ button_bg_color=”gcid-3b5ac83a-684c-4379-a559-60b2aa9e8157″ button_border_color=”gcid-3b5ac83a-684c-4379-a559-60b2aa9e8157″ button_letter_spacing=”1px” button_font=”Roboto|700||on|||||” z_index=”90″ custom_margin=”0px|0px|30px|0px|false|false” custom_margin_tablet=”0px|0px|0px|0px|false|false” custom_margin_phone=”0px|0px|0px|0px|false|false” custom_margin_last_edited=”on|desktop” locked=”off” global_colors_info=”{%22gcid-3b5ac83a-684c-4379-a559-60b2aa9e8157%22:%91%22button_border_color__hover%22,%22button_bg_color%22,%22button_border_color%22%93}” button_text_color__hover_enabled=”on|hover” button_text_color__hover=”#844B67″ button_bg_enable_color__hover=”on” button_border_color__hover=”#88667b” button_border_color__hover_enabled=”on|desktop”][/et_pb_button][/et_pb_column][/et_pb_row][/et_pb_section]
Raised Bed Fencing for a Pest-Free Garden

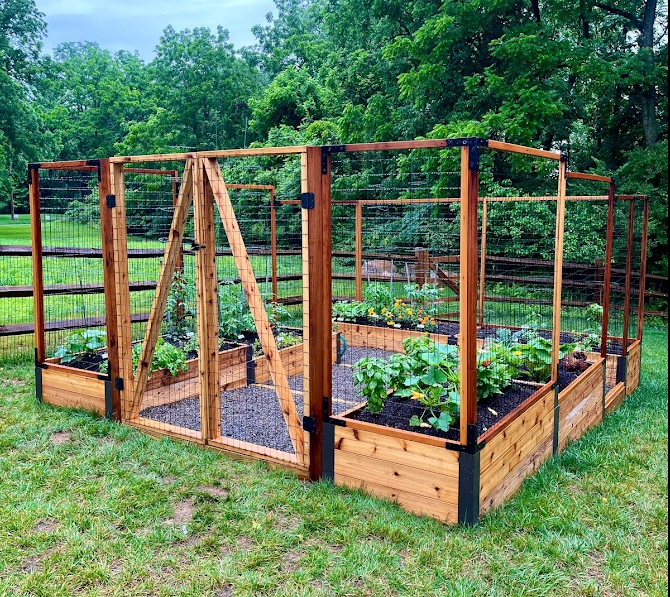
A photo of a u-shaped garden with a double gate and tiered raised beds

[et_pb_section fb_built=”1″ admin_label=”section” _builder_version=”4.27.0″ da_disable_devices=”off|off|off” global_colors_info=”{}” da_is_popup=”off” da_exit_intent=”off” da_has_close=”on” da_alt_close=”off” da_dark_close=”off” da_not_modal=”on” da_is_singular=”off” da_with_loader=”off” da_has_shadow=”on”][et_pb_row admin_label=”row” _builder_version=”4.16″ background_size=”initial” background_position=”top_left” background_repeat=”repeat” global_colors_info=”{}”][et_pb_column type=”4_4″ _builder_version=”4.16″ custom_padding=”|||” global_colors_info=”{}” custom_padding__hover=”|||”][et_pb_text _builder_version=”4.27.0″ _module_preset=”default” text_text_color=”#000000″ link_font=”|700|||on|||#000000|” link_text_color=”#000000″ header_2_line_height=”1.5em” hover_enabled=”0″ header_2_font_size_tablet=”” header_2_font_size_phone=”23px” header_2_font_size_last_edited=”on|phone” global_colors_info=”{}” sticky_enabled=”0″]

Introduction

Are you tired of deer or other pests devouring your garden? Whether you live in an urban environment, the suburbs, or a rural area, pests can be a persistent problem for home gardeners. Animals nibbling on your plants or digging up your beds can undo all your hard work. While various pest control methods exist, fencing is one of the most effective ways to protect your garden from critters.

Deer and groundhogs are among the most destructive pests for home gardens. Let’s take a closer look at how each can damage your plants and why fencing is a crucial solution.

[/et_pb_text][et_pb_text _builder_version=”4.27.0″ _module_preset=”default” text_text_color=”#000000″ link_font=”|700|||on|||#000000|” link_text_color=”#000000″ header_2_line_height=”1.5em” header_2_font_size_tablet=”” header_2_font_size_phone=”23px” header_2_font_size_last_edited=”on|phone” global_colors_info=”{}”]

Deer Damage in Gardens

Deer can destroy your garden overnight, eating plants down to their stems. Common signs of deer activity include nibbled leaves, hoof prints, and droppings. Since deer are most active at dawn and dusk, they may slip by unnoticed until the damage is done. Though deer can jump high, they tend to avoid small, enclosed spaces where they can’t land easily. A 5-6 foot tall fence around your raised bed garden can effectively prevent deer from getting in. While repellents can offer some help, they aren’t foolproof and don’t provide the physical barrier that fencing does.

[/et_pb_text][et_pb_image src=”https://backyard-eats.com/wp-content/uploads/2024/09/pexels-jim-fawns-231491-756758.jpg” title_text=”pexels-jim-fawns-231491-756758″ show_bottom_space=”off” _builder_version=”4.27.0″ _module_preset=”default” custom_margin=”20px||20px||true|false” global_colors_info=”{}”][/et_pb_image][et_pb_text _builder_version=”4.27.0″ _module_preset=”default” global_colors_info=”{}”]

Photo by Jim Fawns on Unsplash

[/et_pb_text][et_pb_text _builder_version=”4.27.0″ _module_preset=”default” text_text_color=”#000000″ link_font=”|700|||on|||#000000|” link_text_color=”#000000″ header_2_line_height=”1.5em” header_2_font_size_tablet=”” header_2_font_size_phone=”23px” header_2_font_size_last_edited=”on|phone” global_colors_info=”{}”]

Groundhog Digging in Beds

Groundhogs are notorious for eating leafy greens and vegetables. These skilled diggers can burrow quickly and cause significant damage to garden beds. If you find burrow entrances or chewed plants, a groundhog is likely the culprit. In addition to burrowing, groundhogs are excellent climbers and can scale fences over 4 feet tall. A sturdy 5-6 foot fence with a solid border—whether a raised bed or buried fence—helps deter groundhogs more effectively than repellents alone.

[/et_pb_text][et_pb_text _builder_version=”4.27.0″ _module_preset=”default” text_text_color=”#000000″ link_font=”|700|||on|||#000000|” link_text_color=”#000000″ header_2_line_height=”1.5em” hover_enabled=”0″ header_2_font_size_tablet=”” header_2_font_size_phone=”23px” header_2_font_size_last_edited=”on|phone” global_colors_info=”{}” sticky_enabled=”0″]

Our Garden Fencing Design

The design of your garden impacts the effectiveness of your fence. Whether you’re protecting a sprawling vegetable garden or a few raised beds, an integrated fencing solution can offer long-term protection.

For raised bed gardens, integrating fencing directly into the bed’s structure boosts both protection and durability. As mentioned, deer are unlikely to jump into enclosed spaces without easy landing room, making integrated fences effective compared to fences that encompass a very large property. Our fencing systems use metal hardware for strong connections between the beds and fence, along with wood supports and metal mesh. The result is a streamlined design that looks polished and holds up well over time.

[/et_pb_text][et_pb_image src=”https://backyard-eats.com/wp-content/uploads/2024/09/18_-cedar-w_-panel-fence.png” title_text=”18_ cedar w_ panel fence” show_bottom_space=”off” _builder_version=”4.27.0″ _module_preset=”default” custom_margin=”20px||20px||true|false” global_colors_info=”{}”][/et_pb_image][et_pb_text _builder_version=”4.27.0″ _module_preset=”default” text_text_color=”#000000″ link_font=”|700|||on|||#000000|” link_text_color=”#000000″ header_2_line_height=”1.5em” header_2_font_size_tablet=”” header_2_font_size_phone=”23px” header_2_font_size_last_edited=”on|phone” global_colors_info=”{}”]

Additional Benefits of Garden Fencing

Beyond pest control, integrated fencing offers several other advantages.

[/et_pb_text][et_pb_text _builder_version=”4.27.0″ _module_preset=”default” text_text_color=”#000000″ link_font=”|700|||on|||#000000|” link_text_color=”#000000″ header_2_line_height=”1.5em” hover_enabled=”0″ header_2_font_size_tablet=”” header_2_font_size_phone=”23px” header_2_font_size_last_edited=”on|phone” global_colors_info=”{}” sticky_enabled=”0″]

Less Maintenance

Building fencing directly into raised beds eliminates the gaps and hard-to-reach spaces where weeds often grow. Detached fences often leave room for weeds to thrive, creating more work for you in terms of upkeep. Integrated designs reduce the need for constant maintenance, giving you more time to enjoy your garden.

[/et_pb_text][et_pb_text _builder_version=”4.27.0″ _module_preset=”default” text_text_color=”#000000″ link_font=”|700|||on|||#000000|” link_text_color=”#000000″ header_2_line_height=”1.5em” hover_enabled=”0″ header_2_font_size_tablet=”” header_2_font_size_phone=”23px” header_2_font_size_last_edited=”on|phone” global_colors_info=”{}” sticky_enabled=”0″]

Support for Vining Plants

Another key benefit of garden fencing is its ability to double as a trellis. Sturdy fencing can support vining plants like cucumbers, beans, and peas, allowing you to maximize vertical space. For home gardeners with limited room, this can make all the difference in how much you can grow. Vertical gardening not only saves space but also improves air circulation around plants, reducing the risk of disease.

[/et_pb_text][et_pb_image src=”https://backyard-eats.com/wp-content/uploads/2024/06/3-2.jpg” title_text=”3″ show_bottom_space=”off” _builder_version=”4.27.0″ _module_preset=”default” custom_margin=”20px||20px||true|false” global_colors_info=”{}”][/et_pb_image][et_pb_text _builder_version=”4.27.0″ _module_preset=”default” text_text_color=”#000000″ link_font=”|700|||on|||#000000|” link_text_color=”#000000″ header_2_line_height=”1.5em” header_2_font_size_tablet=”” header_2_font_size_phone=”23px” header_2_font_size_last_edited=”on|phone” global_colors_info=”{}”]

Use Mesh for Visibility

If you’re concerned about blocking your view, don’t worry. Metal mesh fencing is transparent, so you can still see what’s growing. This lets you monitor your plants from a distance and even spot ripe vegetables from inside your home. Imagine looking out your kitchen window and noticing a bright red tomato ready for picking!

[/et_pb_text][et_pb_text _builder_version=”4.27.0″ _module_preset=”default” text_text_color=”#000000″ link_font=”|700|||on|||#000000|” link_text_color=”#000000″ header_2_line_height=”1.5em” header_2_font_size_tablet=”” header_2_font_size_phone=”23px” header_2_font_size_last_edited=”on|phone” global_colors_info=”{}”]

Why Choose Pest-Proof Fencing?

Creating a pest-proof garden isn’t just about keeping animals away—it’s about making your gardening experience easier and more productive. Without the constant threat of deer and groundhogs, your plants can thrive without needing constant replanting or repair. An integrated fencing solution helps you maintain a clean, efficient garden space, saving time and energy for more enjoyable aspects of gardening like harvesting and planting.

[/et_pb_text][et_pb_text _builder_version=”4.27.0″ _module_preset=”default” text_text_color=”#000000″ link_font=”|700|||on|||#000000|” link_text_color=”#000000″ header_2_line_height=”1.5em” hover_enabled=”0″ header_2_font_size_tablet=”” header_2_font_size_phone=”23px” header_2_font_size_last_edited=”on|phone” global_colors_info=”{}” sticky_enabled=”0″]

Conclusion

Are you ready to protect your garden from pests and boost your productivity? Our sturdy, integrated garden fencing offers a streamlined solution that combines pest control, reduced maintenance, and extra support for vining plants. Contact us today to book a consultation with one of our garden designers and start building your perfect pest-proof garden. Be sure to sign up for our newsletter for more gardening tips and advice!

[/et_pb_text][et_pb_button button_url=”@ET-DC@eyJkeW5hbWljIjp0cnVlLCJjb250ZW50IjoicG9zdF9saW5rX3VybF9wYWdlIiwic2V0dGluZ3MiOnsicG9zdF9pZCI6IjU4MjY0In19@” url_new_window=”on” button_text=”BOOK A CONSULTATION” button_alignment=”left” button_alignment_tablet=”left” button_alignment_phone=”left” button_alignment_last_edited=”on|tablet” disabled_on=”off|off|off” _builder_version=”4.27.0″ _dynamic_attributes=”button_url” _module_preset=”737bea5a-e063-4b24-af3f-21ce28f0bf38″ button_bg_color=”gcid-3b5ac83a-684c-4379-a559-60b2aa9e8157″ button_border_color=”gcid-3b5ac83a-684c-4379-a559-60b2aa9e8157″ button_letter_spacing=”1px” button_font=”Roboto|700||on|||||” z_index=”90″ custom_margin=”0px|0px|30px|0px|false|false” custom_margin_tablet=”0px|0px|0px|0px|false|false” custom_margin_phone=”0px|0px|0px|0px|false|false” custom_margin_last_edited=”on|desktop” locked=”off” global_colors_info=”{%22gcid-3b5ac83a-684c-4379-a559-60b2aa9e8157%22:%91%22button_border_color__hover%22,%22button_bg_color%22,%22button_border_color%22%93}” button_text_color__hover_enabled=”on|hover” button_text_color__hover=”#844B67″ button_bg_enable_color__hover=”on” button_border_color__hover=”#88667b” button_border_color__hover_enabled=”on|desktop”][/et_pb_button][/et_pb_column][/et_pb_row][/et_pb_section]
Winterizing Your Raised Beds: Essential Tips for October

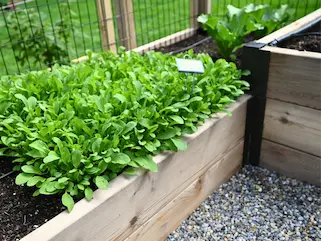
Baby greens in a raised bed

[et_pb_section fb_built=”1″ admin_label=”section” _builder_version=”4.27.0″ da_disable_devices=”off|off|off” global_colors_info=”{}” da_is_popup=”off” da_exit_intent=”off” da_has_close=”on” da_alt_close=”off” da_dark_close=”off” da_not_modal=”on” da_is_singular=”off” da_with_loader=”off” da_has_shadow=”on”][et_pb_row admin_label=”row” _builder_version=”4.16″ background_size=”initial” background_position=”top_left” background_repeat=”repeat” global_colors_info=”{}”][et_pb_column type=”4_4″ _builder_version=”4.16″ custom_padding=”|||” global_colors_info=”{}” custom_padding__hover=”|||”][et_pb_text _builder_version=”4.27.0″ _module_preset=”default” text_text_color=”#000000″ link_font=”|700|||on|||#000000|” link_text_color=”#000000″ header_2_line_height=”1.5em” header_2_font_size_tablet=”” header_2_font_size_phone=”23px” header_2_font_size_last_edited=”on|phone” global_colors_info=”{}”]

Introduction

With fall gardening season in full swing, it’s time to look ahead to preparing your garden for winter. It’s important to clear plant debris, amend the soil, and plant any crops that need to overwinter before hard frosts hit. All of these steps will ensure that you begin the spring planting season with a healthy and productive garden next year!

[/et_pb_text][et_pb_text _builder_version=”4.27.0″ _module_preset=”default” text_text_color=”#000000″ link_font=”|700|||on|||#000000|” link_text_color=”#000000″ header_2_line_height=”1.5em” header_2_font_size_tablet=”” header_2_font_size_phone=”23px” header_2_font_size_last_edited=”on|phone” global_colors_info=”{}”]

Garden Clean-Up: Preparing Beds for the Off-Season

It is essential to clear out dead or spent plants at the end of the season to prevent pests and diseases from overwintering in your soil. “Overwintering” simply means that they will continue to live throughout the winter, becoming a problem when you plant again in spring. Many plants from the same family are susceptible to the same pests and diseases, so even if you rotate crops they could still be affected. To clean up your fall garden, remove any dead plants and debris including leaves, vines, and fruit that could potentially harbor insects.

At the same time, remove or tidy up and trellis netting and supports. This could be as simple as moving tomato cages to a garden shed or garage, to protect the materials and reuse them next season. Our 2-D trellises are designed with easy-to-remove netting, so once your cucumbers, peas, or other vining crops are a tangled mess at the end of the season you can simply remove it and start fresh! This simple preparation will save you a lot of time and frustration next season.

[/et_pb_text][et_pb_text _builder_version=”4.27.0″ _module_preset=”default” text_text_color=”#000000″ link_font=”|700|||on|||#000000|” link_text_color=”#000000″ header_2_line_height=”1.5em” header_2_font_size_tablet=”” header_2_font_size_phone=”23px” header_2_font_size_last_edited=”on|phone” global_colors_info=”{}”]

Soil Care: Boosting Soil Health Before Winter

An annual vegetable garden is not a fully regenerative system. Every season, plants accumulate nutrients, vitamins and minerals from the soil, which we remove from the garden system for our own uses. Additionally, over time, soil compacts, pests and disease accumulates and overwinters in the soil and beneficial soil life like fungi diminishes. In order to maintain soil balance, both in texture, consistency and growing potential, annual gardens require soil care. We choose to break up soil care into two parts; end-of-season care & preseason care.

In fall “end-of-season care”, we add 2-3 inches of mushroom compost to the tops of raised beds. Compost is thick in texture and rich in nutrients, which adds back nutrients, vitamins, minerals to soil life in raised beds. It also suppresses any weed seeds in the soil and prevents them from germinating by reducing their exposure to the sun. Replenishing the soil volume also takes full advantage of raised beds’ height and soil structure.

[/et_pb_text][et_pb_image src=”https://backyard-eats.com/wp-content/uploads/2024/06/12-3.jpg” title_text=”Project1H_BYE” show_bottom_space=”off” _builder_version=”4.27.0″ _module_preset=”default” custom_margin=”20px||20px||true|false” global_colors_info=”{}”][/et_pb_image][et_pb_text _builder_version=”4.27.0″ _module_preset=”default” text_text_color=”#000000″ link_font=”|700|||on|||#000000|” link_text_color=”#000000″ header_2_line_height=”1.5em” header_2_font_size_tablet=”” header_2_font_size_phone=”23px” header_2_font_size_last_edited=”on|phone” global_colors_info=”{}”]

Alternatives to Fertilization During Fall

If you’re concerned about plant health without using fertilizer, here are some alternative ways to care for your fall garden during the growing season.

First, maintain consistent soil moisture to help plants establish roots and prevent pest and disease issues from over-watering. We recommend drip irrigation systems for consistent, even, and regular watering at the roots without adding extra nutrients to the soil. As an added benefit, irrigation timers can be adjusted to a less frequent schedule as fall temperatures cool. Mulching – useful for in-ground beds – also helps retain soil moisture. Additionally, mulch can maintain a comfortable soil temperature which will reduce plant stress and encourage growth.

[/et_pb_text][et_pb_text _builder_version=”4.27.0″ _module_preset=”default” text_text_color=”#000000″ link_font=”|700|||on|||#000000|” link_text_color=”#000000″ header_2_line_height=”1.5em” header_2_font_size_tablet=”” header_2_font_size_phone=”23px” header_2_font_size_last_edited=”on|phone” global_colors_info=”{}”]

Fall Planting: Thinking Ahead

Garlic and shallots can both be planted in late fall before the ground freezes with a hard frost. Unlike “quick fall” crops like baby greens or radishes, which we plant at the end of August, garlic and shallots are best planted in late November or early December in our climate. This gives the crops enough time to get established and begin to grow roots before the ground freezes, without expending all of their energy into producing fruit. Over winter, these crops will go dormant and emerge in spring, growing for several months until they’re ready to harvest in mid-summer. Because growing shallots and garlic takes longer than other crops, don’t miss your chance to plant them this fall and enjoy a delicious harvest next year!

[/et_pb_text][et_pb_image src=”https://backyard-eats.com/wp-content/uploads/2023/04/1-1.png” title_text=”1 (1)” show_bottom_space=”off” _builder_version=”4.27.0″ _module_preset=”default” custom_margin=”20px||20px||true|false” global_colors_info=”{}”][/et_pb_image][et_pb_text _builder_version=”4.27.0″ _module_preset=”default” text_text_color=”#000000″ link_font=”|700|||on|||#000000|” link_text_color=”#000000″ header_2_line_height=”1.5em” header_2_font_size_tablet=”” header_2_font_size_phone=”23px” header_2_font_size_last_edited=”on|phone” global_colors_info=”{}”]

Additional Winter Preparations for Raised Beds

Mulching is a valuable practice for insulating in-ground perennial beds and protecting the soil during the winter months. By applying a thick layer of organic mulch, such as straw, wood chips, or shredded leaves, you can help regulate soil temperature, retain moisture, and prevent the soil from freezing and thawing too rapidly, which can damage plant roots. Mulch also acts as a barrier against weeds, which may still attempt to sprout during warmer winter spells. As the mulch breaks down, it adds organic matter to the soil, improving its structure and fertility for the next growing season. Our team can recommend and apply the right type of mulch tailored to your garden’s specific needs, ensuring your soil remains healthy and well-protected through winter.

Frost protection is a crucial step in safeguarding your raised beds from the harsh winter weather. As temperatures drop, even the hardiest of plants can suffer if not properly shielded from frost. To protect your garden, consider using frost cloths, which are lightweight, breathable fabrics that can be draped over plants to trap heat and keep the cold at bay. For more substantial protection, low tunnels made from hoops and plastic sheeting can create a mini-greenhouse effect, preserving warmth and extending the growing season. Cold frames, which are essentially small, unheated greenhouses, offer even greater insulation and are perfect for overwintering certain crops or starting early spring seeds. By implementing these strategies, you can prevent frost damage, ensuring that your plants remain healthy and vigorous throughout the winter. Our team can assist with setting up these frost protection methods, ensuring your raised beds are well-prepared to face the chill.

[/et_pb_text][et_pb_text _builder_version=”4.27.0″ _module_preset=”default” text_text_color=”#000000″ link_font=”|700|||on|||#000000|” link_text_color=”#000000″ header_2_line_height=”1.5em” header_2_font_size_tablet=”” header_2_font_size_phone=”23px” header_2_font_size_last_edited=”on|phone” global_colors_info=”{}”]

Conclusion

We encourage you to take advantage of Backyard Eats’ professional services to make the garden winterization process seamless and effective. Whether it’s cleaning up spent plants, enriching your soil with compost, or planting garlic and shallots, our team is here to help. To get started, contact us today to schedule your fall and winter garden services. Don’t forget to subscribe to our newsletter for more gardening tips and advice, ensuring you’re always prepared to make the most of your edible garden.

[/et_pb_text][et_pb_button button_url=”@ET-DC@eyJkeW5hbWljIjp0cnVlLCJjb250ZW50IjoicG9zdF9saW5rX3VybF9wYWdlIiwic2V0dGluZ3MiOnsicG9zdF9pZCI6IjU4MjY0In19@” url_new_window=”on” button_text=”BOOK A CONSULTATION” button_alignment=”left” button_alignment_tablet=”left” button_alignment_phone=”left” button_alignment_last_edited=”on|tablet” disabled_on=”off|off|off” _builder_version=”4.27.0″ _dynamic_attributes=”button_url” _module_preset=”737bea5a-e063-4b24-af3f-21ce28f0bf38″ button_bg_color=”gcid-3b5ac83a-684c-4379-a559-60b2aa9e8157″ button_border_color=”gcid-3b5ac83a-684c-4379-a559-60b2aa9e8157″ button_letter_spacing=”1px” button_font=”Roboto|700||on|||||” z_index=”90″ custom_margin=”0px|0px|30px|0px|false|false” custom_margin_tablet=”0px|0px|0px|0px|false|false” custom_margin_phone=”0px|0px|0px|0px|false|false” custom_margin_last_edited=”on|desktop” locked=”off” global_colors_info=”{%22gcid-3b5ac83a-684c-4379-a559-60b2aa9e8157%22:%91%22button_border_color__hover%22,%22button_bg_color%22,%22button_border_color%22%93}” button_text_color__hover_enabled=”on|hover” button_text_color__hover=”#844B67″ button_bg_enable_color__hover=”on” button_border_color__hover=”#88667b” button_border_color__hover_enabled=”on|desktop”][/et_pb_button][/et_pb_column][/et_pb_row][/et_pb_section]
Fall Garden Maintenance: Should You Fertilize in Fall?

c

[et_pb_section fb_built=”1″ admin_label=”section” _builder_version=”4.16″ da_disable_devices=”off|off|off” global_colors_info=”{}” da_is_popup=”off” da_exit_intent=”off” da_has_close=”on” da_alt_close=”off” da_dark_close=”off” da_not_modal=”on” da_is_singular=”off” da_with_loader=”off” da_has_shadow=”on”][et_pb_row admin_label=”row” _builder_version=”4.16″ background_size=”initial” background_position=”top_left” background_repeat=”repeat” global_colors_info=”{}”][et_pb_column type=”4_4″ _builder_version=”4.16″ custom_padding=”|||” global_colors_info=”{}” custom_padding__hover=”|||”][et_pb_text _builder_version=”4.27.0″ _module_preset=”default” text_text_color=”#000000″ link_font=”|700|||on|||#000000|” link_text_color=”#000000″ header_2_line_height=”1.5em” hover_enabled=”0″ header_2_font_size_tablet=”” header_2_font_size_phone=”23px” header_2_font_size_last_edited=”on|phone” global_colors_info=”{}” sticky_enabled=”0″]

Introduction

When discussing fall garden maintenance tasks like summer garden clean-ups, crop rotation and soil care, one question we get asked is: should I fertilize my vegetable garden in fall? Not necessarily. This article will explore the right time to add fertilizer to your raised beds and why, along with alternative soil care methods.

[/et_pb_text][et_pb_text _builder_version=”4.27.0″ _module_preset=”default” text_text_color=”#000000″ link_font=”|700|||on|||#000000|” link_text_color=”#000000″ header_2_line_height=”1.5em” hover_enabled=”0″ header_2_font_size_tablet=”” header_2_font_size_phone=”23px” header_2_font_size_last_edited=”on|phone” global_colors_info=”{}” sticky_enabled=”0″]

Understanding Fall Garden Challenges

Typically in the Greater Philadelphia Area, our fall planting season ranges from mid-August to mid-September. The cooler weather and reduced pest pressure create an ideal environment for tender greens and herbs, but fall gardening also presents some challenges. Common fall gardening risks include a shorter growing season, reduced daylight, and frost risks. Therefore, our focus in fall is preserving plant health and ripening existing crops instead of encouraging new growth. This focus will help you get the most harvest and reward from your garden during a short growing season.

[/et_pb_text][et_pb_image src=”https://backyard-eats.com/wp-content/uploads/2023/09/DSC7789-scaled.jpg” title_text=”_DSC7789″ show_bottom_space=”off” _builder_version=”4.27.0″ _module_preset=”default” custom_margin=”20px||20px||true|false” hover_enabled=”0″ global_colors_info=”{}” sticky_enabled=”0″][/et_pb_image][et_pb_text _builder_version=”4.27.0″ _module_preset=”default” text_text_color=”#000000″ link_font=”|700|||on|||#000000|” link_text_color=”#000000″ header_2_line_height=”1.5em” hover_enabled=”0″ header_2_font_size_tablet=”” header_2_font_size_phone=”23px” header_2_font_size_last_edited=”on|phone” global_colors_info=”{}” sticky_enabled=”0″]

Fertilizing in Fall: When It’s Not Necessary

Because we want fall crops to focus on fruit ripening, we stop watering our gardens with organic fertilizer after fall planting. Fertilizers are typically high in nitrogen, which promotes vegetative plant growth. While vegetative growth can be helpful for certain crops in warmer weather, ultimately it’s counterproductive to fruit growth and ripening. Pausing fertilizer usage in fall signals that plants should shift their energy from expansion to ripening, leading to a quicker harvest. This especially applies to larger fruiting crops like tomatoes or peppers that have already begun to set fruit, and need to be harvested before a frost.

[/et_pb_text][et_pb_text _builder_version=”4.27.0″ _module_preset=”default” text_text_color=”#000000″ link_font=”|700|||on|||#000000|” link_text_color=”#000000″ header_2_line_height=”1.5em” hover_enabled=”0″ header_2_font_size_tablet=”” header_2_font_size_phone=”23px” header_2_font_size_last_edited=”on|phone” global_colors_info=”{}” sticky_enabled=”0″]

Alternatives to Fertilization During Fall

If you’re concerned about plant health without using fertilizer, here are some alternative ways to care for your fall garden during the growing season. First, maintain consistent soil moisture to help plants establish roots and prevent pest and disease issues from over-watering. We recommend drip irrigation systems for consistent, even, and regular watering at the roots without adding extra nutrients to the soil. As an added benefit, irrigation timers can be adjusted to a less frequent schedule as fall temperatures cool. Mulching – useful for in-ground beds – also helps retain soil moisture. Additionally, mulch can maintain a comfortable soil temperature which will reduce plant stress and encourage growth.

[/et_pb_text][et_pb_image src=”https://backyard-eats.com/wp-content/uploads/2024/06/6-1.jpg” title_text=”6″ show_bottom_space=”off” _builder_version=”4.27.0″ _module_preset=”default” custom_margin=”20px||20px||true|false” hover_enabled=”0″ global_colors_info=”{}” sticky_enabled=”0″][/et_pb_image][et_pb_text _builder_version=”4.27.0″ _module_preset=”default” text_text_color=”#000000″ link_font=”|700|||on|||#000000|” link_text_color=”#000000″ header_2_line_height=”1.5em” hover_enabled=”0″ header_2_font_size_tablet=”” header_2_font_size_phone=”23px” header_2_font_size_last_edited=”on|phone” global_colors_info=”{}” sticky_enabled=”0″]

Post-Harvest Care: Adding Nutrients Back to the Soil

Because we don’t fertilize fall gardens, we add nutrients back to the soil during end-of-season care in November or December instead. End-of-season care is essential to soil health and the success of your garden next spring. After fall harvests, we add a layer of compost to our raised beds. Compost is a thick mixture of organic matter that’s rich in nutrients (including nitrogen). Compost will help retain moisture and suppress weeds in your raised beds over winter, lessening the preparation required to revive your garden for spring planting.

[/et_pb_text][et_pb_text _builder_version=”4.27.0″ _module_preset=”default” text_text_color=”#000000″ link_font=”|700|||on|||#000000|” link_text_color=”#000000″ header_2_line_height=”1.5em” hover_enabled=”0″ header_2_font_size_tablet=”” header_2_font_size_phone=”23px” header_2_font_size_last_edited=”on|phone” global_colors_info=”{}” sticky_enabled=”0″]

Subscribe to Our Newsletter

For more expert edible gardening advice and inspiration, don’t forget to subscribe to our weekly newsletter!

[/et_pb_text][et_pb_button button_url=”@ET-DC@eyJkeW5hbWljIjp0cnVlLCJjb250ZW50IjoicG9zdF9saW5rX3VybF9wYWdlIiwic2V0dGluZ3MiOnsicG9zdF9pZCI6IjU4MjY0In19@” url_new_window=”on” button_text=”BOOK A CONSULTATION” button_alignment=”left” button_alignment_tablet=”left” button_alignment_phone=”left” button_alignment_last_edited=”on|tablet” disabled_on=”off|off|off” _builder_version=”4.27.0″ _dynamic_attributes=”button_url” _module_preset=”737bea5a-e063-4b24-af3f-21ce28f0bf38″ button_bg_color=”gcid-3b5ac83a-684c-4379-a559-60b2aa9e8157″ button_border_color=”gcid-3b5ac83a-684c-4379-a559-60b2aa9e8157″ button_letter_spacing=”1px” button_font=”Roboto|700||on|||||” z_index=”90″ custom_margin=”0px|0px|30px|0px|false|false” custom_margin_tablet=”0px|0px|0px|0px|false|false” custom_margin_phone=”0px|0px|0px|0px|false|false” custom_margin_last_edited=”on|desktop” locked=”off” global_colors_info=”{%22gcid-3b5ac83a-684c-4379-a559-60b2aa9e8157%22:%91%22button_border_color__hover%22,%22button_bg_color%22,%22button_border_color%22%93}” button_text_color__hover_enabled=”on|hover” button_text_color__hover=”#844B67″ button_bg_enable_color__hover=”on” button_border_color__hover=”#88667b” button_border_color__hover_enabled=”on|desktop”][/et_pb_button][/et_pb_column][/et_pb_row][/et_pb_section]

Enhance Your Edible Landscape This Fall With These Additions

moon gate trellis

[et_pb_section fb_built=”1″ admin_label=”section” _builder_version=”4.16″ da_disable_devices=”off|off|off” global_colors_info=”{}” da_is_popup=”off” da_exit_intent=”off” da_has_close=”on” da_alt_close=”off” da_dark_close=”off” da_not_modal=”on” da_is_singular=”off” da_with_loader=”off” da_has_shadow=”on”][et_pb_row admin_label=”row” _builder_version=”4.16″ background_size=”initial” background_position=”top_left” background_repeat=”repeat” global_colors_info=”{}”][et_pb_column type=”4_4″ _builder_version=”4.16″ custom_padding=”|||” global_colors_info=”{}” custom_padding__hover=”|||”][et_pb_text _builder_version=”4.27.0″ _module_preset=”default” text_text_color=”#000000″ link_font=”|700|||on|||#000000|” link_text_color=”#000000″ header_2_line_height=”1.5em” header_2_font_size_tablet=”” header_2_font_size_phone=”23px” header_2_font_size_last_edited=”on|phone” global_colors_info=”{}”]

Introduction

Like the plants that you grow in it, a garden can also grow and change over time. In previous posts we’ve discussed the benefits of a garden renovation, the importance of crop rotation and ongoing soil care, and adding essential infrastructure like fencing for pest protection.

But there are also several smaller additions you can make to enhance the function and beauty of your landscape! Many of these structures, like our variety of free-standing trellises, can be placed throughout your annual or perennial edible landscape unlike raised beds. Here are eight ways you can spruce up your garden this fall to prepare for a successful spring growing season:

[/et_pb_text][et_pb_text _builder_version=”4.27.0″ _module_preset=”default” text_text_color=”#000000″ link_font=”|700|||on|||#000000|” link_text_color=”#000000″ header_2_line_height=”1.5em” header_2_font_size_tablet=”” header_2_font_size_phone=”23px” header_2_font_size_last_edited=”on|phone” global_colors_info=”{}”]

Drip Irrigation

Drip irrigation systems in home gardening redefine convenience, delivering precise hydration with minimal effort. By automating the watering process, plants get water where, when and how they need it: at the roots, in the morning, and in appropriate amounts.

[/et_pb_text][et_pb_text _builder_version=”4.27.0″ _module_preset=”default” text_text_color=”#000000″ link_font=”|700|||on|||#000000|” link_text_color=”#000000″ header_2_line_height=”1.5em” header_2_font_size_tablet=”” header_2_font_size_phone=”23px” header_2_font_size_last_edited=”on|phone” global_colors_info=”{}”]

2-D Trellises

One practical trellising strategy is to build a two-dimensional trellis “wall” on the north side of your garden for plants to climb without shading other crops. Commonly built out of durable wood like cedar, these trellises can be fastened right to sturdy bed framework.

[/et_pb_text][et_pb_image src=”https://backyard-eats.com/wp-content/uploads/2022/08/66FD56F4-868F-4FFD-B914-76E834652CEC-scaled.jpeg” title_text=”Ambler Community Garden4″ show_bottom_space=”off” _builder_version=”4.27.0″ _module_preset=”default” custom_margin=”20px||20px||true|false” global_colors_info=”{}”][/et_pb_image][et_pb_text _builder_version=”4.27.0″ _module_preset=”default” text_text_color=”#000000″ link_font=”|700|||on|||#000000|” link_text_color=”#000000″ header_2_line_height=”1.5em” header_2_font_size_tablet=”” header_2_font_size_phone=”23px” header_2_font_size_last_edited=”on|phone” global_colors_info=”{}”]

Moon Gate Trellis

Moon gate trellises bring elegance and functionality, serving as focal points and vertical support for climbing plants within garden spaces.
Their unique circular design can help create garden “tunnels” and unique overhead harvesting experiences.

[/et_pb_text][et_pb_text _builder_version=”4.27.0″ _module_preset=”default” text_text_color=”#000000″ link_font=”|700|||on|||#000000|” link_text_color=”#000000″ header_2_line_height=”1.5em” header_2_font_size_tablet=”” header_2_font_size_phone=”23px” header_2_font_size_last_edited=”on|phone” global_colors_info=”{}”]

Garden Obelisks

Obelisks serve as striking vertical accents while offering structural support for climbing plants within growing spaces. Unlike 2-D trellises, obelisks can be flexibly moved around to support crop rotation and planting schedules.

[/et_pb_text][et_pb_image src=”https://backyard-eats.com/wp-content/uploads/2024/06/16-2.jpg” title_text=”16″ show_bottom_space=”off” _builder_version=”4.27.0″ _module_preset=”default” custom_margin=”20px||20px||true|false” global_colors_info=”{}”][/et_pb_image][et_pb_text _builder_version=”4.27.0″ _module_preset=”default” text_text_color=”#000000″ link_font=”|700|||on|||#000000|” link_text_color=”#000000″ header_2_line_height=”1.5em” header_2_font_size_tablet=”” header_2_font_size_phone=”23px” header_2_font_size_last_edited=”on|phone” global_colors_info=”{}”]

Gate Arbors

Gate arbors also serve dual roles, providing both functional passage and vertical support for climbing plants within raised beds. You can try growing annuals like peas and squash overhead every year or wood perennials like grapes or wisteria.

[/et_pb_text][et_pb_text _builder_version=”4.27.0″ _module_preset=”default” text_text_color=”#000000″ link_font=”|700|||on|||#000000|” link_text_color=”#000000″ header_2_line_height=”1.5em” header_2_font_size_tablet=”” header_2_font_size_phone=”23px” header_2_font_size_last_edited=”on|phone” global_colors_info=”{}”]

Perennial Beds

Perimeter planting beds offer the opportunity to integrate perennials into the landscape and add year round aesthetic charm to the structured look of the garden space. We plant perennial beds with edible herbs and flowers that provide beauty and habitat for pollinators.

[/et_pb_text][et_pb_text _builder_version=”4.27.0″ _module_preset=”default” text_text_color=”#000000″ link_font=”|700|||on|||#000000|” link_text_color=”#000000″ header_2_line_height=”1.5em” header_2_font_size_tablet=”” header_2_font_size_phone=”23px” header_2_font_size_last_edited=”on|phone” global_colors_info=”{}”]

Seating Areas

In home gardening, seating areas and tables integrated into the landscape offer functionality and visual appeal. Providing comfortable spaces for relaxation or dining, they become focal points for enjoyable moments amidst the flourishing greenery of your raised beds or perennial landscape.

[/et_pb_text][et_pb_image src=”https://backyard-eats.com/wp-content/uploads/2024/06/12-4.jpg” title_text=”12″ show_bottom_space=”off” _builder_version=”4.27.0″ _module_preset=”default” custom_margin=”20px||20px||true|false” global_colors_info=”{}”][/et_pb_image][et_pb_text _builder_version=”4.27.0″ _module_preset=”default” text_text_color=”#000000″ link_font=”|700|||on|||#000000|” link_text_color=”#000000″ header_2_line_height=”1.5em” header_2_font_size_tablet=”” header_2_font_size_phone=”23px” header_2_font_size_last_edited=”on|phone” global_colors_info=”{}”]

Garden Tool Storage

Tool storage solutions in home gardening streamline organization while maximizing efficiency. With tools at hand, tasks become more manageable, allowing for smoother workflow and greater enjoyment of your raised bed gardening experience.

[/et_pb_text][et_pb_text _builder_version=”4.27.0″ _module_preset=”default” text_text_color=”#000000″ link_font=”|700|||on|||#000000|” link_text_color=”#000000″ header_2_line_height=”1.5em” header_2_font_size_tablet=”” header_2_font_size_phone=”23px” header_2_font_size_last_edited=”on|phone” global_colors_info=”{}”]

Subscribe to Our Newsletter

For more expert edible gardening advice and inspiration, don’t forget to subscribe to our weekly newsletter!

[/et_pb_text][et_pb_button button_url=”@ET-DC@eyJkeW5hbWljIjp0cnVlLCJjb250ZW50IjoicG9zdF9saW5rX3VybF9wYWdlIiwic2V0dGluZ3MiOnsicG9zdF9pZCI6IjU4MjY0In19@” url_new_window=”on” button_text=”BOOK A CONSULTATION” button_alignment=”left” button_alignment_tablet=”left” button_alignment_phone=”left” button_alignment_last_edited=”on|tablet” disabled_on=”off|off|off” _builder_version=”4.27.0″ _dynamic_attributes=”button_url” _module_preset=”737bea5a-e063-4b24-af3f-21ce28f0bf38″ button_bg_color=”gcid-3b5ac83a-684c-4379-a559-60b2aa9e8157″ button_border_color=”gcid-3b5ac83a-684c-4379-a559-60b2aa9e8157″ button_letter_spacing=”1px” button_font=”Roboto|700||on|||||” z_index=”90″ custom_margin=”0px|0px|30px|0px|false|false” custom_margin_tablet=”0px|0px|0px|0px|false|false” custom_margin_phone=”0px|0px|0px|0px|false|false” custom_margin_last_edited=”on|desktop” locked=”off” global_colors_info=”{%22gcid-3b5ac83a-684c-4379-a559-60b2aa9e8157%22:%91%22button_border_color__hover%22,%22button_bg_color%22,%22button_border_color%22%93}” button_text_color__hover_enabled=”on|hover” button_text_color__hover=”#844B67″ button_bg_enable_color__hover=”on” button_border_color__hover=”#88667b” button_border_color__hover_enabled=”on|desktop”][/et_pb_button][/et_pb_column][/et_pb_row][/et_pb_section]

How to Dry Homegrown Dill for Long-Term Storage

Closeup photo of dill fronds from Engin Akyurt from Unsplash

[et_pb_section fb_built=”1″ admin_label=”section” _builder_version=”4.16″ da_disable_devices=”off|off|off” global_colors_info=”{}” da_is_popup=”off” da_exit_intent=”off” da_has_close=”on” da_alt_close=”off” da_dark_close=”off” da_not_modal=”on” da_is_singular=”off” da_with_loader=”off” da_has_shadow=”on”][et_pb_row admin_label=”row” _builder_version=”4.16″ background_size=”initial” background_position=”top_left” background_repeat=”repeat” global_colors_info=”{}”][et_pb_column type=”4_4″ _builder_version=”4.16″ custom_padding=”|||” global_colors_info=”{}” custom_padding__hover=”|||”][et_pb_text _builder_version=”4.27.0″ _module_preset=”default” text_text_color=”#000000″ link_font=”|700|||on|||#000000|” link_text_color=”#000000″ header_2_line_height=”1.5em” header_2_font_size_tablet=”” header_2_font_size_phone=”23px” header_2_font_size_last_edited=”on|phone” global_colors_info=”{}”]

Introduction

Dill’s feathery green leaves and distinctive aroma make it stand out in any vegetable garden. Whether you use it fresh or dried, dill adds a refreshing flavor to a variety of dishes: from pickles and salads to soups and seafood. Dill is easy to grow and preserve at home so you can enjoy its vibrant taste year-round! You don’t need fancy equipment to get started. Here’s a beginner-friendly tutorial to properly dry dill at home and enjoy this unique herb after the growing season has ended.

[/et_pb_text][et_pb_text _builder_version=”4.27.0″ _module_preset=”default” text_text_color=”#000000″ link_font=”|700|||on|||#000000|” link_text_color=”#000000″ header_2_line_height=”1.5em” header_2_font_size_tablet=”” header_2_font_size_phone=”23px” header_2_font_size_last_edited=”on|phone” global_colors_info=”{}”]

When to Harvest Dill

In the gardening world, dill is known as a “tender herb” due to its high moisture content and delicate leaves. Because of these factors, dill can’t be dried for long-term storage as easily as “woody” herbs like rosemary, sage, and thyme. While woody herbs can be hung to air-dry in a dark and dry location, dill needs a low-temperature drying process to prevent mold.

Start by harvesting dill at peak freshness. Typically, dill is ready to harvest when the plant is 4-6 inches tall with unfurled leaves. For the best flavor and quality, harvest dill before the plant starts to flower and go to seed. You can either pick a few stems as needed, or cut a group of stems at the base for a larger batch. The good news is that dill will regrow in 2-3 weeks, so you can enjoy multiple harvests throughout the season!

[/et_pb_text][et_pb_image src=”https://backyard-eats.com/wp-content/uploads/2024/08/engin-akyurt-kgb34f0HRSc-unsplash.jpg” title_text=”engin-akyurt-kgb34f0HRSc-unsplash” show_bottom_space=”off” _builder_version=”4.27.0″ _module_preset=”default” custom_margin=”20px||20px||true|false” global_colors_info=”{}”][/et_pb_image][et_pb_text _builder_version=”4.27.0″ _module_preset=”default” text_text_color=”#6B6B6B” link_font=”|700|||on|||#6B6B6B|” link_text_color=”#6B6B6B” global_colors_info=”{}”]

Photo by engin akyurt on Unsplash

[/et_pb_text][et_pb_divider show_divider=”off” _builder_version=”4.27.0″ _module_preset=”default” global_colors_info=”{}”][/et_pb_divider][et_pb_text _builder_version=”4.27.0″ _module_preset=”default” text_text_color=”#000000″ link_font=”|700|||on|||#000000|” link_text_color=”#000000″ header_2_line_height=”1.5em” header_2_font_size_tablet=”” header_2_font_size_phone=”23px” header_2_font_size_last_edited=”on|phone” global_colors_info=”{}”]

How To Air-Dry Dill

Preparing dill for drying is simple: choose fresh, healthy stems, rinse them thoroughly under cold water to remove any dirt or insects, and pat dry with towels. Then, you can choose from three preservation methods: air drying, oven drying, or using a dehydrator. Each method is easy to follow and suitable for beginners.

To air-dry dill, bunch several stems together and secure them with a rubber band or string. Hang the bunches in a dry, warm, and well-ventilated area away from direct sunlight. A garage or basement can work well, but remember to check the dill regularly to prevent mold – which is more likely to develop with this method than quicker strategies. Dill typically takes 1-2 weeks to fully air-dry. Fully dried dill should be crisp to the touch.

[/et_pb_text][et_pb_image src=”https://backyard-eats.com/wp-content/uploads/2024/08/allie-dearie-ZW8dIPP4S4U-unsplash.jpg” title_text=”allie-dearie-ZW8dIPP4S4U-unsplash” show_bottom_space=”off” _builder_version=”4.27.0″ _module_preset=”default” custom_margin=”20px||20px||true|false” global_colors_info=”{}”][/et_pb_image][et_pb_text _builder_version=”4.27.0″ _module_preset=”default” text_text_color=”#6B6B6B” link_font=”|700|||on|||#6B6B6B|” link_text_color=”#6B6B6B” global_colors_info=”{}”]

Photo by Allie Dearie on Unsplash

[/et_pb_text][et_pb_text _builder_version=”4.27.0″ _module_preset=”default” text_text_color=”#000000″ link_font=”|700|||on|||#000000|” link_text_color=”#000000″ header_2_line_height=”1.5em” header_2_font_size_tablet=”” header_2_font_size_phone=”23px” header_2_font_size_last_edited=”on|phone” global_colors_info=”{}”]

How to Dry Dill in the Oven

If you prefer oven drying, spread the washed dill in a single layer on a baking sheet. Make sure not to overcrowd it to ensure even drying. Set the oven to a low temperature, around 95-115°F (35-46°C), to avoid burning. Check dill frequently to prevent overheating; the entire process usually takes 1-2 hours. Follow similar spacing and temperature guidelines if using a specialized dehydrator machine, which often takes 4-8 hours to fully dry herbs. Always consult your specific appliance’s manufacturer’s instructions for additional guidance.

[/et_pb_text][et_pb_text _builder_version=”4.27.0″ _module_preset=”default” text_text_color=”#000000″ link_font=”|700|||on|||#000000|” link_text_color=”#000000″ header_2_line_height=”1.5em” header_2_font_size_tablet=”” header_2_font_size_phone=”23px” header_2_font_size_last_edited=”on|phone” global_colors_info=”{}”]

How to Store Dried Dill

Proper storage is key to keeping dried dill flavorful and fresh. Use airtight containers like glass jars or vacuum-sealed bags and store them in a cool, dark place like a kitchen cabinet. Exposure to light and air can reduce potency over time. With proper storage, dried dill can last up to 6-12 months—possibly until your next homegrown harvest!

[/et_pb_text][et_pb_image src=”https://backyard-eats.com/wp-content/uploads/2024/08/laura-mitulla-aAGPWsp0WZk-unsplash.jpg” title_text=”laura-mitulla-aAGPWsp0WZk-unsplash” show_bottom_space=”off” _builder_version=”4.27.0″ _module_preset=”default” custom_margin=”20px||20px||true|false” global_colors_info=”{}”][/et_pb_image][et_pb_text _builder_version=”4.27.0″ _module_preset=”default” text_text_color=”#6B6B6B” link_font=”|700|||on|||#6B6B6B|” link_text_color=”#6B6B6B” global_colors_info=”{}”]

Photo by Laura Mitulla on Unsplash

[/et_pb_text][et_pb_text _builder_version=”4.27.0″ _module_preset=”default” text_text_color=”#000000″ link_font=”|700|||on|||#000000|” link_text_color=”#000000″ header_2_line_height=”1.5em” header_2_font_size_tablet=”” header_2_font_size_phone=”23px” header_2_font_size_last_edited=”on|phone” global_colors_info=”{}”]

Learn More

Ready to take your homegrown dill to the next level? Embrace these simple drying methods and enjoy the fruits of your gardening efforts all year long. Don’t forget to subscribe to our weekly newsletter for more gardening tips and culinary inspiration!

[/et_pb_text][et_pb_button button_url=”@ET-DC@eyJkeW5hbWljIjp0cnVlLCJjb250ZW50IjoicG9zdF9saW5rX3VybF9wYWdlIiwic2V0dGluZ3MiOnsicG9zdF9pZCI6IjU4MjY0In19@” url_new_window=”on” button_text=”BOOK A CONSULTATION” button_alignment=”left” button_alignment_tablet=”left” button_alignment_phone=”left” button_alignment_last_edited=”on|tablet” disabled_on=”off|off|off” _builder_version=”4.27.0″ _dynamic_attributes=”button_url” _module_preset=”737bea5a-e063-4b24-af3f-21ce28f0bf38″ button_bg_color=”gcid-3b5ac83a-684c-4379-a559-60b2aa9e8157″ button_border_color=”gcid-3b5ac83a-684c-4379-a559-60b2aa9e8157″ button_letter_spacing=”1px” button_font=”Roboto|700||on|||||” z_index=”90″ custom_margin=”0px|0px|30px|0px|false|false” custom_margin_tablet=”0px|0px|0px|0px|false|false” custom_margin_phone=”0px|0px|0px|0px|false|false” custom_margin_last_edited=”on|desktop” locked=”off” global_colors_info=”{%22gcid-3b5ac83a-684c-4379-a559-60b2aa9e8157%22:%91%22button_border_color__hover%22,%22button_bg_color%22,%22button_border_color%22%93}” button_text_color__hover_enabled=”on|hover” button_text_color__hover=”#844B67″ button_bg_enable_color__hover=”on” button_border_color__hover=”#88667b” button_border_color__hover_enabled=”on|desktop”][/et_pb_button][/et_pb_column][/et_pb_row][et_pb_row _builder_version=”4.27.0″ _module_preset=”default” global_colors_info=”{}”][et_pb_column type=”4_4″ _builder_version=”4.27.0″ _module_preset=”default” global_colors_info=”{}”][et_pb_toggle title=”FURTHER READING” open_toggle_text_color=”#FFFFFF” icon_color=”#FFFFFF” toggle_icon=”||fa||400″ open_icon_color=”#FFFFFF” open_toggle_icon=”||fa||900″ _builder_version=”4.27.0″ _module_preset=”default” title_text_color=”#FFFFFF” title_font=”|700|||||||” body_font=”|600|||||||” body_text_color=”#FFFFFF” background_color=”gcid-c8781551-ca60-42c8-ba6c-c1e000785908″ global_colors_info=”{%22gcid-c8781551-ca60-42c8-ba6c-c1e000785908%22:%91%22background_color%22%93}” background__hover_enabled=”on|desktop” background_color__hover=”#BFBFBF” background_enable_color__hover=”on”]

“How to Dry Fresh Dill” by For the Love of Cooking. Available at: https://fortheloveofcooking.net/2020/10/how-to-dry-fresh-dill.html

University of Illinois Extension. “Harvesting and Drying Herbs.” Available at: https://extension.illinois.edu/herbs/harvesting-and-drying-herbs

Harvest to Table. “How to Dry Herbs.” Available at: https://harvesttotable.com/how-to-dry-herbs/

University of Georgia Extension. “How to Dry Herbs.” Available at: https://extension.uga.edu/publications/detail.html?number=B990

National Center for Home Food Preservation. “Drying Herbs.” Available at: https://nchfp.uga.edu/how/dry/herbs.html

[/et_pb_toggle][/et_pb_column][/et_pb_row][/et_pb_section]

7 Quick Summer Veggie Recipes For Your Kid’s Lunch

Photo of a veggie-filled quesadilla from Lottie Griffiths from Unsplash

[et_pb_section fb_built=”1″ admin_label=”section” _builder_version=”4.16″ da_disable_devices=”off|off|off” global_colors_info=”{}” da_is_popup=”off” da_exit_intent=”off” da_has_close=”on” da_alt_close=”off” da_dark_close=”off” da_not_modal=”on” da_is_singular=”off” da_with_loader=”off” da_has_shadow=”on”][et_pb_row admin_label=”row” _builder_version=”4.16″ background_size=”initial” background_position=”top_left” background_repeat=”repeat” global_colors_info=”{}”][et_pb_column type=”4_4″ _builder_version=”4.16″ custom_padding=”|||” global_colors_info=”{}” custom_padding__hover=”|||”][et_pb_text _builder_version=”4.27.0″ _module_preset=”default” text_text_color=”#000000″ link_font=”|700|||on|||#000000|” link_text_color=”#000000″ global_colors_info=”{}”]

Easy Summer Lunch Ideas

As summer draws to a close and back-to-school season begins, home gardeners are often blessed with a bounty of fresh produce, from crisp cucumbers to juicy cherry tomatoes. While this abundance is a joy, it can also present a challenge—especially when it comes to finding ways to use up all those veggies in a way that’s kid-friendly and convenient for busy school lunches. To help you make the most of your garden harvest, we’ve compiled a list of seven quick, easy, and nutritious veggie-packed lunch ideas that your kids will love. These recipes are designed to be both delicious and travel-friendly, ensuring that you can send your little ones off to school with fresh and satisfying meals.

[/et_pb_text][et_pb_divider show_divider=”off” _builder_version=”4.27.0″ _module_preset=”default” global_colors_info=”{}”][/et_pb_divider][et_pb_text _builder_version=”4.27.0″ _module_preset=”default” text_text_color=”#000000″ link_font=”|700|||on|||#000000|” link_text_color=”#000000″ header_2_line_height=”2em” header_6_font=”|600|||||||” header_6_text_color=”#844B67″ header_6_line_height=”2em” header_2_font_size_tablet=”” header_2_font_size_phone=”24px” header_2_font_size_last_edited=”on|phone” global_colors_info=”{}” header_6_line_height_phone=”1.5em” header_6_line_height_last_edited=”on|phone” header_6_line_height_tablet=”2em”]

1. Veggie Pinwheels

Homegrown bell peppers, carrots, and spinach work great in these easy wraps.
  • Ingredients: Whole grain tortillas, hummus, shredded carrots, sliced bell peppers, spinach.
  • Instructions: Spread hummus on tortillas, layer with shredded carrots, sliced bell peppers, and spinach. Roll up tightly and slice into pinwheels.

[/et_pb_text][et_pb_text _builder_version=”4.27.0″ _module_preset=”default” text_text_color=”#000000″ link_font=”|700|||on|||#000000|” link_text_color=”#000000″ header_2_line_height=”2em” header_6_font=”|600|||||||” header_6_text_color=”#844B67″ header_6_line_height=”2em” header_2_font_size_tablet=”” header_2_font_size_phone=”24px” header_2_font_size_last_edited=”on|phone” global_colors_info=”{}” header_6_line_height_phone=”1.5em” header_6_line_height_last_edited=”on|phone” header_6_line_height_tablet=”2em”]

2. Mini Veggie Egg Muffins

This recipe is a fantastic way to use up a lot of vegetables at once!
  • Ingredients: Flour, eggs, shredded carrots, zucchini, cheese.
  • Instructions: Mix ingredients, pour into mini muffin tins, bake until golden. Easy to pack and eat without mess.

[/et_pb_text][et_pb_image src=”https://backyard-eats.com/wp-content/uploads/2024/08/33749974185_0426a54f2d_c.jpg” title_text=”33749974185_0426a54f2d_c” show_bottom_space=”off” _builder_version=”4.27.0″ _module_preset=”default” custom_margin=”20px||20px||true|false” global_colors_info=”{}”][/et_pb_image][et_pb_text _builder_version=”4.27.0″ _module_preset=”default” hover_enabled=”0″ global_colors_info=”{}” text_text_color=”#6B6B6B” sticky_enabled=”0″]

Picture credit: Jules (@stone-soup) from Flickr

[/et_pb_text][et_pb_text _builder_version=”4.27.0″ _module_preset=”default” text_text_color=”#000000″ link_font=”|700|||on|||#000000|” link_text_color=”#000000″ header_2_line_height=”2em” header_6_font=”|600|||||||” header_6_text_color=”#844B67″ header_6_line_height=”2em” header_2_font_size_tablet=”” header_2_font_size_phone=”24px” header_2_font_size_last_edited=”on|phone” global_colors_info=”{}” header_6_line_height_phone=”1.5em” header_6_line_height_last_edited=”on|phone” header_6_line_height_tablet=”2em”]

3. Cucumber and Cream Cheese Roll-Ups

For when you’re tired of turning pickles into cucumbers.
  • Ingredients: Cucumbers, cream cheese, whole grain tortillas.
  • Instructions: Spread cream cheese on tortillas, layer with thinly sliced cucumber, roll up tightly, and slice into pinwheels.

[/et_pb_text][et_pb_text _builder_version=”4.27.0″ _module_preset=”default” text_text_color=”#000000″ link_font=”|700|||on|||#000000|” link_text_color=”#000000″ header_2_line_height=”2em” header_6_font=”|600|||||||” header_6_text_color=”#844B67″ header_6_line_height=”2em” header_2_font_size_tablet=”” header_2_font_size_phone=”24px” header_2_font_size_last_edited=”on|phone” global_colors_info=”{}” header_6_line_height_phone=”1.5em” header_6_line_height_last_edited=”on|phone” header_6_line_height_tablet=”2em”]

4. Stuffed Mini Bell Peppers

This is a great way to use our Mini Lunchbox Snack Peppers.
  • Ingredients: Mini bell peppers, cream cheese or hummus, chopped veggies (cucumbers, carrots).
  • Instructions: Fill mini bell peppers with cream cheese or hummus and chopped veggies; serve as bite-sized snacks.

[/et_pb_text][et_pb_image src=”https://backyard-eats.com/wp-content/uploads/2024/08/28001885574_cfd36d43a7_c.jpg” title_text=”28001885574_cfd36d43a7_c” show_bottom_space=”off” _builder_version=”4.27.0″ _module_preset=”default” custom_margin=”20px||20px||true|false” global_colors_info=”{}”][/et_pb_image][et_pb_text _builder_version=”4.27.0″ _module_preset=”default” hover_enabled=”0″ global_colors_info=”{}” text_text_color=”#6B6B6B” sticky_enabled=”0″]

Picture credit: Mike (@anotherpintplease) from Flickr

[/et_pb_text][et_pb_text _builder_version=”4.27.0″ _module_preset=”default” text_text_color=”#000000″ link_font=”|700|||on|||#000000|” link_text_color=”#000000″ header_2_line_height=”2em” header_6_font=”|600|||||||” header_6_text_color=”#844B67″ header_6_line_height=”2em” header_2_font_size_tablet=”” header_2_font_size_phone=”24px” header_2_font_size_last_edited=”on|phone” global_colors_info=”{}” header_6_line_height_phone=”1.5em” header_6_line_height_last_edited=”on|phone” header_6_line_height_tablet=”2em”]

5. Chilled Veggie Pasta Salad

Don’t forget the homegrown herbs to spice up this quick salad.
  • Ingredients: Cooked pasta, cherry tomatoes, cucumbers, bell peppers, olives, feta cheese, Italian dressing.
  • Instructions: Toss cooked pasta with chopped veggies, olives, and feta cheese. Dress with Italian dressing and chill before serving.

[/et_pb_text][et_pb_text _builder_version=”4.27.0″ _module_preset=”default” text_text_color=”#000000″ link_font=”|700|||on|||#000000|” link_text_color=”#000000″ header_2_line_height=”2em” header_6_font=”|600|||||||” header_6_text_color=”#844B67″ header_6_line_height=”2em” header_2_font_size_tablet=”” header_2_font_size_phone=”24px” header_2_font_size_last_edited=”on|phone” global_colors_info=”{}” header_6_line_height_phone=”1.5em” header_6_line_height_last_edited=”on|phone” header_6_line_height_tablet=”2em”]

6. Veggie-Filled Mini Quesadillas

If you prefer plain quesadillas, turn your tomatoes and onions into a quick salsa side dish.
  • Ingredients: Whole wheat tortillas, shredded cheese, finely chopped bell peppers, spinach.
  • Instructions: Fill tortillas with cheese and veggies, fold, and slice into triangles.

[/et_pb_text][et_pb_image src=”https://backyard-eats.com/wp-content/uploads/2024/08/lottie-griffiths-pvTgyioFSTY-unsplash.jpg” title_text=”lottie-griffiths-pvTgyioFSTY-unsplash” show_bottom_space=”off” _builder_version=”4.27.0″ _module_preset=”default” width=”80%” custom_margin=”20px||20px||true|false” global_colors_info=”{}”][/et_pb_image][et_pb_text _builder_version=”4.27.0″ _module_preset=”default” hover_enabled=”0″ global_colors_info=”{}” text_text_color=”#6B6B6B” sticky_enabled=”0″]

Picture credit: Lottie Griffiths from Unsplash

[/et_pb_text][et_pb_text _builder_version=”4.27.0″ _module_preset=”default” text_text_color=”#000000″ link_font=”|700|||on|||#000000|” link_text_color=”#000000″ header_2_line_height=”2em” header_6_font=”|600|||||||” header_6_text_color=”#844B67″ header_6_line_height=”2em” hover_enabled=”0″ header_2_font_size_tablet=”” header_2_font_size_phone=”24px” header_2_font_size_last_edited=”on|phone” global_colors_info=”{}” header_6_line_height_last_edited=”on|phone” header_6_line_height_phone=”1.5em” sticky_enabled=”0″ header_6_line_height_tablet=”2em”]

7. Mediterranean Veggie Salad

Again, fresh herbs make a big difference in this summer salad.
  • Ingredients: Cherry tomatoes, cucumber slices, Kalamata olives, feta cheese, a sprinkle of oregano, and a drizzle of olive oil.
  • Instructions: In small cups or containers, combine cherry tomatoes, cucumber slices, and Kalamata olives. Top with crumbled feta cheese, a sprinkle of oregano, and a drizzle of olive oil. Serve chilled.

[/et_pb_text][et_pb_image src=”https://backyard-eats.com/wp-content/uploads/2024/08/sebastian-pandelache-dwilNQajTh0-unsplash.jpg” title_text=”sebastian-pandelache-dwilNQajTh0-unsplash” show_bottom_space=”off” _builder_version=”4.27.0″ _module_preset=”default” width=”80%” custom_margin=”20px||20px||true|false” global_colors_info=”{}”][/et_pb_image][et_pb_text _builder_version=”4.27.0″ _module_preset=”default” hover_enabled=”0″ global_colors_info=”{}” text_text_color=”#6B6B6B” sticky_enabled=”0″]

Picture credit: Sebastian Pandelache from Unsplash

[/et_pb_text][et_pb_text _builder_version=”4.27.0″ _module_preset=”default” text_text_color=”#000000″ link_font=”|700|||on|||#000000|” link_text_color=”#000000″ header_2_line_height=”2em” header_6_font=”|600|||||||” header_6_text_color=”#844B67″ header_6_font_size=”16px” header_6_line_height=”2em” header_2_font_size_tablet=”” header_2_font_size_phone=”24px” header_2_font_size_last_edited=”on|phone” global_colors_info=”{}”]

Conclusion

We hope you found these 10 tasty and easy lunch ideas helpful for using up your summer garden’s fresh produce. These recipes are designed to be nutritious, kid-friendly, and perfect for busy school days. We’d love to hear how you incorporate your own garden veggies into meals—share your favorite recipes and tips using this form!

[/et_pb_text][et_pb_button button_url=”https://backyard-eats.typeform.com/to/j53yoiw3″ url_new_window=”on” button_text=”SHARE A RECIPE” button_alignment=”left” button_alignment_tablet=”center” button_alignment_phone=”left” button_alignment_last_edited=”on|tablet” disabled_on=”off|off|off” _builder_version=”4.27.0″ _module_preset=”737bea5a-e063-4b24-af3f-21ce28f0bf38″ button_bg_color=”gcid-3b5ac83a-684c-4379-a559-60b2aa9e8157″ button_border_color=”gcid-3b5ac83a-684c-4379-a559-60b2aa9e8157″ button_letter_spacing=”1px” button_font=”Roboto|700||on|||||” z_index=”90″ custom_margin=”0px|0px|30px|0px|false|false” custom_margin_tablet=”-50px|0px|0px|0px|false|false” custom_margin_phone=”0px|0px|0px|0px|false|false” custom_margin_last_edited=”on|desktop” locked=”off” global_colors_info=”{%22gcid-3b5ac83a-684c-4379-a559-60b2aa9e8157%22:%91%22button_border_color__hover%22,%22button_bg_color%22,%22button_border_color%22%93}” button_text_color__hover_enabled=”on|hover” button_text_color__hover=”#844B67″ button_bg_enable_color__hover=”on” button_border_color__hover=”#88667b” button_border_color__hover_enabled=”on|desktop”][/et_pb_button][/et_pb_column][/et_pb_row][/et_pb_section]
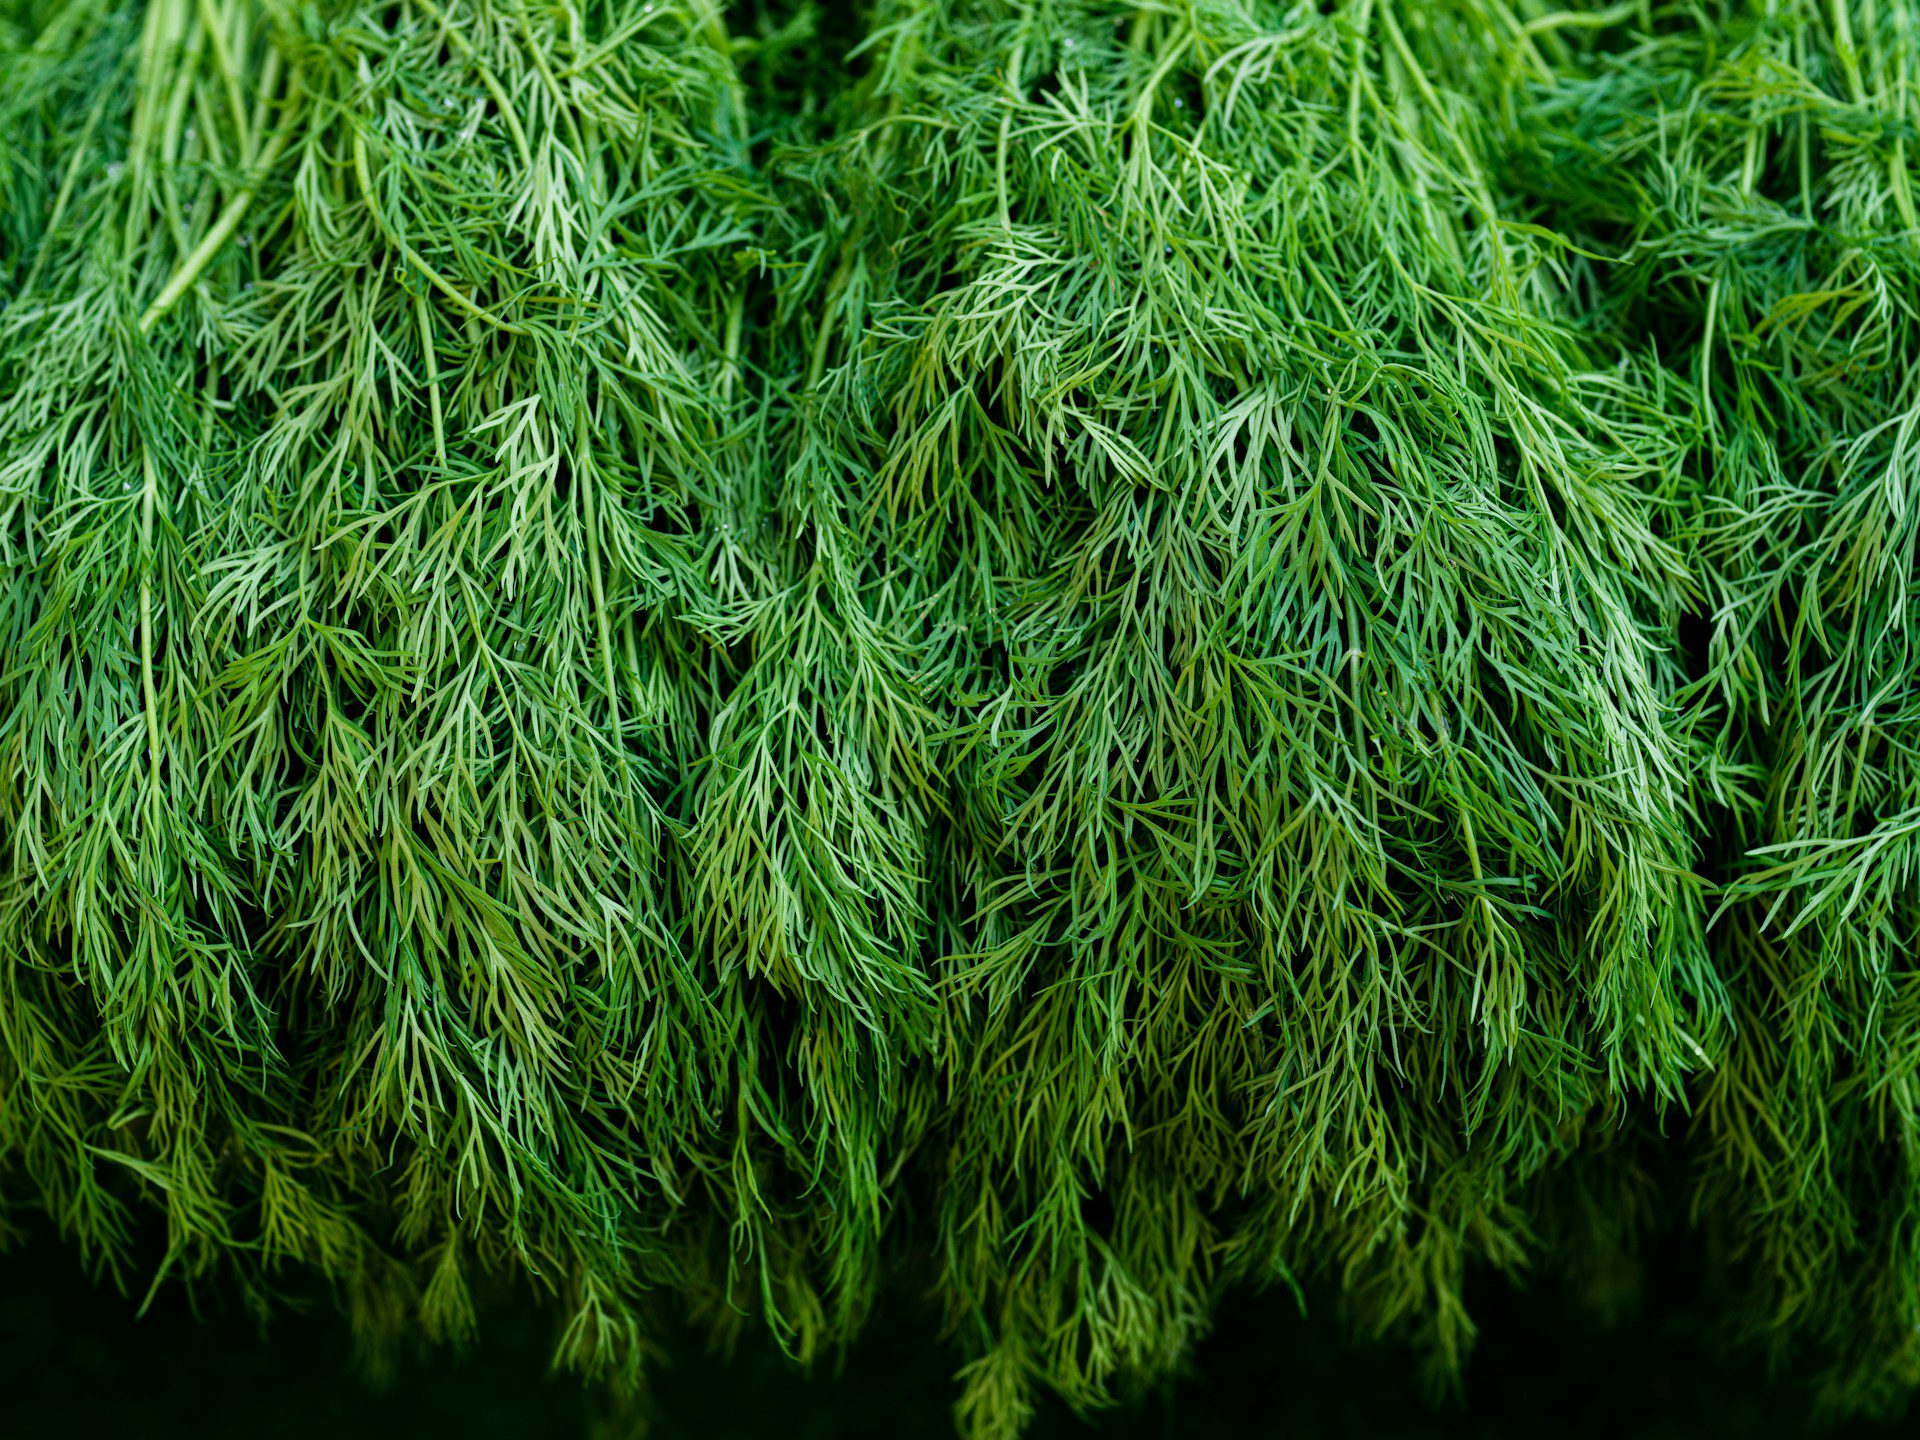
The Health Benefits of Growing Your Own Food

Photo of Backyard Eats gardener harvesting turnips from a raised bed

[et_pb_section fb_built=”1″ admin_label=”section” _builder_version=”4.16″ da_disable_devices=”off|off|off” global_colors_info=”{}” da_is_popup=”off” da_exit_intent=”off” da_has_close=”on” da_alt_close=”off” da_dark_close=”off” da_not_modal=”on” da_is_singular=”off” da_with_loader=”off” da_has_shadow=”on”][et_pb_row admin_label=”row” _builder_version=”4.16″ background_size=”initial” background_position=”top_left” background_repeat=”repeat” hover_enabled=”0″ global_colors_info=”{}” sticky_enabled=”0″][et_pb_column type=”4_4″ _builder_version=”4.16″ custom_padding=”|||” global_colors_info=”{}” custom_padding__hover=”|||”][et_pb_text _builder_version=”4.27.0″ _module_preset=”default” text_text_color=”#000000″ link_font=”|700|||on|||#000000|” link_text_color=”#000000″ global_colors_info=”{}”]

Gardening offers a wealth of benefits that extend far beyond the simple pleasure of harvesting fresh fruits and vegetables. By cultivating your own garden, you not only gain access to nutrient-rich produce but also engage in an activity that enhances physical fitness, boosts mental well-being, and fosters social connections. Gardening connects people with nature, promoting a healthier and more fulfilling lifestyle. Additionally, growing your own food reduces reliance on commercially-produced, chemically-treated produce, contributing to a more sustainable way of living.

[/et_pb_text][et_pb_text _builder_version=”4.27.0″ _module_preset=”default” text_text_color=”#000000″ link_font=”|700|||on|||#000000|” link_text_color=”#000000″ hover_enabled=”0″ global_colors_info=”{}” header_2_font_size_last_edited=”on|phone” header_2_font_size_phone=”24px” header_2_line_height=”1.5em” sticky_enabled=”0″]

Nutritional Value of Homegrown Food

Home-grown produce is often more nutrient-rich than store-bought options, particularly when harvested fresh and free from pesticides. According to the University of California, “Fresh fruits and vegetables play a very significant role in human nutrition, especially as sources of vitamins (Vitamin C, Vitamin A, Vitamin B6, thiamine, niacin), minerals, and dietary fiber” (University of California Agriculture and Natural Resources 2024). Freshly harvested produce typically retains more of these nutrients compared to store-bought options, which can lose nutritional value during transportation and storage.

When you grow your own food, you have control over what you eat, allowing you to avoid the chemicals commonly used in commercial farming. For example, glyphosate, a widely used herbicide, has raised concerns about its potential health risks, including a possible link to cancer. Although the research is ongoing, the World Health Organization classifies glyphosate as a “probable human carcinogen.” By choosing organic gardening methods, you can reduce your and your family’s exposure to harmful chemicals.

Additionally, growing a variety of fruits and vegetables in your garden allows you to tailor your diet to your nutritional needs. A diverse, plant-rich diet supports overall health, lowering the risk of chronic diseases like cardiovascular disease and diabetes. The Harvard T.H. Chan School of Public Health emphasizes the importance of consuming a variety of produce, stating, “Eat a variety of types and colors of produce in order to give your body the mix of nutrients it needs” (Harvard T.H. Chan School of Public Health 2024).

[/et_pb_text][et_pb_image src=”https://backyard-eats.com/wp-content/uploads/2024/08/DSC7741-scaled.jpg” title_text=”_DSC7741″ show_bottom_space=”off” _builder_version=”4.27.0″ _module_preset=”default” custom_margin=”20px||20px||true|false” global_colors_info=”{}”][/et_pb_image][et_pb_divider show_divider=”off” _builder_version=”4.27.0″ _module_preset=”default” global_colors_info=”{}”][/et_pb_divider][et_pb_text _builder_version=”4.27.0″ _module_preset=”default” text_text_color=”#000000″ link_font=”|700|||on|||#000000|” link_text_color=”#000000″ global_colors_info=”{}” header_2_line_height=”1.5em” header_2_font_size_phone=”24px” header_2_font_size_last_edited=”on|phone”]

Physical Health Benefits of Gardening

Gardening is a surprisingly effective form of physical exercise. Activities such as planting, weeding, and harvesting all contribute to daily exercise goals, engaging various muscle groups and promoting overall fitness. According to Dan Hickey from the National Gardening Association, “Gardening uses all the major muscle groups, the muscles that do most of the calorie burning in the human body. Legs, buttocks, shoulders, stomach, arms, neck, and back all get a workout. Gardening also increases flexibility and strengthens joints” (Hickey 2024).

Regular physical activity is crucial for reducing the risk of chronic diseases such as obesity, heart disease, and diabetes. The physical demands of gardening, whether it’s digging, raking, or lifting, can help maintain a healthy weight, improve cardiovascular health, and enhance muscle tone and strength. Hickey also suggests that beginner gardeners start with shorter bursts of activity and gradually work up to longer or more demanding tasks, making gardening an accessible form of exercise for people of all ages and fitness levels.

Another significant benefit of gardening is exposure to sunlight, which stimulates the body’s production of Vitamin D. Vitamin D is essential for bone health and immune function. According to the National Institute of Health, “Without sufficient vitamin D, bones can become thin, brittle, or misshapen…Together with calcium, vitamin D also helps protect older adults from osteoporosis” (National Institutes of Health, Office of Dietary Supplements 2024). Spending time in the garden allows for the synthesis of Vitamin D, contributing to overall health and well-being.

[/et_pb_text][et_pb_image src=”https://backyard-eats.com/wp-content/uploads/2024/08/DSC7798-scaled.jpg” title_text=”_DSC7798″ show_bottom_space=”off” _builder_version=”4.27.0″ _module_preset=”default” custom_margin=”20px||20px||true|false” global_colors_info=”{}”][/et_pb_image][et_pb_text _builder_version=”4.27.0″ _module_preset=”default” text_text_color=”#000000″ link_font=”|700|||on|||#000000|” link_text_color=”#000000″ global_colors_info=”{}” header_2_line_height=”1.5em” header_2_font_size_phone=”24px” header_2_font_size_last_edited=”on|phone”]

Mental Health Benefits of Gardening

Gardening also offers numerous mental health benefits. The act of gardening provides an opportunity to disconnect from the stresses of daily life, offering a peaceful and meditative environment. Engaging with nature has been shown to reduce stress, anxiety, and depression, and enhance overall mood.

Richard Thompson from the Royal College of Physicians advocates for “green care,” a treatment method that emphasizes the therapeutic benefits of spending time in nature. Thompson suggests that exposure to green spaces can improve mental well-being by treating “the whole person” rather than just addressing symptoms (Thompson 2018). Gardening, in particular, has been shown to be beneficial for individuals recovering from illness or injury, offering a gentle and enjoyable form of physical therapy.

The American Psychological Association also supports the positive impact of green spaces, noting that even urban parks and small gardens can provide significant mental health benefits (American Psychological Association 2020). Gardening encourages mindfulness, allowing individuals to focus on the present moment and engage their senses. The repetitive tasks of gardening can be soothing, providing a sense of accomplishment and progress as plants grow and thrive.

[/et_pb_text][et_pb_image src=”https://backyard-eats.com/wp-content/uploads/2024/08/DSC7906-scaled.jpg” title_text=”_DSC7906″ show_bottom_space=”off” _builder_version=”4.27.0″ _module_preset=”default” custom_margin=”20px||20px||true|false” global_colors_info=”{}”][/et_pb_image][et_pb_text _builder_version=”4.27.0″ _module_preset=”default” text_text_color=”#000000″ link_font=”|700|||on|||#000000|” link_text_color=”#000000″ global_colors_info=”{}” header_2_line_height=”1.5em” header_2_font_size_phone=”24px” header_2_font_size_last_edited=”on|phone”]

Social Advantages of Gardening

In addition to its physical and mental health benefits, gardening can also foster social connections. Community gardens, in particular, offer a space for people to come together, share knowledge, and work toward a common goal. These gardens promote a sense of belonging and community, helping to combat social isolation and loneliness.

Community gardens provide educational opportunities and increase access to fresh produce, particularly in urban areas where green space may be limited. They also serve as a hub for social interaction, where neighbors can collaborate, share resources, and support one another. These social connections can enhance personal well-being, creating a supportive network that contributes to overall quality of life.

Gardening in one’s own backyard can also create opportunities for social interaction, whether it’s sharing homegrown produce with friends and family or participating in gardening clubs and local events. The shared experience of gardening can strengthen relationships and create lasting bonds.

[/et_pb_text][et_pb_image src=”https://backyard-eats.com/wp-content/uploads/2024/08/DSC7959-scaled.jpg” title_text=”_DSC7959″ show_bottom_space=”off” _builder_version=”4.27.0″ _module_preset=”default” custom_margin=”20px||20px||true|false” global_colors_info=”{}”][/et_pb_image][et_pb_text _builder_version=”4.27.0″ _module_preset=”default” text_text_color=”#000000″ link_font=”|700|||on|||#000000|” link_text_color=”#000000″ global_colors_info=”{}” header_2_line_height=”1.5em” header_2_font_size_phone=”24px” header_2_font_size_last_edited=”on|phone”]

Environmental Impact of Homegrown Food

Beyond personal health benefits, gardening also supports environmental sustainability. Growing your own food reduces reliance on commercially produced food, which often involves extensive transportation and the use of chemical fertilizers and pesticides. Home gardens have a lower carbon footprint, as produce only needs to travel from your garden to your kitchen.

Furthermore, home gardeners can choose organic methods to avoid harmful chemicals like glyphosate, which have been linked to health risks and environmental damage (Turner and Borwick 2023). By practicing sustainable gardening, you contribute to a healthier ecosystem, supporting soil health and local biodiversity.

In addition, gardening allows individuals to connect with the earth and develop a greater appreciation for nature. This connection can inspire more environmentally conscious behavior, such as composting, water conservation, and supporting local pollinators by planting native plants. These small, individual actions collectively contribute to a more sustainable future.

[/et_pb_text][et_pb_text _builder_version=”4.27.0″ _module_preset=”default” text_text_color=”#000000″ link_font=”|700|||on|||#000000|” link_text_color=”#000000″ global_colors_info=”{}” header_2_line_height=”1.5em” header_2_font_size_phone=”24px” header_2_font_size_last_edited=”on|phone”]

Conclusion

Gardening is more than just a hobby; it is a powerful tool for improving physical, mental, and social health. By growing your own food, you gain access to fresh, nutrient-rich produce while reducing exposure to harmful chemicals. Gardening also provides an enjoyable form of physical exercise, promotes mental well-being through connection with nature, and fosters social connections within the community.

In addition to these personal benefits, gardening supports environmental sustainability by reducing the carbon footprint of food production and encouraging organic practices. Whether tending to a backyard garden or participating in a community plot, the act of gardening offers a holistic approach to health and well-being, enriching both the body and mind. By cultivating a garden, you’re building a more sustainable lifestyle and enjoying the many rewards of fresh, home-grown produce.

[/et_pb_text][et_pb_button button_url=”@ET-DC@eyJkeW5hbWljIjp0cnVlLCJjb250ZW50IjoicG9zdF9saW5rX3VybF9wYWdlIiwic2V0dGluZ3MiOnsicG9zdF9pZCI6IjU4MjY0In19@” url_new_window=”on” button_text=”BOOK A CONSULTATION” button_alignment=”left” button_alignment_tablet=”left” button_alignment_phone=”left” button_alignment_last_edited=”on|tablet” disabled_on=”off|off|off” _builder_version=”4.27.0″ _dynamic_attributes=”button_url” _module_preset=”737bea5a-e063-4b24-af3f-21ce28f0bf38″ button_bg_color=”gcid-3b5ac83a-684c-4379-a559-60b2aa9e8157″ button_border_color=”gcid-3b5ac83a-684c-4379-a559-60b2aa9e8157″ button_letter_spacing=”1px” button_font=”Roboto|700||on|||||” z_index=”90″ custom_margin=”0px|0px|30px|0px|false|false” custom_margin_tablet=”0px|0px|0px|0px|false|false” custom_margin_phone=”0px|0px|0px|0px|false|false” custom_margin_last_edited=”on|desktop” hover_enabled=”0″ locked=”off” global_colors_info=”{%22gcid-3b5ac83a-684c-4379-a559-60b2aa9e8157%22:%91%22button_border_color__hover%22,%22button_bg_color%22,%22button_border_color%22%93}” button_text_color__hover_enabled=”on|hover” button_text_color__hover=”#844B67″ button_bg_enable_color__hover=”on” button_border_color__hover=”#88667b” button_border_color__hover_enabled=”on|desktop” sticky_enabled=”0″][/et_pb_button][/et_pb_column][/et_pb_row][et_pb_row _builder_version=”4.27.0″ _module_preset=”default” global_colors_info=”{}”][et_pb_column type=”4_4″ _builder_version=”4.27.0″ _module_preset=”default” global_colors_info=”{}”][et_pb_toggle title=”FURTHER READING” open_toggle_text_color=”#FFFFFF” icon_color=”#FFFFFF” toggle_icon=”||fa||400″ open_icon_color=”#FFFFFF” open_toggle_icon=”||fa||900″ _builder_version=”4.27.0″ _module_preset=”default” title_text_color=”#FFFFFF” body_font=”|600|||||||” body_text_color=”#FFFFFF” background_color__hover=”#BFBFBF” background_enable_color__hover=”on” global_colors_info=”{%22gcid-c8781551-ca60-42c8-ba6c-c1e000785908%22:%91%22background_color%22%93}” title_font=”|700|||||||” background_color=”gcid-c8781551-ca60-42c8-ba6c-c1e000785908″ background__hover_enabled=”on|desktop” hover_enabled=”0″ sticky_enabled=”0″]

American Psychological Association. “The Healing Power of Nature.” *American Psychological Association*. April 2020. https://www.apa.org/monitor/2020/04/nurtured-nature.

Harvard T.H. Chan School of Public Health. “The Nutrition Source: Vegetables and Fruits.” *Harvard T.H. Chan School of Public Health*. Accessed August 12, 2024. https://www.hsph.harvard.edu/nutritionsource/what-should-you-eat/vegetables-and-fruits/.

Hickey, Dan. “Gardening is Exercise.” The Garden.org. Last modified August 10, 2024. https://garden.org/learn/articles/view/126/Gardening-is-Exercise/.

National Institutes of Health, Office of Dietary Supplements. “Vitamin D: Fact Sheet for Health Professionals.” *National Institutes of Health*. Accessed August 12, 2024. https://ods.od.nih.gov/factsheets/VitaminD-HealthProfessional/.

Soares, D., L. Silva, S. Duarte, A. Pena, and A. Pereira. “Glyphosate Use, Toxicity and Occurrence in Food.” Foods 10, no. 11 (November 12, 2021): 2785. https://doi.org/10.3390/foods10112785. PMID: 34829065; PMCID: PMC8622992.

Thompson, Roger. “Gardening for Health: A Regular Dose of Gardening.” Clinical Medicine 18, no. 3 (June 2018): 201-205. https://doi.org/10.7861/clinmedicine.18-3-201. PMID: 29858428; PMCID: PMC6334070.

Turner, Terry, and Kim Borwick. “Roundup Weed Killer: Uses, Safety & Cancer Risk.” Consumer Notice, LLC. Accessed September 29, 2023. https://www.consumernotice.org/environmental/pesticides/roundup/.

University of California Agriculture and Natural Resources. “Postharvest Technology of Horticultural Crops.” *University of California Agriculture and Natural Resources*. Accessed August 12, 2024. https://ucanr.edu/sites/Postharvest_Technology_Center/Publications_722/Postharvest_Technology_Newsletter/.

[/et_pb_toggle][/et_pb_column][/et_pb_row][/et_pb_section]