[et_pb_section fb_built=”1″ admin_label=”section” _builder_version=”4.16″ da_disable_devices=”off|off|off” global_colors_info=”{}” da_is_popup=”off” da_exit_intent=”off” da_has_close=”on” da_alt_close=”off” da_dark_close=”off” da_not_modal=”on” da_is_singular=”off” da_with_loader=”off” da_has_shadow=”on”][et_pb_row admin_label=”row” _builder_version=”4.16″ background_size=”initial” background_position=”top_left” background_repeat=”repeat” global_colors_info=”{}”][et_pb_column type=”4_4″ _builder_version=”4.16″ custom_padding=”|||” global_colors_info=”{}” custom_padding__hover=”|||”][et_pb_text _builder_version=”4.27.0″ _module_preset=”default” text_text_color=”#000000″ link_font=”|700|||on|||#000000|” link_text_color=”#000000″ header_2_line_height=”1.5em” header_2_font_size_tablet=”” header_2_font_size_phone=”23px” header_2_font_size_last_edited=”on|phone” global_colors_info=”{}”]
Introduction
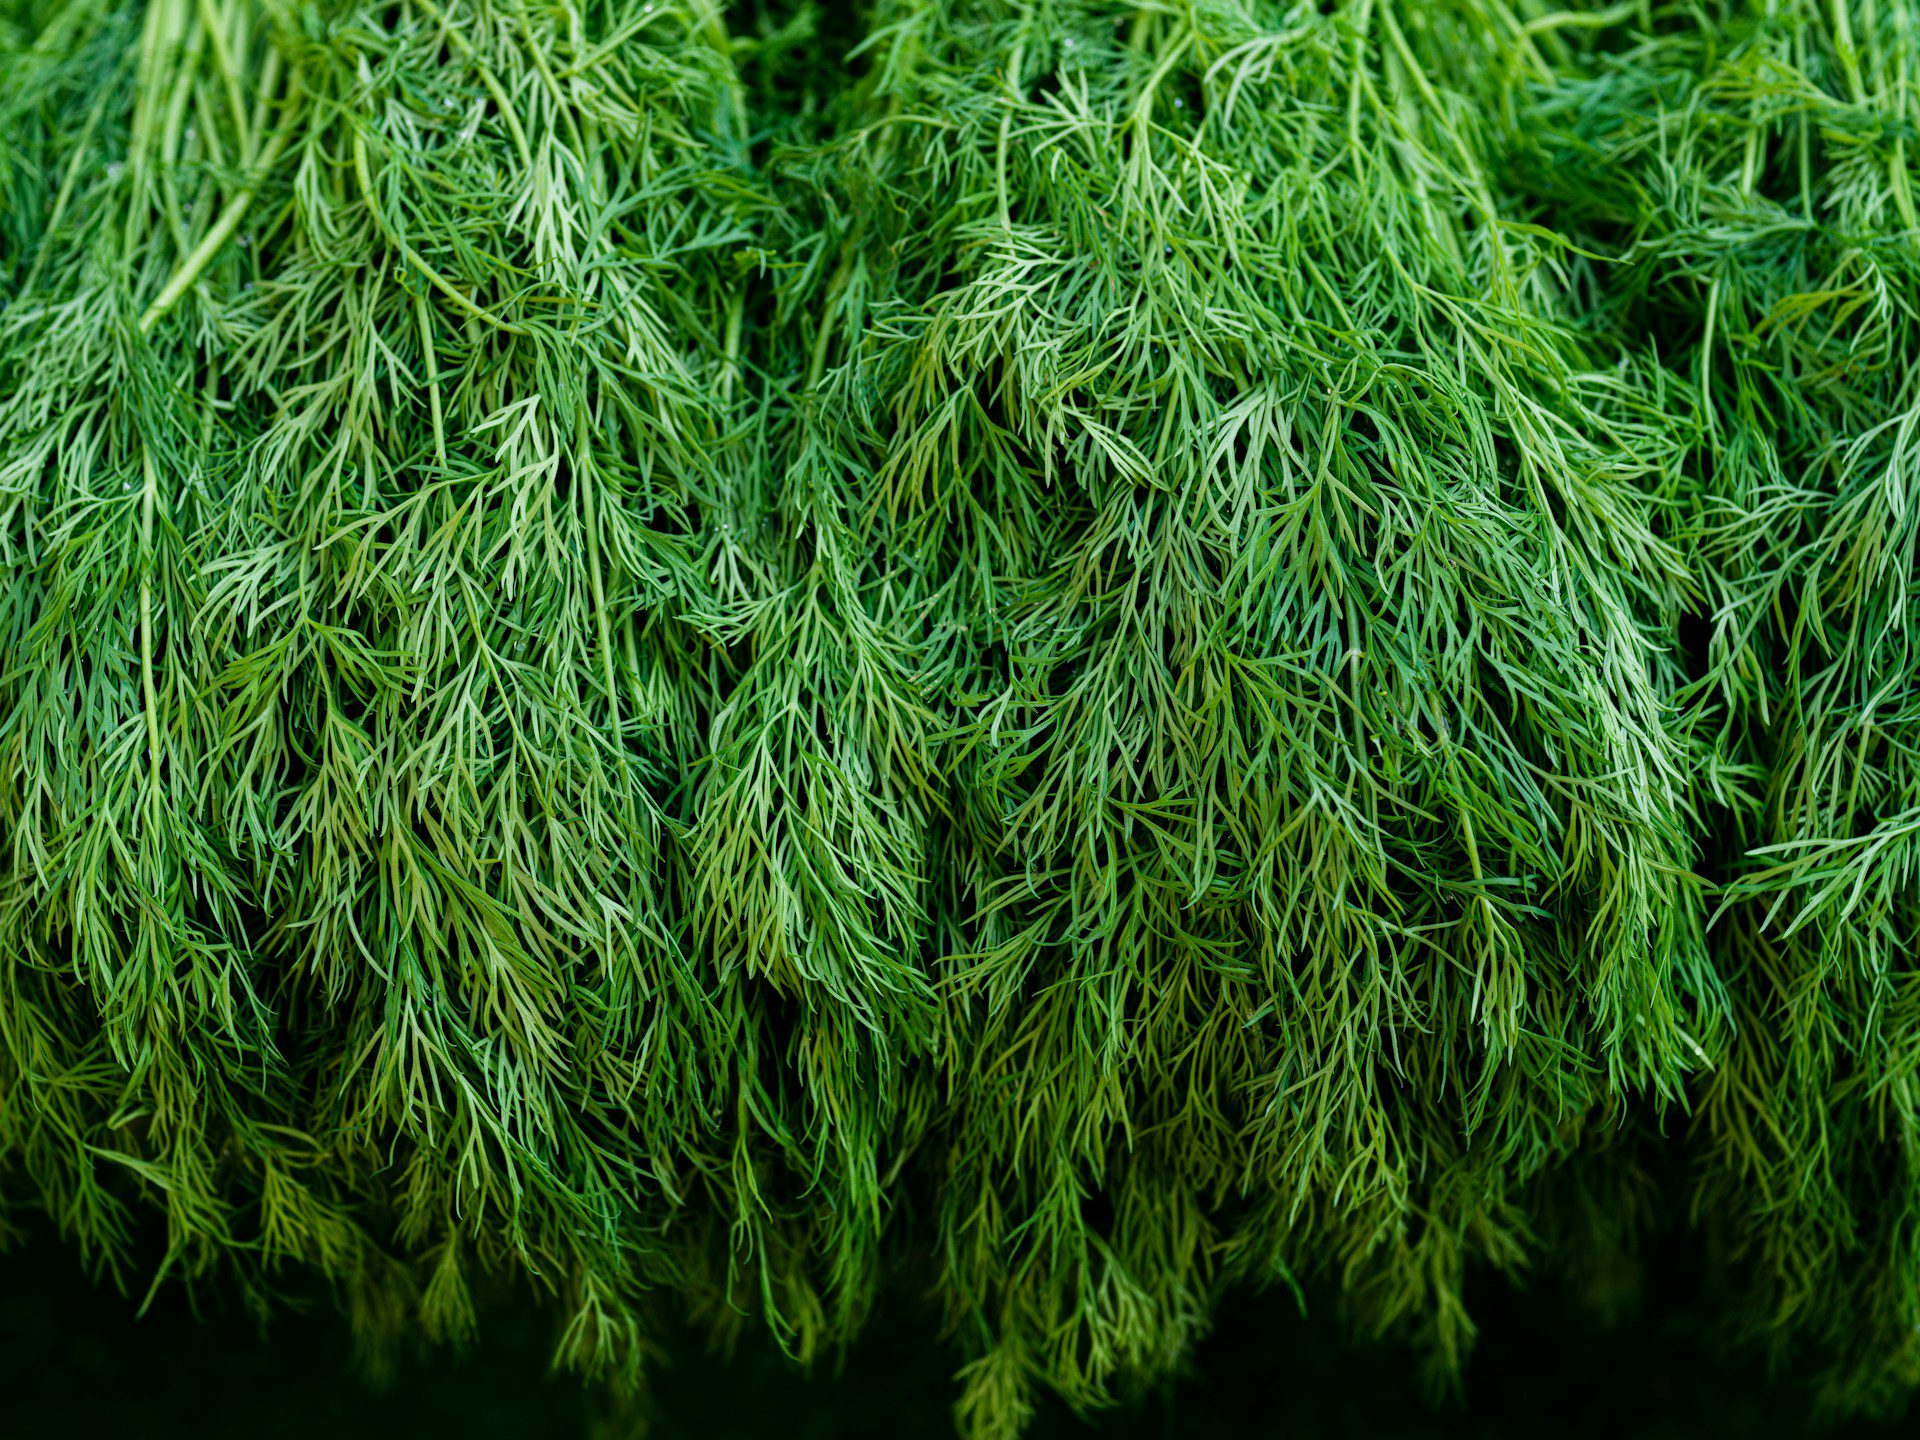
Dill’s feathery green leaves and distinctive aroma make it stand out in any vegetable garden. Whether you use it fresh or dried, dill adds a refreshing flavor to a variety of dishes: from pickles and salads to soups and seafood. Dill is easy to grow and preserve at home so you can enjoy its vibrant taste year-round! You don’t need fancy equipment to get started. Here’s a beginner-friendly tutorial to properly dry dill at home and enjoy this unique herb after the growing season has ended.
[/et_pb_text][et_pb_text _builder_version=”4.27.0″ _module_preset=”default” text_text_color=”#000000″ link_font=”|700|||on|||#000000|” link_text_color=”#000000″ header_2_line_height=”1.5em” header_2_font_size_tablet=”” header_2_font_size_phone=”23px” header_2_font_size_last_edited=”on|phone” global_colors_info=”{}”]
When to Harvest Dill
In the gardening world, dill is known as a “tender herb” due to its high moisture content and delicate leaves. Because of these factors, dill can’t be dried for long-term storage as easily as “woody” herbs like rosemary, sage, and thyme. While woody herbs can be hung to air-dry in a dark and dry location, dill needs a low-temperature drying process to prevent mold.
Start by harvesting dill at peak freshness. Typically, dill is ready to harvest when the plant is 4-6 inches tall with unfurled leaves. For the best flavor and quality, harvest dill before the plant starts to flower and go to seed. You can either pick a few stems as needed, or cut a group of stems at the base for a larger batch. The good news is that dill will regrow in 2-3 weeks, so you can enjoy multiple harvests throughout the season!
[/et_pb_text][et_pb_image src=”https://backyard-eats.com/wp-content/uploads/2024/08/engin-akyurt-kgb34f0HRSc-unsplash.jpg” title_text=”engin-akyurt-kgb34f0HRSc-unsplash” show_bottom_space=”off” _builder_version=”4.27.0″ _module_preset=”default” custom_margin=”20px||20px||true|false” global_colors_info=”{}”][/et_pb_image][et_pb_text _builder_version=”4.27.0″ _module_preset=”default” text_text_color=”#6B6B6B” link_font=”|700|||on|||#6B6B6B|” link_text_color=”#6B6B6B” global_colors_info=”{}”]
Photo by engin akyurt on Unsplash
[/et_pb_text][et_pb_divider show_divider=”off” _builder_version=”4.27.0″ _module_preset=”default” global_colors_info=”{}”][/et_pb_divider][et_pb_text _builder_version=”4.27.0″ _module_preset=”default” text_text_color=”#000000″ link_font=”|700|||on|||#000000|” link_text_color=”#000000″ header_2_line_height=”1.5em” header_2_font_size_tablet=”” header_2_font_size_phone=”23px” header_2_font_size_last_edited=”on|phone” global_colors_info=”{}”]
How To Air-Dry Dill
Preparing dill for drying is simple: choose fresh, healthy stems, rinse them thoroughly under cold water to remove any dirt or insects, and pat dry with towels. Then, you can choose from three preservation methods: air drying, oven drying, or using a dehydrator. Each method is easy to follow and suitable for beginners.
To air-dry dill, bunch several stems together and secure them with a rubber band or string. Hang the bunches in a dry, warm, and well-ventilated area away from direct sunlight. A garage or basement can work well, but remember to check the dill regularly to prevent mold – which is more likely to develop with this method than quicker strategies. Dill typically takes 1-2 weeks to fully air-dry. Fully dried dill should be crisp to the touch.
[/et_pb_text][et_pb_image src=”https://backyard-eats.com/wp-content/uploads/2024/08/allie-dearie-ZW8dIPP4S4U-unsplash.jpg” title_text=”allie-dearie-ZW8dIPP4S4U-unsplash” show_bottom_space=”off” _builder_version=”4.27.0″ _module_preset=”default” custom_margin=”20px||20px||true|false” global_colors_info=”{}”][/et_pb_image][et_pb_text _builder_version=”4.27.0″ _module_preset=”default” text_text_color=”#6B6B6B” link_font=”|700|||on|||#6B6B6B|” link_text_color=”#6B6B6B” global_colors_info=”{}”]
Photo by Allie Dearie on Unsplash
[/et_pb_text][et_pb_text _builder_version=”4.27.0″ _module_preset=”default” text_text_color=”#000000″ link_font=”|700|||on|||#000000|” link_text_color=”#000000″ header_2_line_height=”1.5em” header_2_font_size_tablet=”” header_2_font_size_phone=”23px” header_2_font_size_last_edited=”on|phone” global_colors_info=”{}”]
How to Dry Dill in the Oven
If you prefer oven drying, spread the washed dill in a single layer on a baking sheet. Make sure not to overcrowd it to ensure even drying. Set the oven to a low temperature, around 95-115°F (35-46°C), to avoid burning. Check dill frequently to prevent overheating; the entire process usually takes 1-2 hours. Follow similar spacing and temperature guidelines if using a specialized dehydrator machine, which often takes 4-8 hours to fully dry herbs. Always consult your specific appliance’s manufacturer’s instructions for additional guidance.
[/et_pb_text][et_pb_text _builder_version=”4.27.0″ _module_preset=”default” text_text_color=”#000000″ link_font=”|700|||on|||#000000|” link_text_color=”#000000″ header_2_line_height=”1.5em” header_2_font_size_tablet=”” header_2_font_size_phone=”23px” header_2_font_size_last_edited=”on|phone” global_colors_info=”{}”]
How to Store Dried Dill
Proper storage is key to keeping dried dill flavorful and fresh. Use airtight containers like glass jars or vacuum-sealed bags and store them in a cool, dark place like a kitchen cabinet. Exposure to light and air can reduce potency over time. With proper storage, dried dill can last up to 6-12 months—possibly until your next homegrown harvest!
[/et_pb_text][et_pb_image src=”https://backyard-eats.com/wp-content/uploads/2024/08/laura-mitulla-aAGPWsp0WZk-unsplash.jpg” title_text=”laura-mitulla-aAGPWsp0WZk-unsplash” show_bottom_space=”off” _builder_version=”4.27.0″ _module_preset=”default” custom_margin=”20px||20px||true|false” global_colors_info=”{}”][/et_pb_image][et_pb_text _builder_version=”4.27.0″ _module_preset=”default” text_text_color=”#6B6B6B” link_font=”|700|||on|||#6B6B6B|” link_text_color=”#6B6B6B” global_colors_info=”{}”]
Photo by Laura Mitulla on Unsplash
[/et_pb_text][et_pb_text _builder_version=”4.27.0″ _module_preset=”default” text_text_color=”#000000″ link_font=”|700|||on|||#000000|” link_text_color=”#000000″ header_2_line_height=”1.5em” header_2_font_size_tablet=”” header_2_font_size_phone=”23px” header_2_font_size_last_edited=”on|phone” global_colors_info=”{}”]
Learn More
Ready to take your homegrown dill to the next level? Embrace these simple drying methods and enjoy the fruits of your gardening efforts all year long. Don’t forget to subscribe to our weekly newsletter for more gardening tips and culinary inspiration!
[/et_pb_text][et_pb_button button_url=”@ET-DC@eyJkeW5hbWljIjp0cnVlLCJjb250ZW50IjoicG9zdF9saW5rX3VybF9wYWdlIiwic2V0dGluZ3MiOnsicG9zdF9pZCI6IjU4MjY0In19@” url_new_window=”on” button_text=”BOOK A CONSULTATION” button_alignment=”left” button_alignment_tablet=”left” button_alignment_phone=”left” button_alignment_last_edited=”on|tablet” disabled_on=”off|off|off” _builder_version=”4.27.0″ _dynamic_attributes=”button_url” _module_preset=”737bea5a-e063-4b24-af3f-21ce28f0bf38″ button_bg_color=”gcid-3b5ac83a-684c-4379-a559-60b2aa9e8157″ button_border_color=”gcid-3b5ac83a-684c-4379-a559-60b2aa9e8157″ button_letter_spacing=”1px” button_font=”Roboto|700||on|||||” z_index=”90″ custom_margin=”0px|0px|30px|0px|false|false” custom_margin_tablet=”0px|0px|0px|0px|false|false” custom_margin_phone=”0px|0px|0px|0px|false|false” custom_margin_last_edited=”on|desktop” locked=”off” global_colors_info=”{%22gcid-3b5ac83a-684c-4379-a559-60b2aa9e8157%22:%91%22button_border_color__hover%22,%22button_bg_color%22,%22button_border_color%22%93}” button_text_color__hover_enabled=”on|hover” button_text_color__hover=”#844B67″ button_bg_enable_color__hover=”on” button_border_color__hover=”#88667b” button_border_color__hover_enabled=”on|desktop”][/et_pb_button][/et_pb_column][/et_pb_row][et_pb_row _builder_version=”4.27.0″ _module_preset=”default” global_colors_info=”{}”][et_pb_column type=”4_4″ _builder_version=”4.27.0″ _module_preset=”default” global_colors_info=”{}”][et_pb_toggle title=”FURTHER READING” open_toggle_text_color=”#FFFFFF” icon_color=”#FFFFFF” toggle_icon=”||fa||400″ open_icon_color=”#FFFFFF” open_toggle_icon=”||fa||900″ _builder_version=”4.27.0″ _module_preset=”default” title_text_color=”#FFFFFF” title_font=”|700|||||||” body_font=”|600|||||||” body_text_color=”#FFFFFF” background_color=”gcid-c8781551-ca60-42c8-ba6c-c1e000785908″ global_colors_info=”{%22gcid-c8781551-ca60-42c8-ba6c-c1e000785908%22:%91%22background_color%22%93}” background__hover_enabled=”on|desktop” background_color__hover=”#BFBFBF” background_enable_color__hover=”on”]
“How to Dry Fresh Dill” by For the Love of Cooking. Available at: https://fortheloveofcooking.net/2020/10/how-to-dry-fresh-dill.html
University of Illinois Extension. “Harvesting and Drying Herbs.” Available at: https://extension.illinois.edu/herbs/harvesting-and-drying-herbs
Harvest to Table. “How to Dry Herbs.” Available at: https://harvesttotable.com/how-to-dry-herbs/
University of Georgia Extension. “How to Dry Herbs.” Available at: https://extension.uga.edu/publications/detail.html?number=B990
National Center for Home Food Preservation. “Drying Herbs.” Available at: https://nchfp.uga.edu/how/dry/herbs.html
[/et_pb_toggle][/et_pb_column][/et_pb_row][/et_pb_section]


