

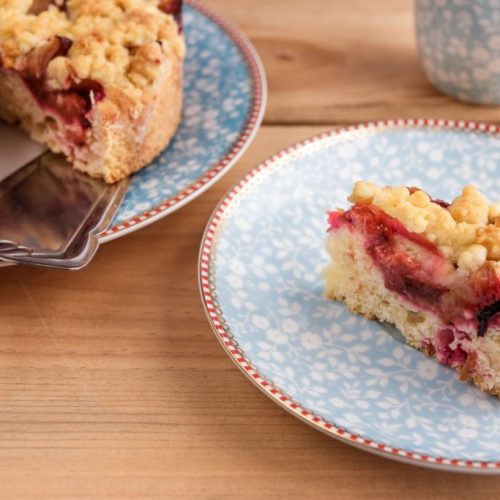
Strawberry rhubarb cake is a delectable and delightful dessert that combines the luscious sweetness of strawberries with the tartness of rhubarb. With minimal effort and a handful of ingredients, you can create a moist and flavorful cake that is sure to impress. The juicy strawberries and tangy rhubarb create a harmonious flavor profile that dances on your taste buds. Whether enjoyed on its own or with a dollop of whipped cream, strawberry rhubarb cake is a delightful treat that celebrates the flavors of the season. Indulge in the simplicity of making this scrumptious cake and savor every blissful bite.
Strawberry Rhubarb Cake
Strawberry rhubarb cake is a delectable and delightful dessert that combines the luscious sweetness of strawberries with the tartness of rhubarb.
Ingredients
- 3 eggs
- 2 cups sugar
- 3/4 cup butter (softened)
- 1 tsp vanilla
- 2 cups all-purpose flour (see below for gluten-free alternative)
- 2 cups strawberries (washed, dried as much as possible, and chopped very small)
- 1 cup rhubarb thinly sliced and chopped
Instructions
- Preheat oven to 350 degrees. With a mixer, beat the eggs with the sugar until slightly thickened and light in color, about 5-7 minutes. The mixture should almost double in size. The eggs work as your leavening agent in this recipe, so do not skip or shorten this step. This mixture should form a ribbon when you lift the beaters out of the bowl.
- Add the butter and vanilla; mix two more minutes. Add the flour and mix until just combined. Add the rhubarb and strawberries and stir to mix throughout.
- Spread in a buttered 9x13 pan. Bake for 40-50 minutes, or until very lightly browned and a toothpick inserted near the center of the cake comes out clean. (43 minutes typically works for me.) Let cool completely before cutting into small slices. Enjoy!
Notes
Gluten Free Substitution: 1 ¼ cup brown rice flour + ½ cup potato starch + ¼ cup tapioca starch + 1 teaspoon xanthan gum may be substituted for the amount of all-purpose flour listed in the ingredients above.
This recipe is courtesy of Molly Younkin at Barefeet in the Kitchen.


