Red Currant Muffins

Photo of cranberry muffins from Pexels

Red currant muffins are a delightful and fruity treat that showcases the vibrant taste of red currants in a baked delight. With just a handful of ingredients and simple preparation, you can create moist and flavorful muffins that are both satisfying and delicious. The tangy red currants, studded throughout the batter, burst with flavor and add a delightful pop of color. Whether enjoyed as a breakfast treat or a delightful snack, red currant muffins offer a delightful balance of tartness and sweetness that will please your palate. Embrace the simplicity of making these muffins and savor their deliciousness with every delectable bite.

Photo of cranberry muffins from Pexels

Red Currant Muffins

Janice from The Bake School
The tangy red currants, studded throughout the batter, burst with flavor and add a delightful pop of color.
Prep Time 20 minutes
Cook Time 25 minutes
Total Time 45 minutes
Course Breakfast
Servings 12 muffins

Ingredients
  

Sugar Paste

  • 3 Tbsp unsalted butter
  • 1/4 cup granulated sugar
  • 1/3 cup bleached all-purpose flour

Red Currant Muffins

  • 2 cups bleached all-purpose flour
  • 1.25 cups granulated sugar
  • 2 tsp baking powder
  • 1/2 tsp Diamond Crystal fine kosher salt
  • 1/2 cup unsalted butter (room temperature, cut into rough chunks)
  • 1/2 cup whole milk
  • 2 large eggs
  • 1 tsp pure vanilla extract
  • 1.5 cups red currants (tossed in 1 tablespoon of flour to evenly coat the berries)
  • 1/4 cup sliced almonds

Instructions
 

  • In a small bowl, using a wooden spoon, combine the butter, sugar, and flour until it forms a thick paste. Set aside.
  • Preheat the oven to 375°F. Prepare two 6-cup muffin pans by lining each well with a paper liner. Set aside.
  • In a medium bowl, whisk together all the flour, sugar, baking powder, and salt.
  • Add the butter to the bowl with the dry ingredients and work it in with your fingertips until the mixture resembles coarse sand. Set aside.
  • In a separate bowl, whisk together the milk, eggs, and vanilla, then pour that mixture over the dry ingredients. Stir with a wooden spoon just to combine.
  • Gently fold in the red currants.
  • Divide the batter between the 12 muffin cups.
  • Top each muffin with sliced almonds and chunks of the sugar paste. Bake them for 25 to 30 minutes or until a skewer inserted in the centre comes out clean.
  • Cool on a wire rack.

Notes

Note: this recipe came from Janice from the Bake School blog.

Gooseberry and Elderflower Cordial

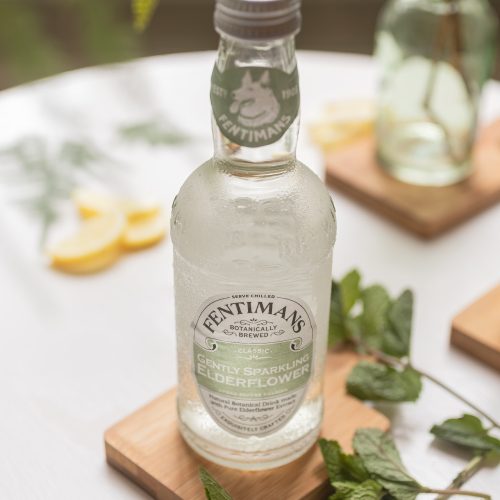
Photo of elderflower soda from Micheile Henderson from Pexels

Gooseberry and elderflower cordial is a delightful and refreshing beverage that combines the tartness of gooseberries with the floral essence of elderflower. With minimal ingredients and simple preparation, you can create a homemade cordial that is both flavorful and invigorating. The tangy gooseberries and delicate elderflower petals infuse the syrup, resulting in a harmonious blend of flavors. Whether enjoyed on its own over ice, mixed with sparkling water, or used as a base for cocktails, gooseberry and elderflower cordial offers a delightful combination of sweet and floral notes that will quench your thirst. Embrace the creativity of making this homemade cordial and savor its deliciousness with every sip.

Photo of elderflower soda from Micheile Henderson from Pexels

Gooseberry and Elderflower Cordial

Monica from Eat Sleep Wild
Gooseberry and elderflower cordial is a delightful and refreshing beverage that combines the tartness of gooseberries with the floral essence of elderflower.
Course Drinks

Ingredients
  

  • 10-12 freshly picked heads elderflower (or more if you pick smaller florets)
  • 600 g granulated sugar (1 lb 5 oz)
  • 600 ml water (20 fl oz)
  • 250 g green gooseberries, topped and tailed (9 oz)
  • 2 unwaxed lemons (or 1 unwaxed lemon and 20g (¾oz) (maybe less) citric acid)
  • Soda or sparkling water (to serve)

Instructions
 

  • Pick over the elderflower heads, trimming the flowers away from the stalk and shaking out any insects.
  • Put the sugar in a large saucepan and add the measured water. Heat over a low heat, stirring occasionally, until the sugar has completely dissolved. Bring to the boil and add the gooseberries.
  • Simmer for 7–8 minutes, then take off the heat.
  • While the gooseberries are simmering, finely pare the rind of the lemon(s) and slice the flesh. Swirl the elderflowers gently in a bowl of cold water.
  • Remove the elderflowers from the water and add to the sugar syrup along with the lemon rind and slices and the citric acid, if using. Stir, lightly cover with a clean tea towel and leave in a cool place overnight.
  • Strain the cordial through a fine sieve into a wide-necked jug or bowl. Pour the cordial through a funnel into 2 x 75cl) sterilized glass bottles and seal. Store in the refrigerator and consume within a month. You can also freeze the cordial in plastic bottles, though remember to leave some headspace to allow the liquid to expand.
  • To serve, dilute to taste with soda or sparkling water.

Notes

Makes about 1.5 litres
Note: using citric acid will increase the shelf life. Tip from Fiona: “You can make the cordial without citric acid if you’re not intending to keep it for long, but don’t overdo the lemon, otherwise it will just taste like lemonade.”
This recipe is courtesy of Monica from the Eat Sleep Wild blog.

Easy Apple Galette

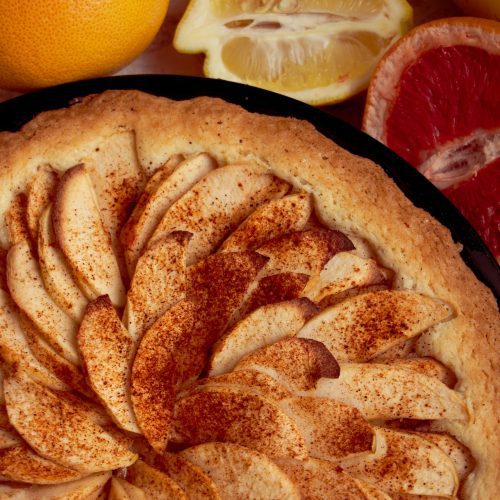
Photo of apple pie from Viktoria Lunyakova from Pexels

Apple galette is a delicious and rustic dessert that highlights the natural sweetness of apples in a simple yet delightful way. With just a few ingredients and straightforward assembly, you can create a flavorful and visually appealing galette that is both comforting and satisfying. The thinly sliced apples, arranged atop a buttery and flaky pastry crust, create a delightful balance of textures and flavors. Whether enjoyed warm with a scoop of ice cream or at room temperature, apple galette offers a delightful combination of sweet and tart tastes that will please your taste buds. Embrace the simplicity of making this dessert and savor its deliciousness with every delightful bite.

Photo of apple pie from Viktoria Lunyakova from Pexels

Easy Apple Galette

Tessa Arias from Handle the Heat
Apple galette is a delicious and rustic dessert that highlights the natural sweetness of apples in a simple yet delightful way.
Prep Time 35 minutes
Cook Time 1 hour
Cooling Time 20 minutes
Total Time 1 hour 55 minutes
Course Dessert
Servings 8 servings

Ingredients
  

  • 1 single pie crust
  • 1.5 lb baking apples (about 3 large apples, peeled and cut into 1/4-inch thick slices)
  • 5 Tbsp lightly packed light brown sugar
  • 1 Tbsp fresh lemon juice
  • 2 tsp cornstarch
  • 1 tsp ground cinnamon
  • 1/2 tsp ground ginger
  • 1/8 tsp fine sea salt
  • 1/2 tsp vanilla extract
  • 1 large egg (beaten)
  • 1.5 tsp water (divided)
  • Coarse sugar (for sprinkling)
  • 1 Tbsp apricot jelly or jam
  • Vanilla ice cream (for serving if desired)

Instructions
 

  • Line a rimmed baking sheet with parchment paper.
  • Remove the pie crust from the fridge to soften slightly while you prepare the filling.
  • Gently toss apples, sugar, lemon juice, cornstarch, cinnamon, ginger, salt, and vanilla together in bowl.
  • Roll out the prepared dough into a 13-inch circle on lightly floured counter, then transfer to prepared pan.
  • Using a slotted spoon, pick up the apples from the bowl leaving the excess juices behind, and arrange them in center of dough, leaving 2-inch border around edge. Carefully grasp 1 edge of dough and fold up 2 inches over apples. Repeat around circumference of tart, overlapping dough every 2 inches; gently pinch pleated dough to secure, but do not press dough into fruit.
  • Place in the fridge and chill while you preheat the oven. Adjust oven rack to lower-middle position and heat oven to 375 degrees. If you have a baking stone, place on the rack to preheat with the oven.
  • Once preheated, beat the egg with 1/2 teaspoon of water. Brush all over the unbaked crust. If desired, brush about 1 tablespoon of the remaining apple juices over the apples. Sprinkle the crust with coarse sugar. Bake until crust is deep golden brown and fruit is bubbling, 50 minutes to 1 hour.
  • Using two spatulas, carefully transfer the baked galette (still on parchment) to a wire rack and let tart cool for 10 minutes.
  • While the galette cools, combine the apricot jam and 1 teaspoon of water in a small glass bowl. Microwave for 15 to 20 seconds or until bubbling. Brush over the apples.
  • Loosen tart from parchment and carefully slide onto wire rack using two spatulas; let cool until warm, about 30 minutes. Cut into wedges and serve with vanilla ice cream, if desired.
  • Store leftovers in an airtight container at room temperature for 1 day or in the fridge for up to 3 days. Refresh in a 300°F oven for 5 to 10 minutes before serving if desired.

Notes

This recipe is courtesy of Tessa from the Handle the Heat blog.

Serviceberry (a.k.a. Saskatoon Berry) Crisp

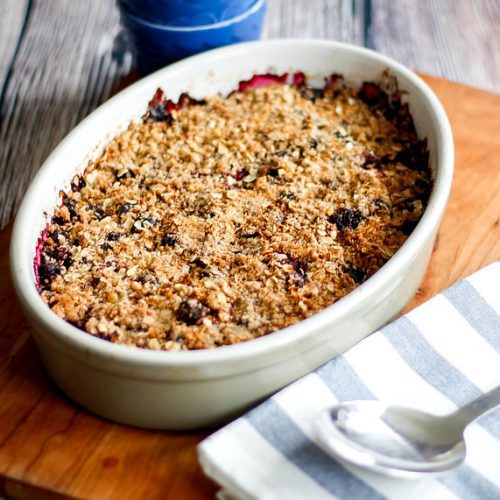
Photo of berry crisp from Marco Verch

Serviceberry crisp is a delectable and comforting dessert that showcases the natural sweetness of service berries in a delightful way. With minimal ingredients and simple preparation, you can create a delicious and rustic crisp that is both satisfying and nostalgic. The juicy serviceberries, topped with a crumbly and buttery oat topping, create a harmonious blend of textures and flavors. Whether enjoyed warm with a scoop of vanilla ice cream or on its own, serviceberry crisp offers a delightful combination of sweet and tart tastes that will please your palate. Embrace the simplicity of making this dessert and savor its deliciousness with every spoonful.

Photo of berry crisp from Marco Verch

Saskatoon Berry Crisp

Around The Nook
The juicy serviceberries, topped with a crumbly and buttery oat topping, create a harmonious blend of textures and flavors.
Prep Time 15 minutes
Cook Time 30 minutes
Total Time 45 minutes
Course Dessert
Servings 8 servings

Ingredients
  

Berry Base

  • 4 cups serviceberries
  • 1/2 cup sugar
  • 1 Tbsp flour
  • 1 Tbsp lemon juice (optional)

Topping

  • 1 cup flour
  • 1.5 cups rolled oats
  • 3/4 cup brown sugar
  • 1 cup butter

Instructions
 

  • Gather your ingredients, preheat oven to 350˚F and lightly grease an 8x8 inch baking dish.

Berry Base

  • Wash berries
  • Stir in ½ cup sugar and 1 tablespoon flour. (Add lemon juice at this time if using)
  • Pour into prepared pan.

Topping

  • Mix together the flour, rolled oats and brown sugar.
  • Add 1 cup butter and with your fingers or a pastry blender, blend the butter until mixture is crumbly.
  • Add crumbled mixture on top of berries.
  • Bake for 30-35 minutes until golden

Notes

This recipe came from the Around the Nook blog.

Fig and Arugula Salad with Pecans, Basil and Goat Cheese

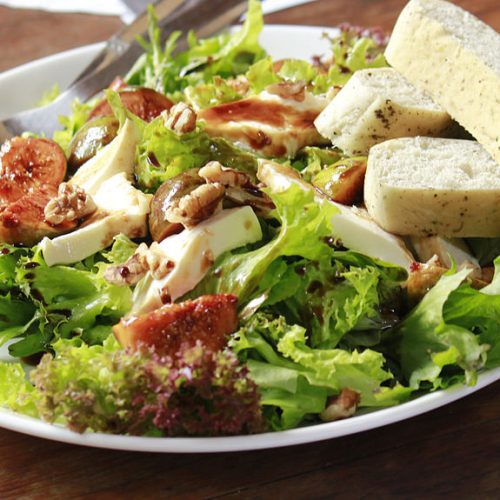
Photo of salad with figs from Triv.rao from Wikimedia Commons

Fig and arugula salad with pecans, basil, and goat cheese is a delightful and flavorful dish that combines the sweetness of figs with the peppery bite of arugula and the richness of goat cheese. With minimal effort and a handful of ingredients, you can create a refreshing salad that is both visually appealing and delicious. The juicy figs, crunchy pecans, fragrant basil, and creamy goat cheese come together in a harmonious blend of flavors and textures. Whether enjoyed as a light lunch or a side dish, this salad offers a delightful balance of tastes that will elevate your taste buds. Embrace the simplicity of making this salad and savor its deliciousness with every mouthwatering bite.

Photo of salad with figs from Triv.rao from Wikimedia Commons

Fig and Arugula Salad w/ Pecans, Basil and Goat Cheese

Sylvia Fontaine from Feasting At Home
Fig and arugula salad with pecans, basil, and goat cheese is a delightful and flavorful dish that combines the sweetness of figs with the peppery bite of arugula and the richness of goat cheese.
Prep Time 20 minutes
Total Time 20 minutes
Course Salad

Ingredients
  

Salad Base

  • 1/4 cup red onion (thinly sliced)
  • 1/2 cup toasted pecans
  • 5 oz baby arugula (about 6-7 cups)
  • 6-8 figs (stems removed, quartered)
  • 10-15 basil leaves (torn)
  • 1/2 cup firm goat cheese, crumbled (use the kind in a log, or try gorgonzola)

Fig Salad Dressing

  • 3 Tbsp olive oil
  • 2.5 Tbsp balsamic vinegar
  • 1-2 tsp maple syrup
  • 1/2 tsp salt
  • 1/2 tsp pepper
  • 1/4 tsp vanilla (optional)

Instructions
 

  • If sensitive to red onions, thinly slice and soak in salted water for 15 minutes.
  • Toast pecans in a dry skillet over medium heat, stirring occasionally until fragrant and lightly toasted, about 5-6 minutes.
  • Place arugula, pecans, drained onions, and torn basil leaves in a large bowl. (At this point you could refrigerate until serving, placing figs and goat cheese overtop of the greens).
  • Drizzle the dressing ingredients into the salad bowl (or feel free to mix dressing together in a small jar or bowl first) tossing the salad until all the leaves are lightly coated. Add the figs and goat cheese, and lightly toss to incorporate.
  • Taste, adjust vinegar and maple to your liking, adding more if you prefer. Serve immediately!

Notes

It helps to use very cold goat cheese or chevre here- makes it much easier to crumble- so leave it the fridge until the last possible moment. You can also place it in the freezer while you prep the salad.
Feel free to sub toasted walnuts– although I think pecans actually do taste better here!
Feel free to swap out gorgonzola cheese for the goat cheese.
This recipe came from Sylvia Fontaine from the  Feasting at Home blog.

Asparagus Risotto

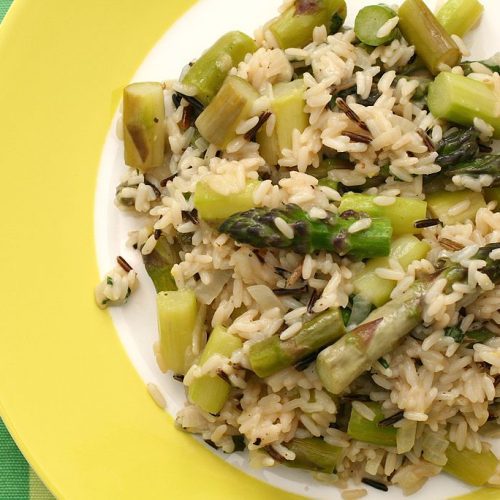
Photo of asparagus risotto from Katrin Morenz from Wikimedia Commons

Asparagus risotto is a creamy and flavorful dish that showcases the vibrant taste of asparagus in a comforting way. With a handful of ingredients and simple cooking techniques, you can create a delightful risotto that is both satisfying and indulgent. The tender asparagus spears, combined with the creamy Arborio rice, create a harmonious blend of textures and flavors. Whether enjoyed as a main course or as a side dish, asparagus risotto offers a delightful balance of earthy asparagus and creamy rice, resulting in a luxurious dish that will please your taste buds. Embrace the process of making this risotto and savor its deliciousness with every luscious spoonful.

Photo of asparagus risotto from Katrin Morenz from Wikimedia Commons

Asparagus Risotto

Love and Lemons
Asparagus risotto offers a delightful balance of earthy asparagus and creamy rice, resulting in a luxurious dish that will please your taste buds.
Prep Time 10 minutes
Cook Time 28 minutes
Total Time 38 minutes
Course Main Course, Side Dish
Servings 4 servings

Ingredients
  

  • 1 Tbsp extra-virgin olive oil
  • 2 cups chopped leeks
  • 1/2 tsp sea salt (or to taste)
  • 2 cloves garlic (minced)
  • 1 cup uncooked Arborio rice (rinsed)
  • 1/2 cup dry white wine
  • 4 cups vegetable broth (room temperature)
  • 1 bunch asparagus (tough ends trimmed, stalks chopped into small pieces)
  • 1 Tbsp fresh lemon juice
  • 2 Tbsp chopped chives
  • 1/4 cup fresh herbs (parsley, basil, tarragon, and/or dill, plus more for garnish)
  • Lemon zest (for garnish)
  • Grated pecorino cheese (optional)
  • Freshly ground black pepper (for garnish)

Instructions
 

  • Heat the olive oil in a large skillet or medium Dutch oven over medium heat. Add the leeks and season with the salt and a few grinds of pepper. Cook, stirring occasionally, for 4 to 5 minutes, or until soft. Add the garlic and stir to incorporate. Stir in the rice and let it cook for 1 minute. Stir in the wine and cook for another 1 to 2 minutes, or until the wine cooks down.
  • Add the broth, ¾ cup at a time, stirring continuously between each addition. Allow each addition of broth to be absorbed by the rice before adding the next. Add the asparagus with the last addition of the broth. Cook until the rice is al dente. The risotto should be soft and creamy.
  • Add the lemon juice, chives, and mixed herbs and season to taste. Garnish with the lemon zest and more herbs. Serve with grated cheese, if desired.

Notes

This recipe came from the Love and Lemons blog.

French Potato Salad

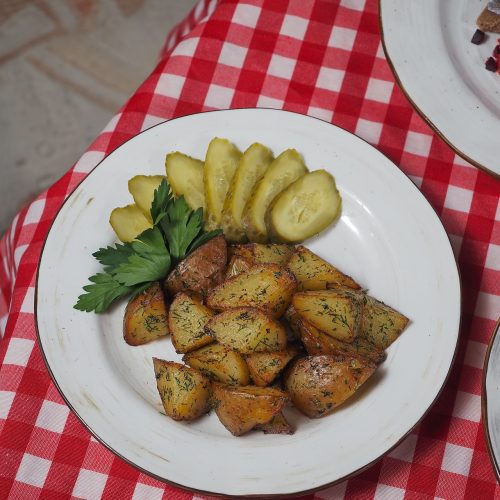
Photo of roasted potatoes from Nadin from Pexels

French potato salad with tarragon is a flavorful and classic dish that combines the creamy goodness of potatoes with the aromatic touch of tarragon. With minimal ingredients and simple preparation, you can create a delightful salad that is both comforting and satisfying. The tender boiled potatoes, tossed with a tangy vinaigrette and fresh tarragon, create a harmonious blend of flavors. Whether enjoyed as a side dish or a light lunch, French potato salad with tarragon offers a delightful balance of tastes and textures. Embrace the simplicity of making this salad and savor its deliciousness with every delectable bite.

Photo of roasted potatoes from Nadin from Pexels

French Potato Salad

Taste of Home
French potato salad with tarragon is a flavorful and classic dish that combines the creamy goodness of potatoes with the aromatic touch of tarragon.
Prep Time 10 minutes
Cook Time 15 minutes
Course Side Dish
Servings 6 cups

Ingredients
  

  • 1 lb baby red potatoes
  • 1 lb baby yellow potatoes
  • 1 clove garlic
  • 1/4 cup olive oil
  • 2 Tbsp white wine or champagne vinegar
  • 2 tsp Dijon mustard
  • 1/2 tsp salt
  • 1/2 tsp pepper
  • 1 shallot (finely chopped)
  • 1 Tbsp each mixed fresh chervil, parsley, and chives
  • 1 tsp minced fresh tarragon

Instructions
 

  • Place potatoes in a large saucepan; add water to cover. Bring to a boil. Reduce heat; cook, uncovered, 10-15 minutes or until tender. With a slotted spoon, remove potatoes to a colander; cool slightly. Return water to a boil. Add garlic; cook, uncovered, 1 minute. Remove garlic and immediately drop into ice water. Drain and pat dry; mince. Reserve 1/4 cup cooking liquid.
  • Cut cooled potatoes into 1/4-inch slices. Transfer potatoes to a large bowl. In a small bowl, whisk reserved cooking liquid, oil, vinegar, mustard, minced garlic, salt and pepper until blended. Pour over potato mixture; toss gently to coat. Gently stir in remaining ingredients. Serve warm or at room temperature.

Notes

If you don't have chervil, you may substitute extra parsley and/or tarragon.
This recipe came from the Taste of Home blog.

Beet Salad with Honey-Lavender Dressing

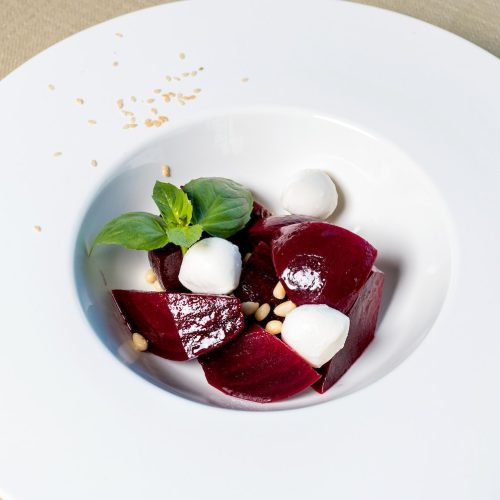
Beet salad from Farhas Ibrahimzade from Pexels

Beet salad with honey-lavender dressing is a delightful and vibrant dish that combines the earthy sweetness of beets with the floral notes of honey and lavender. With minimal effort and a handful of ingredients, you can create a refreshing salad that is both visually stunning and delicious. The roasted or pickled beets offer a tender texture, while the honey-lavender dressing adds a delightful balance of sweet and floral flavors. Whether enjoyed as a refreshing side or a light meal, beet salad with honey-lavender dressing offers a unique combination of tastes and textures that will tantalize your palate. Embrace the simplicity of making this salad and savor its deliciousness with every delightful bite.

Beet salad from Farhas Ibrahimzade from Pexels

Beet Salad with Honey-Lavender Dressing

Martha Stewart
Beet salad with honey-lavender dressing is a delightful and vibrant dish that combines the earthy sweetness of beets with the floral notes of honey and lavender.
Prep Time 1 minute
Cook Time 2 minutes
Total Time 3 minutes
Course Salad
Servings 8 servings

Ingredients
  

Beets

  • 6 medium beets (2 ¼ pounds total) (preferably a mix of yellow and red)
  • extra-virgin olive oil (for drizzling)
  • Coarse salt

Dressing

  • 1 Tbsp extra-virgin olive oil
  • 2 medium shallots (thinly sliced, about 1 cup)
  • 1/3 cup honey
  • 1/2 tsp fresh lavender leaves
  • 1 large egg yolk
  • 2 Tbsp champagne vinegar
  • 1 tsp Dijon mustard
  • 1 cup safflower oil

Salad

  • 2 bunches baby chard (or 1 bunch swiss chard, about 1 lb) (stems removed, leaves torn into 1-inch pieces)
  • 1/2 cup pecans (toasted and salted)
  • 8 oz fresh goat cheese (crumbled)
  • 2 baby Chioggia beets (scrubbed and thinly sliced)

Instructions
 

  • Beets: Preheat oven to 350 degrees. Drizzle medium beets with olive oil in a baking pan; season with salt. Place in a single layer and add 1 cup water. Cover with parchment, then foil, and roast until knife-tender, about 1 1/2 hours. When cool enough to handle, rub off peels with paper towels (use a paring knife for tough spots); discard. Cut beets into bite-size pieces.
  • Dressing: Meanwhile, heat olive oil in a medium saute pan over low. Add shallots and cook, stirring occasionally, until softened, about 3 minutes. Add honey and lavender; simmer until lavender is fragrant, about 5 minutes. Let cool 5 minutes. Puree with yolk, vinegar, and mustard in a blender or food processor until smooth. With machine running, slowly add safflower oil until combined. (If dressing is too thick, add water, 1 teaspoon at a time.)
  • Salad: Combine roasted beets, chard, and pecans in a bowl. Lightly toss with 1/4 cup dressing. Place 1 tablespoon dressing on bottom of each plate, then add salad mixture and goat cheese, dividing evenly. Top with baby beets and serve, with remaining dressing on the side.

Notes

This recipe came from the Martha Stewart blog.

Peachy Jalapeno Guacamole

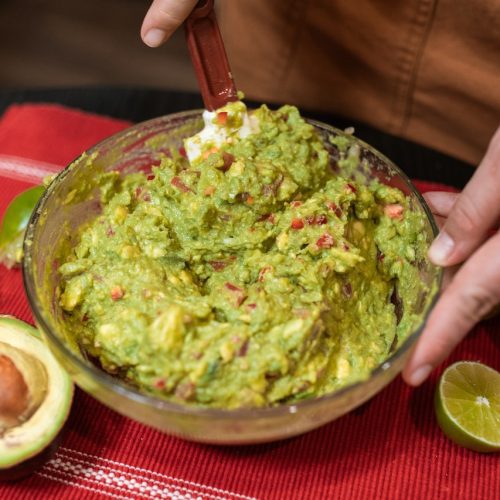
Photo of person making gaucamole from RDNE Stock Project from Pexels

Peachy jalapeno guacamole is a delightful and flavorful twist on the classic dip that combines the sweetness of peaches with the spicy kick of jalapenos. With just a few ingredients and simple preparation, you can create a unique guacamole that is both refreshing and vibrant. The creamy avocados, juicy peaches, and fiery jalapenos come together in a harmonious blend of flavors. Whether enjoyed as a dip with tortilla chips or as a condiment for tacos and sandwiches, peachy jalapeno guacamole offers a burst of sweetness and heat that will delight your taste buds. Embrace the creativity of making this flavorful dip and savor its deliciousness with each delectable bite.

Photo of person making gaucamole from RDNE Stock Project from Pexels

Peachy Jalapeno Guacamole

Taste of Home
Peachy jalapeno guacamole is a delightful and flavorful twist on the classic dip that combines the sweetness of peaches with the spicy kick of jalapenos.
Course Appetizer, Snack

Ingredients
  

  • 2 medium rice avocados (peeled and cubed)
  • 2 Tbsp lime juice
  • 1/2 tsp kosher salt
  • 1/2 tsp ground cumin
  • 1/4 tsp pepper
  • 1 medium peach (peeled and finely chopped)
  • 1 jalapeno pepper (seeded and minced)
  • 2 Tbsp red onion (finely chopped)
  • Tortilla chips (for serving)

Instructions
 

  • Mash avocados with lime juice, salt, cumin and pepper. Gently stir in peach, jalapeno and red onion. Serve with tortilla chips.

Notes

Test Kitchen Tips
  • Leave the seeds in the jalapeno pepper for extra heat.
  • We love this guacamole with chips, but it would complement grilled fish or chicken, too.
  • Wear disposable gloves when cutting hot peppers; the oils can burn skin. Avoid touching your face.
This recipe came from the Taste of Home blog.

Chicken Caesar Salad with Grilled Romaine

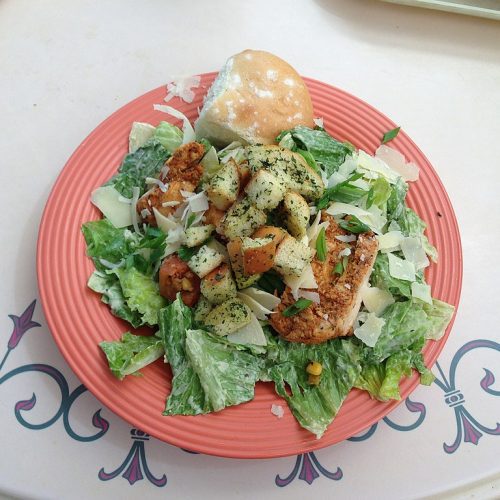
Photo of chicken ceasar salad

Chicken Caesar salad with grilled romaine is a flavorful and satisfying dish that combines the smokiness of grilled romaine lettuce with the savory goodness of chicken and the classic flavors of Caesar dressing. With minimal ingredients and simple preparation, you can create a delightful salad that is both hearty and delicious. The charred romaine lettuce adds a unique depth of flavor, while the tender grilled chicken complements the crispness of the lettuce. Tossed in a creamy Caesar dressing and topped with shaved Parmesan, this salad offers a delightful balance of textures and tastes. Embrace the simplicity of making this salad and savor its deliciousness with every mouthwatering bite.

Photo of chicken ceasar salad

Chicken Caesar Salad with Grilled Romaine

Kyleigh Sage from Barley and Sage
Tossed in a creamy Caesar dressing and topped with shaved Parmesan, this salad offers a delightful balance of textures and tastes.
Prep Time 10 minutes
Cook Time 20 minutes
Total Time 30 minutes
Course Salad
Servings 4 servings

Ingredients
  

Caesar Salad

  • 3 heads romaine lettuce
  • 2 lemons (optional)
  • 1 Tbsp olive oil
  • 2 grilled chicken breasts (sliced)
  • 4 pieces cooked bacon (crumbled)
  • 1/3 cup parmesan cheese (shredded)
  • 1 medium cucumber (diced)
  • 1 cup cherry tomatoes (cut in half)
  • 1/4 cup Caesar dressing

Homemade Croutons

  • 3 cups sourdough bread (about 1/2 loaf) (diced)
  • 1/4 cup butter (melted)
  • 1/2 tsp garlic powder
  • 1/2 tsp kosher salt
  • 1/2 tsp black pepper
  • 2 Tbsp Parmesan cheese (optional)

Instructions
 

Homemade Croutons

  • Preheat the oven to 400°F and line a baking sheet with parchment paper.
  • Cut the bread into 1 inch cubes and add to the bowl. Then drizzle with the melted butter and toss until all the pieces are coated.
  • Sprinkle with garlic powder, salt, pepper, and parmesan and toss to combine.
  • Spread into an even layer on the baking sheet and bake for 10-15 minutes, or until golden brown and crispy.
  • Remove from the oven and let cool completely. Store in an air tight container for up to 2 weeks!

Caesar Salad

  • Preheat your grill to 450°F. If using a grill pan, heat over medium-high heat until it just begins to smoke.
  • Slice the romaine in half lengthwise so that the base is still intact. Slice the lemons in half. Lightly brush both the romaine and lemons with olive oil.
  • Place lemons cut side down on a hot grill and grill without moving for 3-4 minutes. Once the lemons are slightly charred, remove from the heat and set aside.
  • Place the romaine cut side down on the grill for 1-2 minutes until charred and just beginning to wilt. Remove from the grill and squeeze the grilled lemons over top.
  • Chop the grilled romaine into large chunks and add to a large bowl. Add in the chicken, bacon, parmesan, cucumber, tomatoes, and about 1 cup of the croutons and toss to combine.
  • Drizzle with the Caesar dressing (I like about ¼ cup but you can add as much or little as you prefer) and toss to coat.
  • Serve immediately.

Notes

The grilled romaine is best served immediately. 
This recipe came from Kyleigh Sage from the Barley and Sage blog.