Quick and Easy Pickled Green Tomatoes

Photo of green tomatoes from Wayne Jackson from Pexels

Crafting your own pickled green tomatoes is a straightforward, yet incredibly satisfying, endeavor. This method keeps their natural crunch and tanginess intact, resulting in a versatile condiment that pairs wonderfully with various dishes. But there’s more to it than just taste. These homemade delights are brimming with beneficial probiotics, which can work wonders for your digestion. So, while the process is simple, the rewards are abundant. Embrace the ease of making this classic preserve and enjoy the zesty tang it brings to your culinary creations.
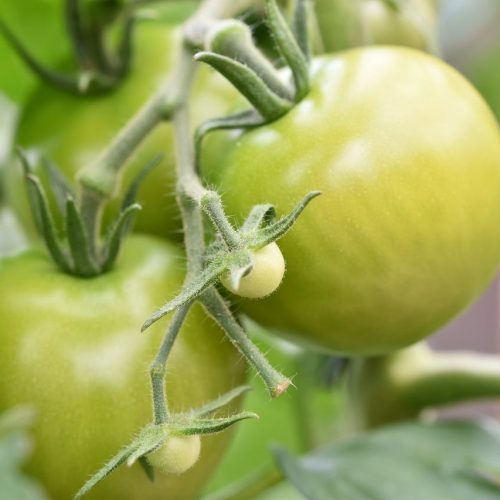
Photo of green tomatoes from Wayne Jackson from Pexels

Easy Pickled Green Tomatoes

Darcey Olson
This crunchy, tangy condiment pairs wonderfully with various dishes.
Prep Time 8 minutes
Cook Time 2 minutes
Resting Time 1 hour
Total Time 1 hour 10 minutes
Course Ingredient
Servings 1 jar

Equipment

  • 1 wide-mouth 1-quart mason jar

Ingredients
  

  • 3-4 large green tomatoes (Note 1)
  • 1/2 small white onion, sliced
  • 2 cloves cloves, smashed
  • 1 cup distilled white vinegar (Note 2)
  • 1 cup water
  • 1 tsp dried dill
  • 2 Tbsp kosher salt
  • 1/2 Tbsp black peppercorn
  • 1 Tbsp sugar
  • 1/4 tsp red pepper flakes

Instructions
 

  • Sterilize a wide-mouth 1-quart mason jar. See the below notes for sterilization tips. (Note 3)
  • Cut the tomatoes into small wedges (or your desired thickness) and transfer to a the large mason jar (or 2 smaller Mason jars) along with the onion slices. Stuff in as many as you can.
  • Add the vinegar, water, salt, sugar, dill, black peppercorn and red pepper flakes to a small non-reactive saucepan and heat over medium heat until the sugar and salt are dissolved (approx. 2-3 minutes). Stir occasionally.
  • Remove the pan from the heat and let slightly cool before ladling the brine over the tomato wedges. Leave about 1/2"-1" of space at the top of the jar.
  • Add the smashed garlic cloves and push down slightly so they're in the brine.
  • Use a butter knife or chopstick to tap on the bottom of the glass to remove hidden air pockets.
  • Once the jars are cooled to room temperature, cover with the matching metal lids. Refrigerate for a minimum of 1 hour before serving.

Notes

Note 1 - You want unripe red tomatoes, not tomatoes bred to be green. 
Note 2 - Use any type of vinegar you prefer. We prefer distilled white vinegar, but apple cider vinegar or red wine vinegar also work.
Note 3 - Sterilize the Glass Jars Is A Must
Oven - preheat the oven to 325º F. Wash the jars and lids in hot soapy water. Rinse and transfer the jars to a cookie sheet (not the rubber ring) and bake for 10 minutes, until the jars are dry. 
Stovetop - Boil a large pot of water, add the glass jars (should be 100% under the water) and boil for 10 minutes.
This recipe is originally from the Foodie and Wine blog.


Heirloom Tomato Bruschetta

Photo of bruschetta on toast from Lucie Liz from Pexels

Crafting heirloom tomato bruschetta is both effortless and gratifying when using the freshest ingredients. The simplicity of this recipe allows the natural flavors to shine, turning humble ingredients into a burst of vibrant taste. Beyond its culinary pleasures, heirloom tomatoes bring their own medicinal benefits, packed with antioxidants and vitamins that promote overall well-being. Embrace the ease of creating this classic dish and relish in the wholesome goodness it brings to your table.

Photo of bruschetta on toast from Lucie Liz from Pexels

Heirloom Tomato Bruschetta

Simple Scratch
Crafting heirloom tomato bruschetta is both effortless and gratifying when using the freshest ingredients.
Prep Time 10 minutes
Cook Time 8 minutes
Resting Time 2 hours
Total Time 2 hours 18 minutes
Course Appetizer
Servings 10 servings

Ingredients
  

  • 2 lb heirloom tomatoes (cored and diced)
  • 1 tsp kosher salt (plus more for seasoning)
  • 4 cloves fresh garlic (peeled and minced)
  • 1/3 cup extra virgin olive oil (plus more for toasting bread)
  • 20 medium basil leaves (stacked, rolled, and thinly sliced)
  • 1 loaf crusty bread (grilled or toasted in oven)

Instructions
 

  • Place chopped tomatoes in a large colander set into a bowl or sink. Season with salt and gently toss. Let this sit for 2 hours or up to over night, tossing occasionally. (the longer the better)
    Save the tomato liquids to make a vinaigrette or discard.
  • Meanwhile add minced garlic to a small sauté pan with the olive oil. Heat on low, stirring occasionally until the garlic has softened and is fragrant. Remove and let cool completely.
  • Once the tomatoes have sat, transfer to a bowl, pour in garlic oil and slice and add the basil. Toss, taste and season with more salt if desired.
  • Slice bread and drizzle with olive oil or spray with olive oil spray. Grill bread or toast in a 400° oven until golden, about 8 minutes.
  • You can serve the heirloom tomato topping in a bowl alongside the grilled or toasted bread and spoon desired amount onto each piece or prepare each slice with equal amounts of the tomato bruschetta and arrange onto a platter.

Notes

This recipe comes from the Simply Scratch blog.

Mrs. Laguda’s Tomato “Gravy” Recipe

Tomato sauce
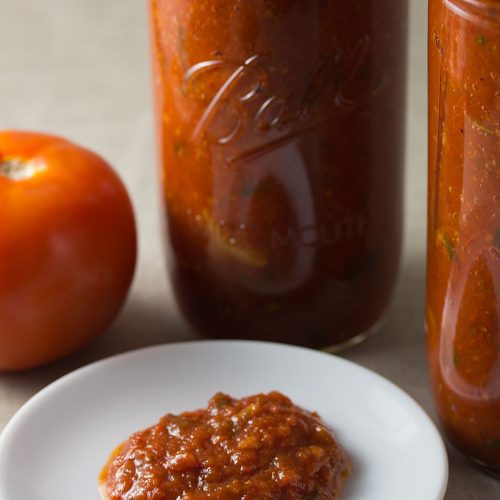
A cherished family heirloom, this tomato sauce recipe has been passed down through generations, carrying with it the essence of tradition and the flavors of simplicity. With just a handful of carefully selected ingredients, you can create a tomato sauce that is rich in both taste and history.
Tomato sauce

Mrs. Laguda's Tomato "Gravy" Recipe

Mrs. Laguda from Ambler, PA
We are excited to share this family tomato sauce recipe from a community member!
Prep Time 10 minutes
Cook Time 2 hours
Resting Time 1 hour
Course Ingredient
Cuisine Italian
Servings 8 people

Ingredients
  

  • 4 Tbsp olive oil
  • 25 plum tomatoes (chopped into 1/2" cubes)
  • 3 cloves garlic (finely chopped)
  • 1 yellow onion (chopped into 1/4" pieces)
  • 1/4 cup chopped fresh basil
  • 1 tsp salt
  • 1 tsp pepper
  • 1 tsp sugar
  • 1 Tbsp dried oregano
  • 1 Tbsp dried thyme

Instructions
 

  • Heat olive oil in a pot over medium heat. Add onions and cook until translucent.
  • Add chopped tomatoes and garlic and cook down, stirring occasionally for 2-3 hours or until it reaches a sauce-like consistency.
  • Take sauce off heat and immediately add basil, salt, pepper, sugar, oregano, & thyme.
  • Stir and let sit for at least 1 hour before serving, ideally over night.

Notes

Note: feel free to scale this recipe according to the amount of tomatoes you have.
Because you do not peel or blanch the tomatoes beforehand, there will be some pieces of tomato skin in the final sauce. If you prefer a smoother texture, use an immersion or stand blender to process the cooled sauce in batches.
This family recipe was submitted by Mrs. Laguda, a community member from Laguda Tailors in Ambler, PA. Her “gravy” is praised by clients, friends, and family alike for its simple yet impactful flavor! We are excited to share it with you today.

Easy Poached Pears

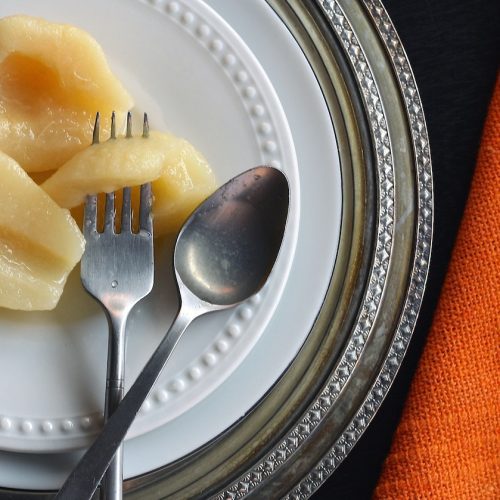
Photo of pears from Pixabay from Pexels

Poached pears are a delightful and elegant dessert that highlights the natural sweetness of pears in a tender and flavorful preparation. With minimal ingredients and gentle cooking, you can create a luxurious dessert that is both visually stunning and delicious. The ripe pears, simmered in a spiced syrup, absorb the fragrant flavors while maintaining their shape and texture. Whether served warm with a drizzle of syrup, paired with ice cream, or added to yogurt, poached pears offer a burst of fruity goodness that will satisfy your palate. Embrace the simplicity of making this sophisticated dessert and savor its deliciousness with every spoonful.

Photo of pears from Pixabay from Pexels

Easy Poached Pears

Janice Lawandi from The Bake School
Poached pears are a delightful and elegant dessert that highlights the natural sweetness of pears in a tender and flavorful preparation.
Prep Time 20 minutes
Cook Time 15 minutes
Total Time 35 minutes
Course Dessert
Servings 8 servings

Equipment

  • 1 saucepan

Ingredients
  

  • 3 cups liquid (wine, fruit juice, or water)
  • 1 cup water
  • 1 cup granulated sugar (more or less depending on how sweet you want them)
  • 1 cinnamon stick (or other spices like whole cloves, star anise, cardamom seeds, etc.)
  • 1 vanilla bean (split)
  • 1 slice lemon or orange peel (no pith)
  • 4 lb pears (peeled, cored and cut in half or whole—I recommend Flemish Beauty or firm Bosc/Bartlett pears)

Instructions
 

  • In a large sauce pan or sauté pan, combine the liquid (whether wine or juice) and water with sugar and spices, vanilla bean, and lemon peel. Bring the mixture to a boil, stirring occasionally with a wooden spoon. The sugar should dissolve before you proceed with the rest of the recipe.
  • Add the pears to the hot poaching liquid, and bring back to a boil again. Cover with a round of parchment and weigh everything down with a lid or a plate so that the pears are immersed. Reduce the heat so that the poaching liquid is just simmering. Poach the pears for 10 to 15 minutes. The pears should be tender but not mushy when they are done. Whole pears could take as much as 45 minutes. You can use a pairing knife to gauge how cooked the pears are: you should be able to easily pierce the pear all the way through when the pears are done.
  • Strain the pears into a large container, then let the poaching liquid cool completely. Transfer the liquid to the container with the pears, cover, and let the pears soak for to absorb more flavour. Alternatively, you can strain out the pears and boil down the syrup to serve with the pears.

Notes

NOTES

  • Use red wine for a more robust wine flavor, a light rosé or white for a milder taste
  • Use maple syrup or honey instead of granulated sugar; feel free to use less sugar in the recipe if you want it less sweet.
  • Use any sweet, warm spices you like, cinnamon, cloves, nutmeg, ginger, star anise, cardamom, etc.
This recipe is by Janice Lawandi from The Bake School blog.

Homemade Blackberry Jam

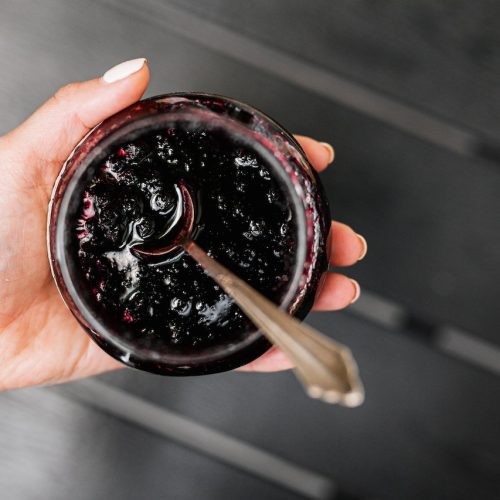
Photo of berry jam from Kaboompics from Pexels

Homemade blackberry jam is a delightful and naturally sweet spread that celebrates the rich flavors of fresh blackberries. With minimal ingredients and simple cooking techniques, you can create a luscious jam that is both flavorful and versatile. The juicy blackberries, combined with sugar and lemon juice, naturally thicken and form a delightful jam consistency. Whether spread on warm toast, used as a filling for pastries, or added to your favorite desserts, homemade blackberry jam offers a burst of fruity goodness that will elevate your culinary creations. Embrace the joy of making this jam at home and savor its deliciousness with every sweet and tangy bite.

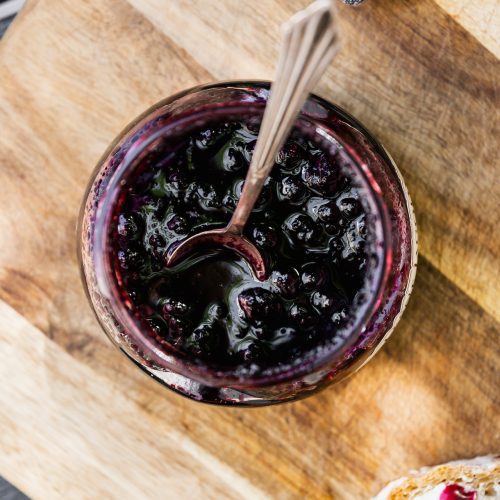
Photo of blueberry jam from Karolina Grabowska from Pexels

Homemade Blackberry Jam

David from Spiced
With minimal ingredients and simple cooking techniques, you can create a luscious jam that is both flavorful and versatile.
Prep Time 5 minutes
Cook Time 25 minutes
Total Time 30 minutes
Course Ingredient

Ingredients
  

  • 16 oz fresh blackberries (~4 cups)
  • 1.75 cups granulated sugar
  • 1/2 Tbsp lemon juice
  • 2 Tbsp cornstarch
  • 2 Tbsp water

Instructions
 

  • Wash berries and place them in a medium saucepan over low heat. Once the berries are warm, muddle them in the saucepan until no large pieces remain. (Optional: Use a food mill at this point to deseed the mixture.)
  • Add the sugar and lemon juice; stir until well combined.
  • Using a separate bowl, mix the cornstarch and water until well combined. Add this mixture to the saucepan; stir until well combined.
  • Increase heat to medium-low, and bring to a boil. Stir frequently to ensure jam doesn’t burn.
  • Once the jam reaches 220°F degrees (~15-20 minutes), remove it from the heat and allow it to cool at room temperature. (If needed, you can skim and discard any foam that may be on top.)
  • Once cool, store in an airtight container in the refrigerator.

Notes

This recipe is by David from Spiced Blog

Eggplant Caprese Stacks

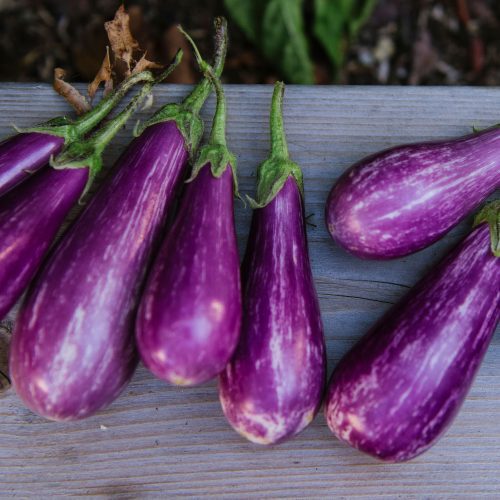
Purple harvested eggplant on wooden ledge

Eggplant Caprese stacks are a delightful and creative twist on the classic Caprese salad, featuring layers of tender eggplant, ripe tomatoes, fresh basil, and creamy mozzarella. With just a few ingredients and simple assembly, you can create a visually appealing and flavorful appetizer or side dish. The grilled or roasted eggplant slices add a smoky flavor, while the juicy tomatoes and fragrant basil complement the creamy mozzarella. Drizzled with balsamic glaze and a sprinkle of salt and pepper, Eggplant Caprese stacks offer a delightful combination of tastes and textures. Embrace the creativity of making these stacks and savor their deliciousness with every delightful bite.

Purple harvested eggplant on wooden ledge

Crispy Eggplant Caprese Stacks

The Comfort of Cooking
Eggplant Caprese stacks are a delightful and creative twist on the classic Caprese salad, featuring layers of tender eggplant, ripe tomatoes, fresh basil, and creamy mozzarella.
Course Main Course
Servings 2 servings

Ingredients
  

Eggplant Stacks

  • 2 ripe tomatoes
  • 1 8 oz ball fresh mozarella
  • 6-8 leaves fresh basil
  • 1 Tbsp olive oil (for skillet)
  • 6 eggplant slices (1/4" thick)
  • 1/4 cup flour
  • 1 egg (lightly beaten)
  • 1/2 cup Panko breadcrumbs

Dressing

  • 2 Tbsp olive oil
  • 1 Tbsp balsamic vinegar
  • Salt and freshly ground pepper, to taste

Instructions
 

  • Slice tomatoes and mozzarella about 1/4-inch thick. Rinse and pat basil dry (you can keep it whole or tear into smaller pieces). Set aside.
  • Preheat a large skillet to medium heat and add 1 Tbsp. olive oil. Prepare eggplant slices by coating lightly in flour, then egg (shaking off excess), and then panko, all in separate dishes. Once skillet is hot, add eggplant slices and fry, in batches, about 3 minutes per side until golden brown. Remove to a paper-towel lined plate.
  • Combine dressing ingredients in a small bowl and whisk until well-combined. Taste and adjust seasonings as needed.
  • On serving plates, build stacks by alternating tomato, mozzarella, eggplant, and basil. Repeat until you have 2 equal-sized stacks. Drizzle with dressing.
  • Enjoy!

Notes

This recipe came from the Comfort of Cooking blog.

Greek Salad

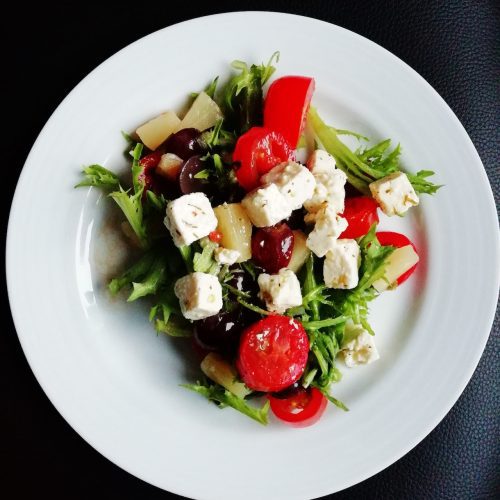
Photo of Greek salad from Lina Luoto from Pexels

Greek salad is a refreshing and flavorful dish that combines the vibrant flavors of fresh vegetables with the tanginess of feta cheese and the richness of Kalamata olives. With minimal ingredients and simple assembly, you can create a delightful salad that is both light and satisfying. The crisp cucumbers, juicy tomatoes, crunchy bell peppers, and thinly sliced red onions come together in a harmonious blend of colors and tastes. Tossed in a zesty dressing made with olive oil, lemon juice, and herbs, Greek salad offers a delightful balance of textures and a burst of Mediterranean flavors. Embrace the simplicity of making this classic salad and savor its deliciousness with every refreshing bite.

Photo of Greek salad from Lina Luoto from Pexels

Greek Salad

Love and Lemons
Greek salad offers a delightful balance of textures and a burst of Mediterranean flavors.
Prep Time 15 minutes
Cook Time 15 minutes
Total Time 30 minutes
Course Salad
Servings 4 servings

Ingredients
  

Dressing

  • 1/4 cup extra-virgin olive oil
  • 3 Tbsp red wine vinegar
  • 1 garlic clove (minced)
  • 1/2 tsp dried oregano (more for sprinkling)
  • 1/4 tsp Dijon mustard
  • 1/4 tsp sea salt
  • Freshly ground black pepper

Salad

  • 1 English cucumber (cut lengthwise, seeded, and sliced 1/4 inch thick)
  • 1 green bell pepper (chopped into 1 inch pieces)
  • 2 cups cherry tomatoes (halved)
  • 5 oz feta cheese (cut into 1/2 inch cubes)
  • 1/3 cup red onion (thinly sliced)
  • 1/3 cup pitted Kalamata olives
  • 1/3 cup fresh mint leaves

Instructions
 

  • Make the dressing: In a small bowl, whisk together the olive oil, vinegar, garlic, oregano, mustard, salt, and several grinds of pepper.
  • On a large platter, arrange the cucumber, green pepper, cherry tomatoes, feta cheese, red onions, and olives. Drizzle with the dressing and very gently toss. Sprinkle with a few generous pinches of oregano and top with the mint leaves. Season to taste and serve.

Notes

Note: Feta in brine is best for this recipe.
This recipe came from the Love and Lemons blog.

Thomas Keller’s Viral Zucchini

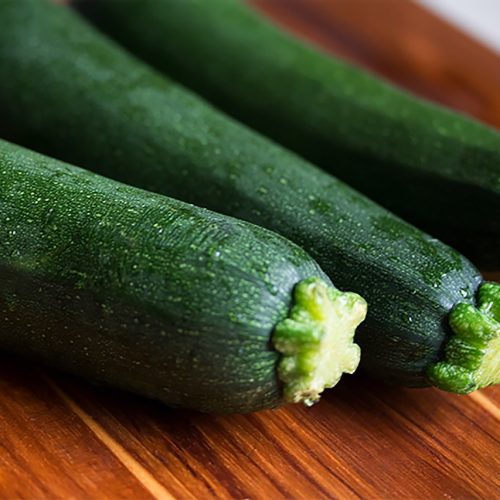
Photo of harvested zucchini from Angele J from Pexels

Seared zucchini is a delicious and simple dish that highlights the natural flavors of zucchini with a delightful caramelized touch. With minimal ingredients and quick cooking, you can create a flavorful and nutritious side dish that is both satisfying and versatile. The tender zucchini slices, seared to perfection, offer a delightful blend of textures and a subtle nutty taste. Whether enjoyed on its own or as a side to a main course, seared zucchini offers a delightful way to enjoy this summer vegetable. Embrace the ease of preparing this dish and savor its deliciousness with every delectable bite.

Photo of harvested zucchini from Angele J from Pexels

Thomas Keller's Viral Zucchini Recipe

Thomas Keller
The tender zucchini slices, seared to perfection, offer a delightful blend of textures and a subtle nutty taste.
Prep Time 20 minutes
Cook Time 10 minutes
Total Time 30 minutes
Course Side Dish

Equipment

  • 1 heat-safe skillet

Ingredients
  

  • 2 zucchini
  • Salt (for sprinkling)
  • Avocado oil (for pan)
  • Feta and fresh mint (optional, for serving)

Instructions
 

  • Preheat oven to 450ºF.
  • Cut zucchini in half and score diagonally.
  • Sprinkle zucchini with salt and let 20 minutes, dabbing away excess moisture with a paper towel.
  • Add avocado oil to an oven-safe pan. Sear zucchini for 6 minutes with the scored side facing down.
  • Move zucchini to the preheated oven for 5 minutes.
  • Flip zucchini and return to the oven for another 5 minutes.
  • Serve with Mediterranean-inspired toppings such as feta and fresh mint.

Notes

Note: this recipe by Thomas Keller was made popular and shared on TikTok.

Blueberry Muffin Bread

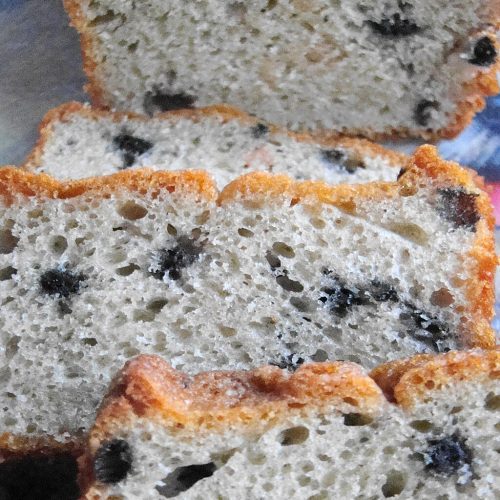
Photo of blueberry bread from Vegan Feast Catering from Flickr

Blueberry muffin bread is a delightful and comforting treat that captures the essence of classic blueberry muffins in a loaf form. With just a few ingredients and simple preparation, you can create a moist and flavorful bread that is both satisfying and delicious. The burst of juicy blueberries, mixed into the batter, offers pockets of sweetness in every slice. Whether enjoyed as a breakfast treat or a delightful snack, blueberry muffin bread offers a delightful balance of tartness and sweetness that will please your taste buds. Embrace the simplicity of making this bread and savor its deliciousness with each mouthwatering bite.

Photo of blueberry bread from Vegan Feast Catering from Flickr

Blueberry Muffin Bread

Sally McKinney from Sally's Baking Addiction
Blueberry muffin bread is a delightful and comforting treat that captures the essence of classic blueberry muffins in a loaf form.
Prep Time 15 minutes
Cook Time 2 hours
Total Time 2 hours 15 minutes
Course Breakfast

Ingredients
  

  • 2 cups all-purpose flour (spooned and leveled)
  • 1 tsp baking soda
  • 1 tsp baking powder
  • 1/2 tsp salt
  • 1/2 cup unsalted butter (softened to room temperature)
  • 1/2 cup granulated sugar
  • 1/4 cup packed light or dark brown sugar
  • 2 large eggs (room temperature)
  • 1/2 cup sour cream (room temperature)
  • 1.5 tsp pure vanilla extract
  • 1/3 cup milk (room temperature)
  • 1.5 cups fresh blueberries
  • 2 Tbsp blueberry jam and/or crumb topping (see recipe note) (optional)

Instructions
 

  • Adjust the oven rack to the lower third position and preheat the oven to 350°F (177°C). Grease a 9x5 inch loaf pan or coat with nonstick spray. Set aside.
  • Whisk the flour, baking soda, baking powder, and salt together in a large bowl.
  • Using a handheld or stand mixer fitted with a paddle or whisk attachment, beat the butter, granulated sugar, and brown sugar together on high speed until smooth and creamy, about 2 minutes. On medium speed, add the eggs one at a time, beating well after each addition. Beat in the sour cream and vanilla extract on medium speed until combined. With the mixer running on low speed, add the dry ingredients and milk into the wet ingredients and beat until no flour pockets remain. Fold in the blueberries.
  • Spoon the batter into the prepared baking pan. See note if adding streusel or blueberry jam swirl. Bake for 60-65 minutes, loosely covering the bread with aluminum foil at the 30 minute mark to help prevent the top and sides from getting too brown. A toothpick inserted in the center of the loaf will come out clean when the bread is done. Remove from the oven and allow the bread to cool completely in the pan set on a wire rack.
  • Cover and store bread at room temperature for 2 days or in the refrigerator for up to 1 week.

Notes

Freezing Instructions: Cool baked muffin bread completely. Tightly wrap the loaf or slices (individually or grouped) in 2 layers of plastic wrap or aluminum foil. Place wrapped bread in a large freezer-friendly storage bag or reusable container. Freeze for up to 3-4 months. Thaw wrapped or unwrapped in the refrigerator or at room temperature.
Sour Cream: Plain yogurt is a great substitute for sour cream. Unsweetened applesauce or mashed banana may also be used.
Blueberries: Fresh blueberries are best. I do not suggest frozen blueberries. If you need to use them, do not thaw, add another 2 Tablespoons of flour to the dry ingredients, and extend the bake time.
Why is everything at room temperature? All refrigerated items should be at room temperature so the batter mixes together easily and evenly.
Blueberry Jam or Crumble Topping: If desired, swirl 2 Tablespoons blueberry jam (or any flavor) into the top of the loaf before baking. A crumble topping adds a lovely crunch. Simply combine 1/4 cup (31g) all-purpose flour, 2 Tablespoons brown sugar, and 1/4 teaspoon ground cinnamon, then using a fork, mix in 2 Tablespoons melted unsalted butter until crumbles form. Sprinkle over loaf before baking.
Note: this recipe came from Sally's Baking Addiction blog.

Blackberry Compote

Photo of blueberry jam from Karolina Grabowska from Pexels

Blackberry compote is a luscious and versatile sauce that celebrates the natural sweetness of blackberries in a delightful way. With minimal ingredients and simple preparation, you can create a flavorful compote that is both versatile and delicious. The juicy blackberries, simmered with a touch of sweetness, break down into a thick and fruity sauce that can be used in various ways. Whether drizzled over pancakes, swirled into yogurt, or used as a topping for desserts, blackberry compote offers a burst of vibrant flavor that will elevate your dishes. Embrace the simplicity of making this versatile sauce and savor its deliciousness with every spoonful.

Photo of berry jam from Kaboompics from Pexels

Easy Blackberry Compote

Kate Hackworthy from Veggie Desserts
The juicy blackberries, simmered with a touch of sweetness, break down into a thick and fruity sauce that can be used in various ways.
Cook Time 15 minutes
Total Time 15 minutes
Course Ingredient
Servings 6 servings

Ingredients
  

  • 2 cups blackberries (fresh or frozen)
  • 2 Tbsp sugar
  • 1 Tbsp lemon juice
  • 1 Tbsp water

Instructions
 

  • Add the blackberries, sugar, lemon juice and water to a pot, stir and bring to the boil.
  • Allow it to boil for about 5 minutes, stirring often to stop it from scorching.
  • Reduce the heat to low and let it simmer and bubble for 10 minutes. It will thicken further as it cools.
  • Serve warm or allow to cool and store in a sterilized jar in the fridge for up to 5 days (or freeze for up to 2 months).

Notes

Notes
For a thicker compote, you can stir 1tsp cornstarch mixed with 1 teaspoon water (called a 'slurry') into the compote at the end of cooking and cook for a further minute. This won't affect the taste or look of the compote but will thicken it.
Storage
Fridge: Keep in a sterilized jar for up to 2 weeks.
Freezer: Store the completely cooled compote in a freezer-safe bag or container for up to two months.
 
This recipe came from Kate Hackworthy at the Veggie Desserts blog.