Stuffed Zucchini Blossoms

Photo of zucchini blossoms from Paul Asman and Jill Lenoble from Wikimedia Commons

Stuffed zucchini blossoms are a delicate and delightful appetizer that celebrates the beauty of zucchini flowers. With minimal ingredients and careful preparation, you can create a culinary masterpiece that combines the subtle sweetness of the blossoms with a flavorful filling. The delicate flowers are carefully stuffed with a mixture of cheese, herbs, or other delicious fillings, and then lightly battered and fried to crispy perfection. Whether enjoyed as an elegant appetizer or a unique addition to a meal, stuffed zucchini blossoms offer a delightful blend of textures and flavors. Embrace the artistry of preparing these edible blooms and savor the exquisite taste with each delightful bite.
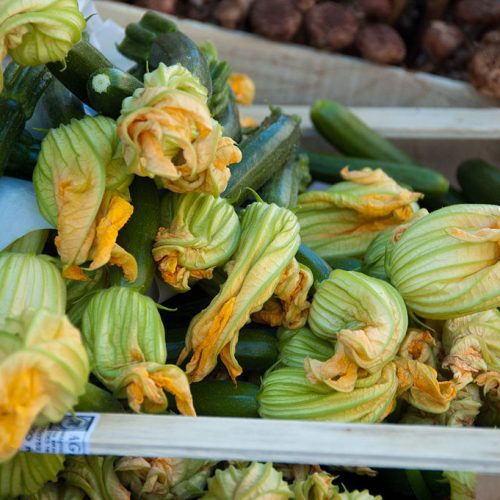
Photo of zucchini blossoms from Paul Asman and Jill Lenoble from Wikimedia Commons

Stuffed Zucchini Blossoms

Chef Dennis Littley
Stuffed zucchini blossoms are a delicate and delightful appetizer that celebrates the beauty of zucchini flowers.
Prep Time 10 minutes
Cook Time 10 minutes
Course Appetizer
Servings 12 blossoms

Ingredients
  

Stuffed Zucchini Blossoms

  • 12-15 zucchini blossoms
  • 1/2 cup ricotta cheese
  • 1 oz Romano cheese (grated)
  • 1 oz Mozzarella cheese (shredded)
  • 1 egg (lightly beaten)
  • sea salt (to taste)
  • black pepper (to taste)
  • A pinch granulated garlic
  • cooking oil (as needed)

Egg Batter

  • 2 whole eggs
  • 1/4 cup milk
  • 1/4 cup flour
  • 1/4 cup Romano (grated)
  • 1 Tbsp basil or Italian parsley (chopped)

Instructions
 

Blossom Stuffing

  • Mix all the ingredients together and place in small pastry bag, or a ziplock bag with an end snipped off.
  • Open one end of the blossom gently and squeeze a small amount of cheese into the blossom. Due not overfill, you want enough to almost fill the blossom not to make it bulge.
  • Refrigerate the blossoms for about 10-15 minutes while you get the egg mixture together.

Egg Batter

  • Lightly beat the eggs and add in milk, flour, cheese, and basil. Mix well. Egg mixture should be about pancake mix thickness. If the mix is too thick the egg coating will be to thick and if its too thin it will run off.
  • Heat a large sauté pan and then add about ¼ inch of cooking oil to the pan.
  • Dredge Zucchini blossom in egg mixture, shed any excess egg and place into hot oil, continue the process till you fill the pan.
  • Fry each side of the Blossom until golden brown, about two minutes on each side, the second side may cook faster, keep an eye on them.
  • Place finished blossom on paper towels to drain off any excess oil. Place blossoms on serving tray and season with grated Romano cheese, sea salt and black pepper.

Notes

This recipe is courtesy of Chef Dennis Littley from Ask Chef Dennis.

Dill-Pickled Green Beans

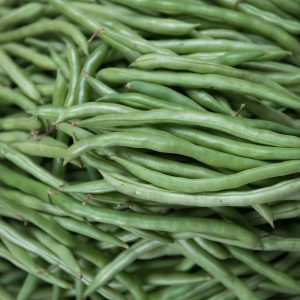
Photo of harvested green beans from Yulia Rozanova from Pexels

Dill-pickled green beans are a tangy and crunchy treat that showcases the natural freshness of green beans with the delightful flavor of dill. With minimal ingredients and simple preparation, you can create a homemade batch of pickled green beans that is both flavorful and versatile. The combination of the crisp green beans and the aromatic dill creates a delightful balance of textures and tastes. Whether enjoyed as a refreshing snack, a flavorful addition to salads, or a tangy accompaniment to sandwiches, dill-pickled green beans offer a burst of flavor that will tantalize your taste buds. Embrace the ease of making these pickles at home and savor their deliciousness with every crunchy bite.

Photo of harvested green beans from Yulia Rozanova from Pexels

Pickled Dilly Beans (Dill-Pickled Green Beans)

Ashley Adamant
Dill-pickled green beans are a tangy and crunchy treat that showcases the natural freshness of green beans with the delightful flavor of dill.
Course Side Dish

Equipment

  • Canning jars with lids and bands
  • Water bath canner

Ingredients
  

  • 2 lb green beans (ends trimmed)
  • 2.5 cups vinegar (5% acidity)
  • 1 cup water
  • 3 Tbsp canning salt
  • 3/4 tsp crushed red pepper flakes
  • 6 sprigs fresh dill
  • 3-6 cloves garlic (peeled)

Instructions
 

  • Wash beans and trim the stem ends.  Trim both ends if you like uniformity, but the tail end is the tender end so you can leave it intact.  I start by measuring one bean to 1 inch below jar height, and then cut them all to the same length so they pack well into the jar.
  • Pack the green beans into wide mouth pint jars and top each jar with 1/4 tsp. red pepper flakes, 2 dill sprigs and 1-2 garlic cloves.  Be sure to leave just over 1/2 inch headspace.
  • Combine vinegar, water and canning salt and bring to a boil on the stove to make a hot brine.  Pour the hot brine over the beans in jars, leaving 1/2 inch headspace.
  • Seal the jars with new canning lids, tighten on bands, and process in a water bath canner for 10 minutes adjusting for altitude.
  • Remove the jars from the canner and allow to stand at room temperature for a few hours until they've "popped" and completely sealed.  Store any unsealed jars in the fridge and use immediately.
  • For sealed jars, remove the canning bands and store in the pantry at room temperature.

Notes

This recipe is from Ashley Adamant at Creative Canning.

Eggplant Parmesan

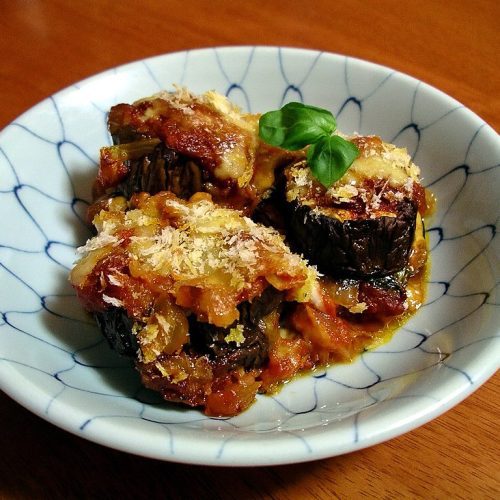
Photo of cooked eggplant from Wikipedia

Eggplant Parmesan is a classic and comforting dish that highlights the tender texture of eggplant and the rich flavors of tomato sauce and cheese. With a few basic ingredients and straightforward steps, you can create a delicious and satisfying meal that is both hearty and flavorful. The layers of breaded and fried eggplant slices, smothered in tomato sauce and melted cheese, create a harmonious combination of textures and tastes. Whether served as a main course or as a delightful side, Eggplant Parmesan offers a comforting and indulgent experience that will delight your taste buds. Embrace the simplicity of making this Italian favorite and savor the deliciousness with each bite.

Photo of cooked eggplant from Wikipedia

Eggplant Parmagiana

Nico Pallota from The Plant-Based School
Eggplant Parmesan is a classic and comforting dish that highlights the tender texture of eggplant and the rich flavors of tomato sauce and cheese.
Prep Time 30 minutes
Cook Time 1 hour
Total Time 1 hour 30 minutes
Course Main Course
Servings 8 people

Equipment

  • 1 9x13 inch baking dish

Ingredients
  

Tomato Sauce

  • 2 Tbsp extra-virgin olive oil
  • 1 yellow onion (finely chopped)
  • 3 cloves garlic (finely chopped)
  • 4 cups tomato passata
  • 1/2 tsp salt
  • 1/4 tsp black pepper

Oven-Roasted Eggplant

  • 4 lb eggplant (about 4 medium eggplants)
  • 1/4 cup extra-virgin olive oil
  • 3/4 tsp salt

Other Ingredients

  • 1.5 cups (5 oz) parmigiano reggiano (finely grated)
  • 2.5 cups (10 oz) mozzarella (grated or chopped)
  • 1.5 cups basil leaves

Instructions
 

Make Tomato Sauce

  • In a large pan with low edges, gently fry the finely chopped onion in oil for 3 minutes. Add finely chopped garlic and fry for one more minute.
  • Add tomato passatasalt, and pepper, and simmer on medium to low heat for 30 minutes, stirring occasionally. In the meantime, bake the eggplants.

Bake The Eggplants

  • Preheat the oven to 430°F or 220°C. Line three large baking trays with parchment paper.
  • Wash and dry the eggplants and remove their stems. Cut the eggplants into ⅕ inch (0.5 cm) slices.
  • Arrange eggplant slices on the baking trays on a single layer without overlapping. Brush with olive oil and sprinkle with salt.
  • Bake at 430°F or 220°C for about 25 to 30 minutes, until the eggplant slices are slightly golden brown on top.

Assemble The Parmigiana

  • We make a parmigiana with four layers of eggplant slices, and the last layer has more sauce, parmesan, and mozzarella than the other layers. Keep this in mind when you add the sauce and the cheese.
  • Add just a bit of tomato sauce to a large baking dish or casserole (9 x 13 inches | 23 x 33 cm).
  • Add the first layer of eggplant slices. Arrange them tightly but without overlapping. Cut the slices with scissors if they are too large.
  • Cover with a ladleful of tomato sauce and spread it with a spoon.
  • Drizzle with a couple of handfuls of finely grated parmesan cheese, a sprinkle of grated or chopped mozzarella cheese, and a handful of basil leaves.
  • Cover with the second layer of eggplant slices, this time arranged in the opposite direction.
  • Add a ladleful of tomato sauce, then parmesanmozzarella, and basil like before.
  • Repeat with two more layers of eggplant (4 eggplant layers in total).The last layer should have more tomato sauceparmesan, and mozzarella than the other layers. Do not add basil on top.

Bake The Parmigiana

  • Bake the eggplant parmigiana in a preheated oven at 350°F or 180°C for 30 minutes until the tomato is bubbling and the cheese melts.
  • Let cool down for 15 minutes. Then garnish with fresh basil leaves and cut into eight portions with a sharp knife. Serve with a simple side salad.

Notes

TIPS
  1. Do not add water to the tomato sauce. The tomato sauce should be quite dense by the end and not watery at all.
  2. Don't cut eggplant slices too thick; the parmigiana won't be as yummy.
  3. You can bake the three trays of eggplant slices simultaneously, but you have to switch them around as they cook. Using the fan-assisted function of the oven helps distribute the heat when the oven is crowded.
  4. All slices must get golden brown on top. The eggplant is tastier this way, and less watery, making a creamier and richer parmigiana.
  5. It's important to let the parmigiana cool down 15 to 30 minutes before serving it.
This recipe is courtesy of Nico Pallotta from The Plant-Based School.

Air Fryer Snap Peas

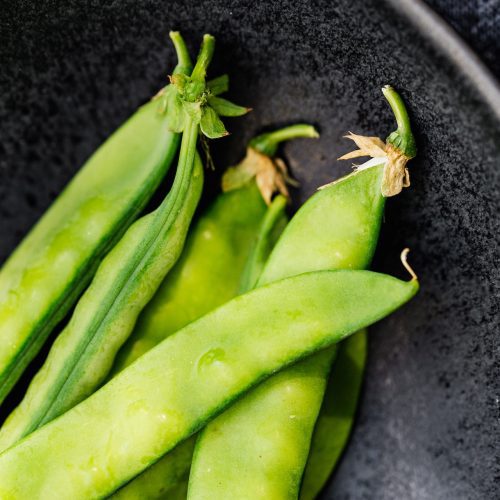
Photo of snap peas from Karolina Grabowska from Pexels

Air fryer snap peas are a quick and delicious snack or side dish that highlights the natural sweetness and crispness of snap peas. With just a drizzle of oil and a sprinkle of seasoning, you can achieve perfectly cooked and crunchy snap peas in no time. The air fryer method locks in the vibrant green color and enhances the natural flavors of the peas. Whether enjoyed as a healthier alternative to traditional fried snacks or as a flavorful addition to your meals, air fryer snap peas offer a delightful way to enjoy this nutritious vegetable with minimal effort. Embrace the simplicity of using the air fryer and savor the delightful crunch of these tasty snap peas.

Photo of snap peas from Karolina Grabowska from Pexels

Air Fryer Snap Peas

Becky from Air Frying Foodie
Air fryer snap peas are a quick and delicious snack or side dish that highlights the natural sweetness and crispness of snap peas.
Prep Time 5 minutes
Cook Time 6 minutes
Total Time 11 minutes
Course Snack
Servings 4 servings

Ingredients
  

  • 2 cups snap peas (fresh)
  • 1 Tbsp sesame oil
  • 1 tsp minced garlic
  • 1/2 tsp kosher salt

Instructions
 

  • Rinse snap peas under cool water and pat them dry completely with paper towels. Trim ends and then place snap peas in a medium-sized bowl. 
  • Measure and pour sesame oil, garlic, and salt over snap peas. Toss peas in bowl with oil mixture until they are fully coated. 
  • Transfer peas to the air fryer basket, spreading them out in a single layer so they don’t overlap and can cook evenly.
  • Air Fry at 380 degrees F for 6-8 minutes. Serve when finished cooking.

Notes

Optional Flavors: Adding extra seasonings can really change up this side dish. For extra flavors, add a pinch of black pepper, chili powder, a tablespoon soy sauce, red pepper flakes, Cajun seasoning, lemon juice, garlic powder, blackening seasoning or parmesan cheese.
Optional Toppings: You can top these peas with pickled onions, crumbled bacon bits, diced peppers, scallions, chop walnuts, pumpkin seeds or almonds into pieces. Black or toasted sesame seeds will also add extra crunch.
Optional Favorite Dipping Sauce: Any favorite dipping sauce such as teriyaki sauce, Greek yogurt with a bit of spice, garlic hummus, mustard sauce or hot chili sauce, are all perfect for dipping.
Cooking Tips: These are super tasty at room temperature, warm or hot. To ensure they are super crispy spritz basket with olive oil spray prior to cooking.
Substitutions: If you do not have sesame oil use a tablespoon olive oil.

Creamy Cucumber Radish Salad

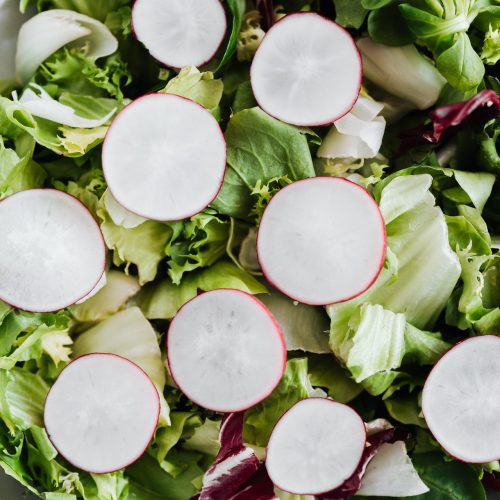
Photo of harvested radishes from Kulbir from Pexels

Creamy cucumber radish salad is a refreshing and delightful dish that combines the cool crunch of cucumbers with the crispness of radishes. With minimal ingredients and simple preparation, you can create a creamy and tangy salad that is both light and satisfying. The combination of the fresh cucumbers and peppery radishes creates a harmonious blend of flavors and textures. Whether enjoyed as a side dish or a refreshing snack, creamy cucumber radish salad offers a burst of freshness and a creamy dressing that complements the vegetables perfectly. Embrace the simplicity of making this flavorful salad and enjoy its refreshing taste with every bite.

Photo of salad with radishes from Wild Hearth and Home

Creamy Cucumber Radish Salad

Taesha Butler
Creamy cucumber radish salad is a refreshing and delightful dish that combines the cool crunch of cucumbers with the crispness of radishes.
Prep Time 10 minutes
Total Time 10 minutes
Course Salad
Servings 4 servings

Ingredients
  

  • 4 mini or Persian cucumbers (or 1 large English cucumber)
  • 1 bunch radishes
  • 3 Tbsp chopped fresh dill (or 2 tsp dried dill)
  • 1/4 cup chopped fresh chives (or 1/2 cup thinly sliced scallions)
  • 1/3 cup plain Greek yogurt
  • 2 Tbsp extra-virgin olive oil
  • 2 tsp red wine vinegar (or apple cider vinegar)
  • 1 tsp honey
  • 1/2 tsp kosher salt
  • 1/4 tsp garlic powder
  • Freshly ground black pepper (to taste)

Instructions
 

  • Thinly slice radishes and cucumbers using either a sharp knife or a mandolin.
  • Place thinly sliced cucumbers, radishes, dill, and chives in a large bowl. Mix to combine.
  • In a separate bowl or large liquid measuring cup, whisk together the yogurt, olive oil, vinegar, honey, salt, garlic powder, and pepper.
  • Pour dressing over the vegetables and toss to coat. Once dressing is mixed with the cucumbers, the cucumbers begin to release liquid, so the salad is best when eaten right away.
  • To make ahead, cover and store the vegetables and dressing separately in the refrigerator for up to a day. Toss with dressing, then serve.

Notes

If you are using a regular (not Persian or English) cucumber, you will want to peel it and remove some of the seeds. To remove the seeds, cut the cucumber in half lengthwise then use a spoon to scoop out some of the seeds. Discard the seeds then slice the cucumber into thin half circles.
What kind of yogurt to use: I like using a whole milk or 2% plain Greek yogurt for this recipe. However, you can use any kind of plain Greek yogurt you like. Regular yogurt will not work as well in this recipe because it has too much liquid and the dressing will not be thick enough to coat the vegetables.
Instead of yogurt, you could use sour cream or a mixture of mayonnaise and either yogurt or sour cream.
Sweetener: I like to add a touch of honey to balance out the sour flavor of the yogurt and vinegar. Instead of honey you can use white sugar or any other sweetener of your choice to taste. You can also leave it out if you prefer, but the dressing will be a little tangier.
This recipe is courtesy of Taesha Butler at The Natural Nurturer.

Roasted Acorn Squash with Rosemary

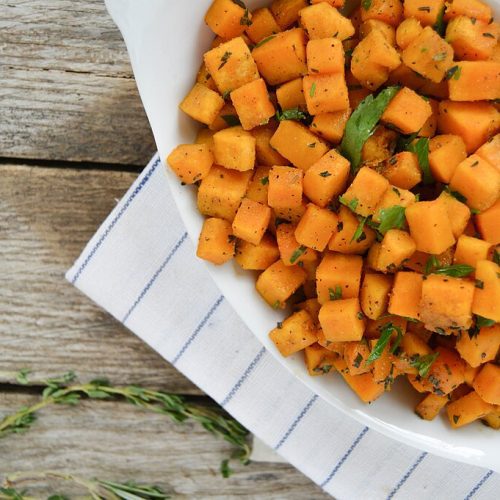
Photo of diced roasted squash

Roasted acorn squash with rosemary is a simple, flavorful side dish that combines the sweetness of acorn squash with the aromatic touch of rosemary. The tender squash and fragrant herb create a harmonious flavor profile. Enjoy this delightful and comforting dish as a standalone side or part of your favorite meal.

Photo of diced roasted squash

Roasted Acorn Squash with Rosemary

Alea Millham
Roasted acorn squash with rosemary is a simple, flavorful side dish that combines the sweetness of acorn squash with the aromatic touch of rosemary.
Prep Time 10 minutes
Cook Time 20 minutes
Total Time 30 minutes
Course Side Dish
Servings 6 servings

Ingredients
  

  • 6 cups acorn squash (cubed)
  • 2 Tbsp olive oil
  • 2 tsp rosemary
  • 1 tsp garlic powder
  • 1/2 tsp onion powder
  • 1/4 tsp salt
  • 1/8 tsp coarse ground pepper

Instructions
 

  • Preheat the oven to 475 degrees Fahrenheit.
  • Place acorn squash cubes on a large cookie sheet with raised edges.
  • Drizzle olive oil over the acorn squash. Toss to coat.
  • Sprinkle the rosemary, garlic powder, onion powder, salt, and pepper over the acorn squash. Toss to coat.
  • Spread the acorn squash pieces out evenly over the cookie sheet. Place in the oven and cook for 10 minutes. After 10 minutes, flip the squash pieces over and cook for another 5 - 10 minutes or until the squash is fork-tender.

Notes

This recipe is courtesy o Alea Millham from Premeditated Leftovers.

Sautéed Broccoli Rabe with Garlic and Crushed Red Pepper

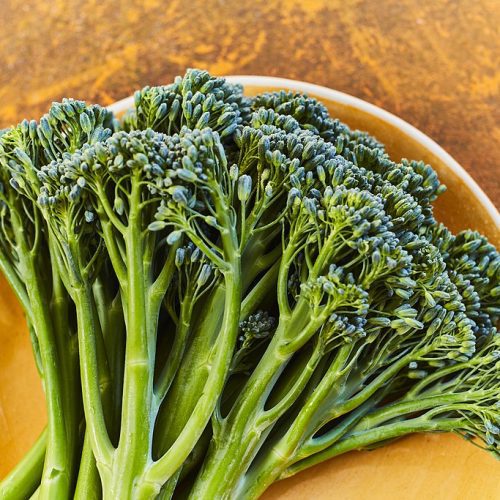
Photo of harvested mini broccoli

Sauteed broccoli rabe with garlic and crushed red pepper is a flavorful and satisfying dish that combines the bitterness of broccoli rabe with the aromatic kick of garlic and the gentle heat of crushed red pepper. With just a few ingredients and minimal cooking time, you can create a vibrant and nutritious side dish that is both simple and delicious. The tender-crisp broccoli rabe pairs perfectly with the bold flavors of garlic and crushed red pepper, creating a delightful balance of taste sensations. Whether served as a standalone side or as a flavorful accompaniment to a main course, sauteed broccoli rabe is a versatile and delightful addition to your culinary repertoire.

Photo of harvested mini broccoli

Sautéed Broccoli Rabe with Garlic and Crushed Red Pepper

Jessie from The Life Jolie
The tender-crisp broccoli rabe pairs perfectly with the bold flavors of garlic and crushed red pepper, creating a delightful balance of taste sensations.
Prep Time 10 minutes
Cook Time 15 minutes
Total Time 25 minutes
Course Side Dish
Servings 4 servings

Ingredients
  

  • 2-3 bunches brocoli raab (cleaned and trimmed of stalks)
  • 3-4 cloves garlic (or garlic powder or both)
  • olive oil
  • crushed red pepper
  • salt

Instructions
 

  • Heat the oil in your pan over medium-high heat.
  • Add the garlic and some crushed red pepper and saute for a few minutes until the garlic is golden (keep an eye on it because burned garlic ruins the dish).
  • Add the broccoli rabe to the pan along with some salt and garlic powder and a couple spoonfuls of water.
  • Stir periodically until the broccoli rabe cooks down, around 10 minutes.
  • Once it's cooked down a bit taste it and added additional salt and crushed red pepper as needed.

Notes

Variation: You can also boil the broccoli rabe for a couple minutes before adding it to the pan. If you do this, you'll scoop it directly from the pot into the pan so that some of the water comes with it- if you do it this way, you won't need to add any additional water. But make sure you're extra careful when you add the broccoli rabe because if the oil is super hot and you add the soaked broccoli rabe it will cause the oil to splash up. So take the pan off the heat for a couple minutes before you add it.
This recipe is courtesy of Jessie from The Life Jolie.

Butternut Squash, Kale & Gnocchi Skillet

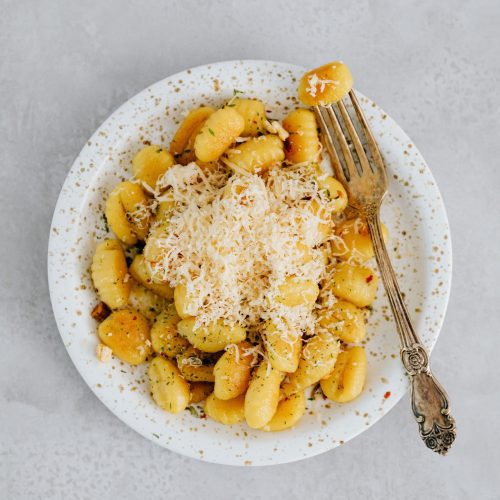
Photo of gnocchi with cheese from Karolina Grabowska from Pexels

This butternut squash, kale, and gnocchi skillet is a comforting and flavorful dish that brings together the earthy sweetness of butternut squash, the hearty goodness of kale, and the pillowy texture of gnocchi. With just a few ingredients and simple steps, you can create a satisfying one-skillet meal that is both nourishing and delicious. The tender butternut squash, wilted kale, and perfectly cooked gnocchi blend harmoniously, offering a balance of flavors and textures. Whether served as a comforting weeknight dinner or a crowd-pleasing side dish, this skillet dish is a delightful way to enjoy the flavors of the season. Embrace the ease of preparation and relish in the delectable combination of ingredients with each comforting bite.

Photo of gnocchi with cheese from Karolina Grabowska from Pexels

Butternut Squash, Sausage, and Kale Gnocchi Skillet

Danae
This butternut squash, kale, and gnocchi skillet is a comforting and flavorful dish that brings together the earthy sweetness of butternut squash, the hearty goodness of kale, and the pillowy texture of gnocchi
Course Main Course
Servings 4 servings

Ingredients
  

  • 2 links Italian turkey sausage (casings removed)
  • 1 Tbsp olive oil
  • 1/2 cup yellow onion (diced)
  • 3 cups butternut squash (peeled and cubed into 1/2" cubes)
  • 1 clove garlic (grated or minced)
  • 1 tsp fresh rosemary (chopped)
  • 1/4 tsp ground nutmeg
  • 1/4 tsp red pepper flakes (optional)
  • 16 oz gnocchi
  • 4 cups chopped kale (can substitute spinach)
  • 1.25 cups low-sodium chicken broth
  • 1/2 cup part-skim mozzarella cheese (shredded)

Instructions
 

  • Over medium-high heat, spray a skillet with cooking oil or drizzle in about a teaspoon. Squeeze the sausage out of the casing and into the skillet. Use a potato masher or wooden spoon to crumble the sausage. Once the sausage is cooked through remove it from the skillet and onto a plate lined with paper towels to soak up any excess grease.
  • Add a tablespoon olive oil to the skillet along with the diced onion and cubed butternut squash. Season with salt and pepper. Cook the vegetables over medium heat stirring frequently.
  • When the squash is tender, approximately 8-10 minutes, add garlic, rosemary, nutmeg, and red pepper flakes. Cook another minute and then pour in the chicken broth. Scrape up any of the brown bits from the bottom of the skillet then stir in the gnocchi and kale.
  • Cover the skillet with a lid and simmer over medium-low heat until the gnocchi is tender, about 5 minutes. Remove the lid and stir in the sausage. Taste for seasoning. Sprinkle the mozzarella over the top of everything and cover with the lid again. Cook for a couple more minutes or until the cheese is melted. Serve immediately.

Notes

This recipe is courtesy of Danae at Recipe Runner.

Zucchini Pancakes

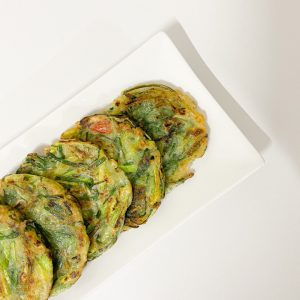
Photo of vegetable pancake

Zucchini pancakes are a delightful and versatile dish that showcases the natural goodness of zucchini in a flavorful way. With a handful of ingredients and simple preparation, you can create a crispy and savory pancake that is both satisfying and nutritious. The grated zucchini adds a subtle sweetness and a pleasant texture to the pancakes. Whether enjoyed as a savory breakfast, a light lunch, or a side dish, zucchini pancakes are a tasty way to incorporate more vegetables into your meals. Embrace the ease of making these delicious pancakes and savor their wholesome flavor with each delectable bite.

Photo of vegetable pancake

Zucchini Pancakes Recipe

Carolyn Cope
Whether enjoyed as a savory breakfast, a light lunch, or a side dish, zucchini pancakes are a tasty way to incorporate more vegetables into your meals.
Active Time 20 minutes
Total Time 50 minutes
Course Side Dish
Servings 2 servings

Ingredients
  

  • 2 medium zucchini
  • 1/2 medium yellow onion
  • 1/2 tsp salt
  • 2 large eggs
  • 1 clove garlic (finely minced)
  • 1/4 cup Parmesan cheese (shredded)
  • 1/4 tsp fresh thyme or oregano (minced)
  • 1/4 tsp lemon zest
  • 1/8 tsp freshly ground black pepper
  • 6 Tbsp flour
  • 1 tsp baking powder
  • 2 Tbsp olive oil

Instructions
 

  • Shred the zucchini and onion on the large holes of a box grater or in a food processor with the shredding disk. Place the shredded vegetables in a colander in the sink and sprinkle with the salt. Toss to combine. Let drain for 30 minutes, then pick up by the handful and squeeze out as much moisture as possible. Place on a kitchen towel or double layer of paper towels.
  • In a medium bowl, combine the eggs, garlic, cheese, herbs, lemon zest, and pepper. Beat well with a fork. Add the drained zucchini mixture and mix together. Sprinkle the flour and baking powder on top and mix with a fork just until well combined.
  • Heat one tablespoon of the olive oil over medium-high heat in a wide, heavy pan. When the oil is hot, drop the batter into the pan by heaping tablespoonful. Cook for about three minutes on the first side, until nicely browned. Flip and cook for about two minutes more. Place the cooked pancakes on a paper towel-lined plate and repeat with the remaining oil and batter. Serve with a dollop of Greek yogurt, sour cream, tzatziki or applesauce.

Notes

This recipe is courtesy of Carolyn Cope at Serious Eats.

Tzatziki Sauce

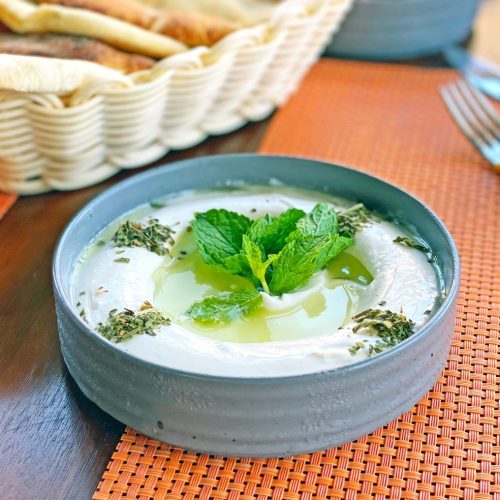
Photo of tzatziki from Shameel Mukkath from pexels

Tzatziki sauce is a refreshing and versatile condiment that adds a burst of flavor to a variety of dishes. With just a few simple ingredients, you can create a creamy and tangy sauce that complements Mediterranean flavors perfectly. The combination of creamy Greek yogurt, fresh cucumber, garlic, and dill creates a harmonious blend of flavors that is both cooling and refreshing. Whether used as a dip for pita bread, a sauce for grilled meats, or a dressing for salads, tzatziki sauce adds a delightful zing to your culinary creations. Experience the joy of making this flavorful sauce at home and elevate your dishes with its irresistible taste.

Photo of tzatziki from Shameel Mukkath from pexels

Tzatziki Sauce

Love and Lemons
With just a few simple ingredients, you can create a creamy and tangy sauce that complements Mediterranean flavors perfectly.
Prep Time 5 minutes
Course Ingredient
Servings 4 people

Ingredients
  

  • 1/2 cup cucumber (finely grated)
  • 1 cup whole milk Greek yogurt
  • 1 Tbsp lemon juice
  • 1/2 Tbsp extra-virgin olive oil
  • 1 clove garlic (grated)
  • 1/4 tsp sea salt
  • 1 Tbsp fresh dill (chopped)
  • 1 Tbsp fresh mint (chopped, optional)

Instructions
 

  • Place the cucumber on a towel and gently squeeze out a bit of the excess water.
  • In a medium bowl, combine the cucumber, yogurt, lemon juice, olive oil, garlic, salt, dill, and mint, if using.
  • Chill until ready to use.

Notes

This recipe is courtesy of Love and Lemons.