Mrs. Laguda’s Tomato “Gravy” Recipe

Tomato sauce
A cherished family heirloom, this tomato sauce recipe has been passed down through generations, carrying with it the essence of tradition and the flavors of simplicity. With just a handful of carefully selected ingredients, you can create a tomato sauce that is rich in both taste and history.
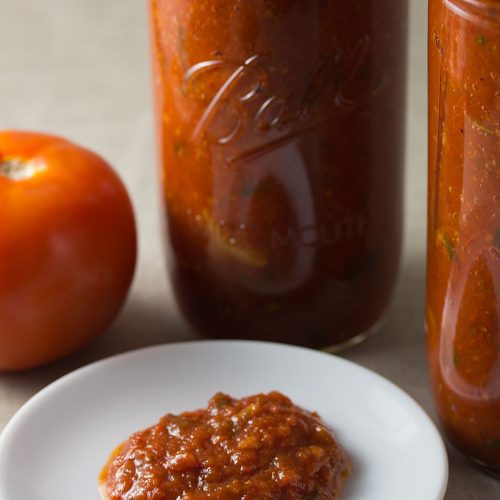
Tomato sauce

Mrs. Laguda's Tomato "Gravy" Recipe

Mrs. Laguda from Ambler, PA
We are excited to share this family tomato sauce recipe from a community member!
Prep Time 10 minutes
Cook Time 2 hours
Resting Time 1 hour
Course Ingredient
Cuisine Italian
Servings 8 people

Ingredients
  

  • 4 Tbsp olive oil
  • 25 plum tomatoes (chopped into 1/2" cubes)
  • 3 cloves garlic (finely chopped)
  • 1 yellow onion (chopped into 1/4" pieces)
  • 1/4 cup chopped fresh basil
  • 1 tsp salt
  • 1 tsp pepper
  • 1 tsp sugar
  • 1 Tbsp dried oregano
  • 1 Tbsp dried thyme

Instructions
 

  • Heat olive oil in a pot over medium heat. Add onions and cook until translucent.
  • Add chopped tomatoes and garlic and cook down, stirring occasionally for 2-3 hours or until it reaches a sauce-like consistency.
  • Take sauce off heat and immediately add basil, salt, pepper, sugar, oregano, & thyme.
  • Stir and let sit for at least 1 hour before serving, ideally over night.

Notes

Note: feel free to scale this recipe according to the amount of tomatoes you have.
Because you do not peel or blanch the tomatoes beforehand, there will be some pieces of tomato skin in the final sauce. If you prefer a smoother texture, use an immersion or stand blender to process the cooled sauce in batches.
This family recipe was submitted by Mrs. Laguda, a community member from Laguda Tailors in Ambler, PA. Her “gravy” is praised by clients, friends, and family alike for its simple yet impactful flavor! We are excited to share it with you today.

Greek Salad

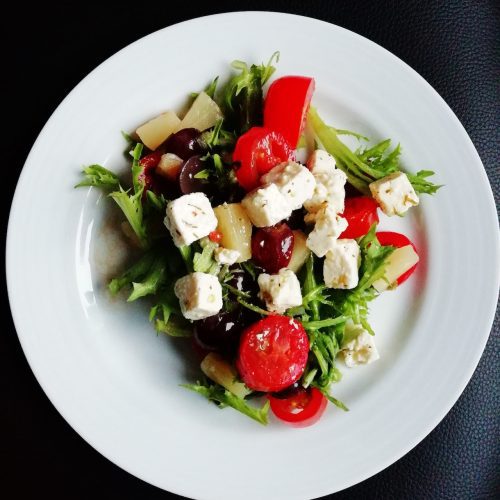
Photo of Greek salad from Lina Luoto from Pexels

Greek salad is a refreshing and flavorful dish that combines the vibrant flavors of fresh vegetables with the tanginess of feta cheese and the richness of Kalamata olives. With minimal ingredients and simple assembly, you can create a delightful salad that is both light and satisfying. The crisp cucumbers, juicy tomatoes, crunchy bell peppers, and thinly sliced red onions come together in a harmonious blend of colors and tastes. Tossed in a zesty dressing made with olive oil, lemon juice, and herbs, Greek salad offers a delightful balance of textures and a burst of Mediterranean flavors. Embrace the simplicity of making this classic salad and savor its deliciousness with every refreshing bite.

Photo of Greek salad from Lina Luoto from Pexels

Greek Salad

Love and Lemons
Greek salad offers a delightful balance of textures and a burst of Mediterranean flavors.
Prep Time 15 minutes
Cook Time 15 minutes
Total Time 30 minutes
Course Salad
Servings 4 servings

Ingredients
  

Dressing

  • 1/4 cup extra-virgin olive oil
  • 3 Tbsp red wine vinegar
  • 1 garlic clove (minced)
  • 1/2 tsp dried oregano (more for sprinkling)
  • 1/4 tsp Dijon mustard
  • 1/4 tsp sea salt
  • Freshly ground black pepper

Salad

  • 1 English cucumber (cut lengthwise, seeded, and sliced 1/4 inch thick)
  • 1 green bell pepper (chopped into 1 inch pieces)
  • 2 cups cherry tomatoes (halved)
  • 5 oz feta cheese (cut into 1/2 inch cubes)
  • 1/3 cup red onion (thinly sliced)
  • 1/3 cup pitted Kalamata olives
  • 1/3 cup fresh mint leaves

Instructions
 

  • Make the dressing: In a small bowl, whisk together the olive oil, vinegar, garlic, oregano, mustard, salt, and several grinds of pepper.
  • On a large platter, arrange the cucumber, green pepper, cherry tomatoes, feta cheese, red onions, and olives. Drizzle with the dressing and very gently toss. Sprinkle with a few generous pinches of oregano and top with the mint leaves. Season to taste and serve.

Notes

Note: Feta in brine is best for this recipe.
This recipe came from the Love and Lemons blog.

Asparagus Risotto

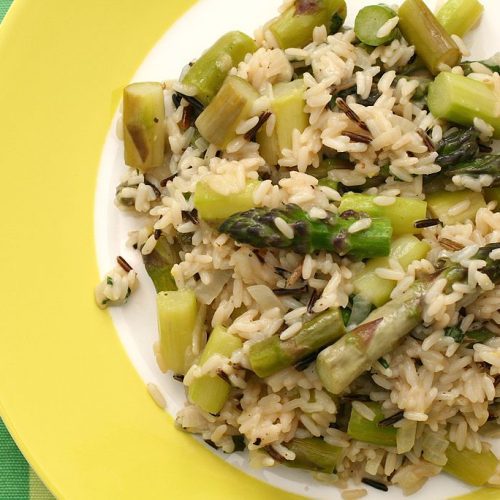
Photo of asparagus risotto from Katrin Morenz from Wikimedia Commons

Asparagus risotto is a creamy and flavorful dish that showcases the vibrant taste of asparagus in a comforting way. With a handful of ingredients and simple cooking techniques, you can create a delightful risotto that is both satisfying and indulgent. The tender asparagus spears, combined with the creamy Arborio rice, create a harmonious blend of textures and flavors. Whether enjoyed as a main course or as a side dish, asparagus risotto offers a delightful balance of earthy asparagus and creamy rice, resulting in a luxurious dish that will please your taste buds. Embrace the process of making this risotto and savor its deliciousness with every luscious spoonful.

Photo of asparagus risotto from Katrin Morenz from Wikimedia Commons

Asparagus Risotto

Love and Lemons
Asparagus risotto offers a delightful balance of earthy asparagus and creamy rice, resulting in a luxurious dish that will please your taste buds.
Prep Time 10 minutes
Cook Time 28 minutes
Total Time 38 minutes
Course Main Course, Side Dish
Servings 4 servings

Ingredients
  

  • 1 Tbsp extra-virgin olive oil
  • 2 cups chopped leeks
  • 1/2 tsp sea salt (or to taste)
  • 2 cloves garlic (minced)
  • 1 cup uncooked Arborio rice (rinsed)
  • 1/2 cup dry white wine
  • 4 cups vegetable broth (room temperature)
  • 1 bunch asparagus (tough ends trimmed, stalks chopped into small pieces)
  • 1 Tbsp fresh lemon juice
  • 2 Tbsp chopped chives
  • 1/4 cup fresh herbs (parsley, basil, tarragon, and/or dill, plus more for garnish)
  • Lemon zest (for garnish)
  • Grated pecorino cheese (optional)
  • Freshly ground black pepper (for garnish)

Instructions
 

  • Heat the olive oil in a large skillet or medium Dutch oven over medium heat. Add the leeks and season with the salt and a few grinds of pepper. Cook, stirring occasionally, for 4 to 5 minutes, or until soft. Add the garlic and stir to incorporate. Stir in the rice and let it cook for 1 minute. Stir in the wine and cook for another 1 to 2 minutes, or until the wine cooks down.
  • Add the broth, ¾ cup at a time, stirring continuously between each addition. Allow each addition of broth to be absorbed by the rice before adding the next. Add the asparagus with the last addition of the broth. Cook until the rice is al dente. The risotto should be soft and creamy.
  • Add the lemon juice, chives, and mixed herbs and season to taste. Garnish with the lemon zest and more herbs. Serve with grated cheese, if desired.

Notes

This recipe came from the Love and Lemons blog.

French Potato Salad

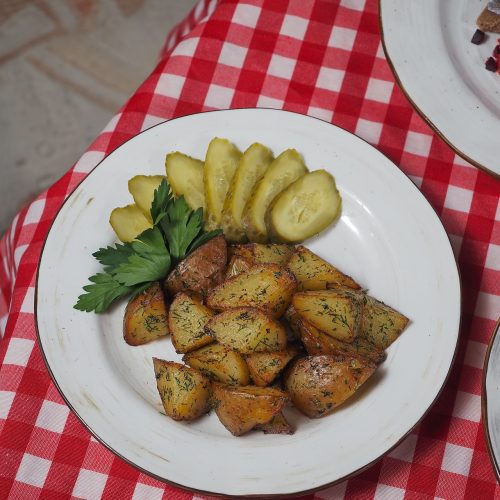
Photo of roasted potatoes from Nadin from Pexels

French potato salad with tarragon is a flavorful and classic dish that combines the creamy goodness of potatoes with the aromatic touch of tarragon. With minimal ingredients and simple preparation, you can create a delightful salad that is both comforting and satisfying. The tender boiled potatoes, tossed with a tangy vinaigrette and fresh tarragon, create a harmonious blend of flavors. Whether enjoyed as a side dish or a light lunch, French potato salad with tarragon offers a delightful balance of tastes and textures. Embrace the simplicity of making this salad and savor its deliciousness with every delectable bite.

Photo of roasted potatoes from Nadin from Pexels

French Potato Salad

Taste of Home
French potato salad with tarragon is a flavorful and classic dish that combines the creamy goodness of potatoes with the aromatic touch of tarragon.
Prep Time 10 minutes
Cook Time 15 minutes
Course Side Dish
Servings 6 cups

Ingredients
  

  • 1 lb baby red potatoes
  • 1 lb baby yellow potatoes
  • 1 clove garlic
  • 1/4 cup olive oil
  • 2 Tbsp white wine or champagne vinegar
  • 2 tsp Dijon mustard
  • 1/2 tsp salt
  • 1/2 tsp pepper
  • 1 shallot (finely chopped)
  • 1 Tbsp each mixed fresh chervil, parsley, and chives
  • 1 tsp minced fresh tarragon

Instructions
 

  • Place potatoes in a large saucepan; add water to cover. Bring to a boil. Reduce heat; cook, uncovered, 10-15 minutes or until tender. With a slotted spoon, remove potatoes to a colander; cool slightly. Return water to a boil. Add garlic; cook, uncovered, 1 minute. Remove garlic and immediately drop into ice water. Drain and pat dry; mince. Reserve 1/4 cup cooking liquid.
  • Cut cooled potatoes into 1/4-inch slices. Transfer potatoes to a large bowl. In a small bowl, whisk reserved cooking liquid, oil, vinegar, mustard, minced garlic, salt and pepper until blended. Pour over potato mixture; toss gently to coat. Gently stir in remaining ingredients. Serve warm or at room temperature.

Notes

If you don't have chervil, you may substitute extra parsley and/or tarragon.
This recipe came from the Taste of Home blog.

Quick Collard Greens

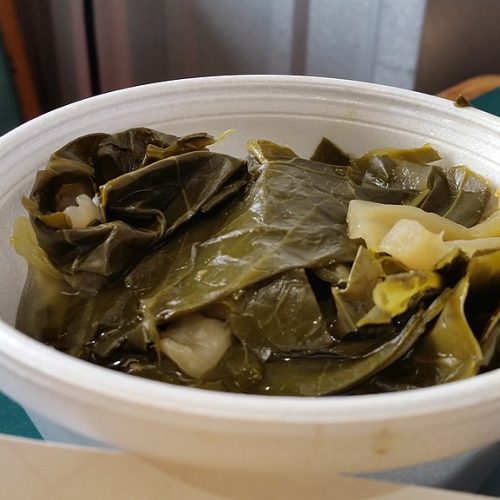
Photo of cooked collard greens from RightCowLeftCoast from Wikimedia Commons

Quick collard greens are a flavorful and nutritious side dish that can be prepared in no time. With minimal ingredients and simple cooking techniques, you can create a delightful dish that is both tender and packed with flavor. The hearty collard greens are quickly cooked, allowing them to retain their vibrant color and texture. Whether sautéed with garlic and a splash of vinegar or cooked with bacon for added richness, quick collard greens offer a delightful combination of tastes. Embrace the simplicity of preparing this dish and savor its deliciousness as a nutritious addition to your meal.

Photo of cooked collard greens from RightCowLeftCoast from Wikimedia Commons

Quick Collard Greens Recipe

Kate from Cookie and Kate
Quick collard greens are a flavorful and nutritious side dish that can be prepared in no time.
Prep Time 8 minutes
Cook Time 7 minutes
Total Time 15 minutes
Course Side Dish
Servings 2 servings

Ingredients
  

  • 1 large bunch collard greens (~10 oz)
  • 1.5 Tbsp extra-virgin olive oil
  • 1/4 tsp fine sea salt
  • 2 cloves garlic (pressed or minced)
  • A pinch red pepper flakes (optional, scale back or omit if sensitive to spice)
  • A couple lemon wedges (for serving)

Instructions
 

  • To prepare the collards: Cut out the thick center rib out of each collard green. Stack the rib-less greens and roll them up into a cigar-like shape. Slice over the “cigar” as thinly as possible (⅛″ to ¼″) to make long strands. Shake up the greens and give them a few chops so the strands aren’t so long.
  • Heat a large, heavy-bottomed skillet over medium-high heat, then add the olive oil. Once the oil is shimmering, add all of the collard greens and the salt.
  • Stir until all of the greens are lightly coated in oil, then let them cook for about 30 seconds before stirring again. Continue stirring in 30-second intervals until the greens are wilted, dark green, and some are starting to turn browns on the edges (this is delicious). This will take between 3 to 6 minutes.
  • Once the collards are just about done, add the garlic and red pepper flakes (if using). Stir to break up the garlic and cook until it’s fragrant, about 30 seconds. Remove the pan from the heat.
  • Immediately divide the cooked collards onto plates, and serve with a lemon wedge each.

Notes

This recipe came from the Cookie and Kate blog.

Roasted Cherry Tomato Caprese

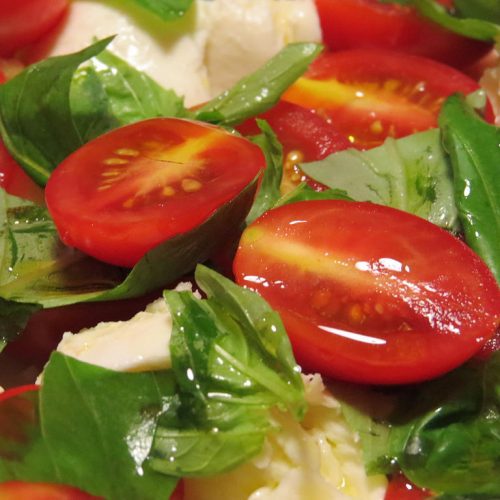
Caprese salad with cherry tomatoes from Basotxerri from Wikimedia Commons

Roasted cherry tomato Caprese is a delightful twist on the classic salad, featuring rich flavors from roasted cherry tomatoes. With minimal ingredients, it creates a visually appealing and delicious dish. The combination of sweet tomatoes, creamy mozzarella, and fresh basil creates a harmonious summer celebration. Whether as an appetizer, side dish, or light main course, it offers a delightful balance of flavors and textures. Embrace simplicity and savor its deliciousness with every bite.

Caprese salad with cherry tomatoes from Basotxerri from Wikimedia Commons

Roasted Cherry Tomato Caprese

Adam Rapoport from Bon Appetit
The combination of sweet tomatoes, creamy mozzarella, and fresh basil creates a harmonious summer celebration.
Course Side Dish
Servings 4 servings

Ingredients
  

  • 2 pints cherry tomatoes
  • 4 sprigs thyme
  • 4 cloves garlic, smashed
  • 1/4 cup extra-virgin olive oil
  • Kosher salt
  • 8 oz fresh buffalo or cow mozzarella (about 1 ball) room temperature, torn into large pieces
  • Flaky sea salt
  • Country-style bread, brushed with oil and toasted in oven (for serving)

Instructions
 

  • Preheat oven to 350°. Toss tomatoes, thyme, garlic, and oil on a rimmed baking sheet to coat and season lightly with kosher salt. Spread out in a single layer and roast until tomatoes are bursting and lightly browned, 40–45 minutes; let cool.
  • Arrange mozzarella on a platter and spoon warm tomato mixture with juices over; sprinkle with sea salt. Serve with olive-oil-toasted bread for soaking up all those extra juices.

Notes

Do Ahead: Tomatoes can be roasted 1 day ahead. Cover and chill. Gently reheat before using.
This recipe came from Adam Rapoport from the Bon Appetit blog.

White Bean and Turnip Salad with Roasted Garlic Scapes

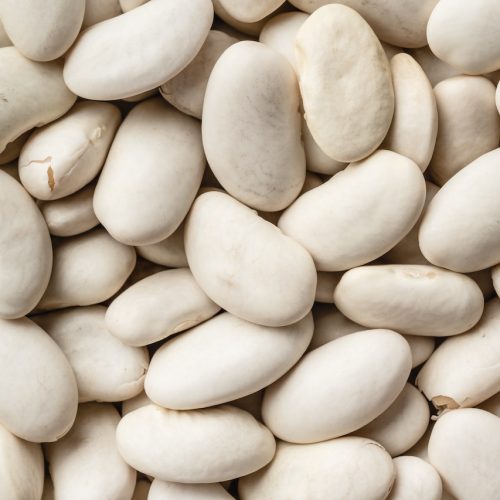
Photo of lima beans from Marina Leonova from Pexels

White bean and turnip salad with roasted garlic scapes is a refreshing and flavorful dish that combines the creaminess of white beans, the crispness of turnips, and the unique taste of roasted garlic scapes. With a handful of ingredients and simple assembly, you can create a delightful salad that is both satisfying and vibrant. The creamy white beans, crunchy turnips, and charred garlic scapes come together in a harmonious blend of textures and flavors. Whether enjoyed as a refreshing side dish or a light lunch, this salad offers a delightful balance of tastes that will tantalize your taste buds.

Photo of lima beans from Marina Leonova from Pexels

White Bean and Turnip Salad with Roasted Garlic Scapes

Valerie from Very Vegan Val
White bean and turnip salad with roasted garlic scapes is a refreshing and flavorful dish that combines the creaminess of white beans, the crispness of turnips, and the unique taste of roasted garlic scapes.
Course Salad

Ingredients
  

  • 6 Hakurei turnips
  • 12 garlic scapes
  • 1.5 cups white beans (about 1 can)
  • 1/2 cup baby arugula
  • 1/4 cup finely chopped parsley
  • 1/4 cup slivered almonds
  • 1 lemon (juice of)
  • 1 Tbsp olive oil
  • 1 tsp chopped fresh thyme
  • Salt and pepper (to taste)

Instructions
 

  • Preheat the oven to 375°F (190°C). Place the garlic scapes on a baking sheet anddrizzle with olive oil and season with salt and pepper.
  • Bake for 10 minutes, flip, and bake for another 10-15 minutes.
  • Let your roasted garlic scapes cool for a coupleminutes until they can be handled, and chop off any parts that have become overlycrispy.
  • Cut the remaining scapes into pieces, and place them in a bowl. Add the beans,drained and rinsed if using canned. Add the arugula, chopped a little if the leavesare larger, parsley, almonds, lemon juice, olive oil, and fresh thyme. Toss, and serveright away or chill until serving

Notes

This recipe came from the Very Vegan Val blog.

Kohlrabi Fries

Photo of french fries from Alex Hussein from Pexels

Kohlrabi fries are a unique and flavorful alternative to traditional potato fries, offering a delightful twist on a beloved snack. With just a few ingredients and minimal preparation, you can create crispy and satisfying fries that are both nutritious and delicious. The kohlrabi, with its mild and slightly sweet flavor, transforms into crispy goodness when thinly sliced and baked to perfection. Whether enjoyed as a healthier snack option or as a tasty side dish, kohlrabi fries offer a delightful crunch and a subtle earthy taste that will please your palate. Embrace the creativity of making these flavorful fries and savor their deliciousness with every bite.

Photo of french fries from Alex Hussein from Pexels

Kohlrabi Fries

Dawn from Girl Heart Food
Kohlrabi fries are a unique and flavorful alternative to traditional potato fries, offering a delightful twist on a beloved snack.
Prep Time 10 minutes
Cook Time 30 minutes
Total Time 40 minutes
Course Side Dish
Servings 4 servings

Ingredients
  

  • 2.5 lb peeled kohlrabi (about 2 medium/large bulbs or 4 pounds before peeling)
  • 3 Tbsp avocado oil (divided)
  • 1 tsp ancho chili powder
  • 1 tsp garlic powder (optional)
  • 1 tsp freshly ground black pepper
  • 3/4 tsp salt
  • sliced green onions or chives, to garnish (optional)

Instructions
 

  • Preheat oven to 425 degrees Fahrenheit.
  • Meanwhile, prepare the kohlrabi. If they have stems/leaves attached you can remove and discard. Remove the tough end. Note: If you like, you can reserve the kohlrabi leaves for use in another recipe.
  • Carefully cut each kohlrabi in half, remove/discard core (if necessary) and peel. Turn each half down so the large flat portion is on the surface and cut into ½-inch slices. Then cut those slices into fries, about ⅓-inch to ½-inch thick (refer to the body of the post above, if necessary).
  • Place kohlrabi fries in a clean tea towel to remove any excess moisture (optional).
  • Place kohlrabi fries in a bowl and toss with 2.5 tablespoons of avocado oil, garlic powder (if using), ancho chili powder, black pepper and salt, ensuring the kohlrabi fries are well coated with the oil and seasonings.
  • Grease a large sheet pan (or two smaller ones) with the remaining ½ tablespoon of avocado oil.
  • Place the kohlrabi fries onto the prepared sheet pan and spread them out in a single layer. Bake the fries for 15 minutes, then remove the sheet pan from the oven and flip the fries with a spatula (again, try to ensure that the fries are in a nice, even layer so they bake up nicely). Place the sheet pan back in the oven and continue baking the fries for another 15 minutes or until the outside of the fries is golden brown and they're tender inside.
  • Transfer kohlrabi fries to a serving dish. Garnish, if desired, with green onion. Serve and enjoy!

Notes

  • Peel your kohlrabi of the thick outer skin. It’s tough (especially tough in larger kohlrabi and does not bake up good). You’ll want to remove all of that.
  • If the core of your kohlrabi is particularly fibrous, you can cut out.
  • If the leaves are still attached to your kohlrabi bulbs (and in good shape), you can clean and reserve and use in another recipe (if you like).
  • Cut your fries into roughly equal-sized pieces so they cook evenly.
  • Mix up the spice blend with your favourite seasoning. If you want to go simple, just use salt and pepper.
  • I like to garnish with chopped green onion, but you can omit. Alternatively, try chopped chives, parsley, cilantro or grated Parmesan cheese.
This recipe came from Dawn from the Girl Heart Food blog.

Fennel and Carrot Salad

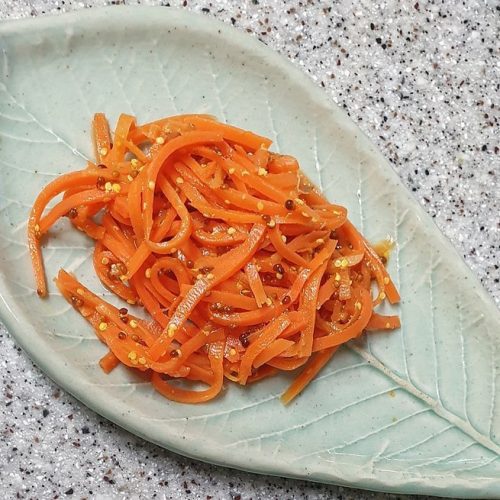
Photo of grated carrots from 건복맘 from Wikimedia Commons

Crafting a fennel and carrot salad is a simple yet highly rewarding culinary journey. This salad showcases the natural sweetness of carrots and the subtle licorice-like notes of fennel, resulting in a crisp and refreshing dish. Beyond its delightful flavor, this salad is packed with vitamins, fiber, and antioxidants, making it a nutritious addition to your meals. Embrace the ease of preparing this salad and savor the wholesome goodness it brings to your table.


Photo of grated carrots from 건복맘 from Wikimedia Commons

Fennel & Carrot Salad

Laura from A Food Lover's Kitchen
This salad showcases the natural sweetness of carrots and the subtle licorice-like notes of fennel, resulting in a crisp and refreshing dish.
Prep Time 10 minutes
Total Time 10 minutes
Course Salad
Servings 2 servings

Ingredients
  

  • 1 fennel bulb (thinly sliced)
  • 2 medium carrots (shaved)
  • 1 red onion (thinly sliced)
  • 2 Tbsp walnuts (chopped and lightly toasted)
  • 1 Tbsp extra-virgin olive oil
  • 1/4 tsp Dijon mustard
  • 1/4 tsp agave syrup or honey
  • Salt and pepper to taste

Instructions
 

  • Add the fennel, carrot, onion, and walnuts to a mixing bowl.
  • In another small bowl, combine the olive oil, vinegar, mustard, agave syrup, and a sprinkle of salt and pepper, and mix well to combine. 
  • Add the vinaigrette to the salad and toss to coat. Serve with a sprinkle of salt and ground black pepper, to taste.

Notes

This recipe is courtesy of Laura from A Food Lover's Kitchen

Pan Con Tomate (Spanish Tomato Toast)

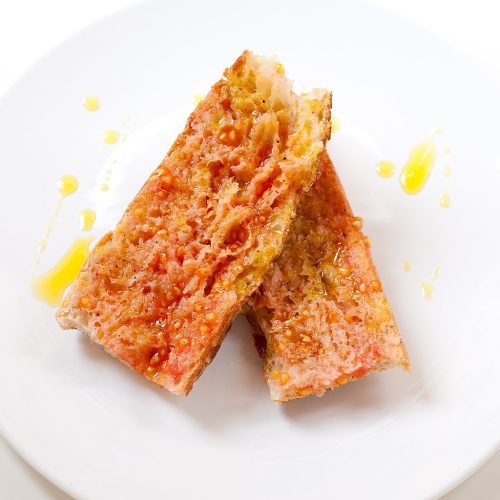
Photo of pan con tomate from jules from Wikimedia Commons

Pan con tomate is a simple and flavorful dish that highlights the vibrant taste of tomatoes with the rustic charm of crusty bread. With just a handful of ingredients and minimal preparation, you can create a delightful appetizer or snack that is both satisfying and refreshing. The ripe tomatoes are grated or crushed, then spread onto toasted bread, allowing their natural juices to infuse the bread. Whether enjoyed as a light breakfast, a quick snack, or a side dish, pan con tomate offers a burst of fresh flavors and a delightful combination of textures. Embrace the simplicity of making this traditional Spanish dish and savor its deliciousness with each savory bite.

Photo of pan con tomate from jules from Wikimedia Commons

Pan Con Tomate (Spanish Tomato Toast)

Kaleigh McMordie from Lively Table
Pan con tomate is a simple and flavorful dish that highlights the vibrant taste of tomatoes with the rustic charm of crusty bread.
Prep Time 10 minutes
Cook Time 5 minutes
Total Time 15 minutes
Course Appetizer
Servings 6 servings

Ingredients
  

  • 1 loaf whole grain or sourdough bread
  • 1 clove garlic
  • 2 large ripe tomatoes (or 3-4 small)
  • extra-virgin olive oil
  • coarse sea salt (to taste)

Instructions
 

  • Turn the oven on to the broil setting.
  • Slice bread ½ inch thick and place on a baking sheet. Drizzle lightly with olive oil. Toast under the broiler for 3-5 minutes, or until crisp and golden.
  • Cut garlic clove in half and rub onto one face of the toast.
  • Use a large-holed cheese grater to grate the tomato into a medium bowl, discarding the large piece of skin when you get to the end.
  • Spoon tomato mixture over pieces of toast.
  • Drizzle with olive oil and sprinkle with salt.

Notes

Extra grated tomato can be stored in an airtight container in the refrigerator for up to 3 days.
The key to the best tasting pan con tomate is good quality ingredients - fresh bread, ripe summer tomatoes, and good olive oil.
This recipe is courtesy of Kaleigh McMordie from Lively Table