Garlic Scape Pesto

Photo of pesto in a glass jay from Caroline Attwood from Unsplash

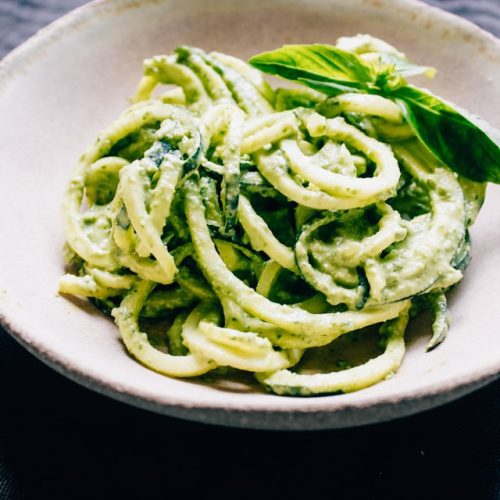
Embrace the unique flavors of the season with Garlic Scape Pesto, a vibrant twist on the classic sauce that highlights the fresh, mildly garlicky taste of young garlic scapes from your garden. Blended with fragrant basil, toasted pine nuts, and a generous splash of olive oil, this pesto offers a creamy, zesty burst of summer in every spoonful. Perfect for tossing with pasta, spreading on sandwiches, or using as a dip, this versatile recipe celebrates the fleeting but fantastic flavors of early summer harvests.

Photo of pesto in a glass jay from Caroline Attwood from Unsplash

Garlic Scape Pesto

Kristina Razon
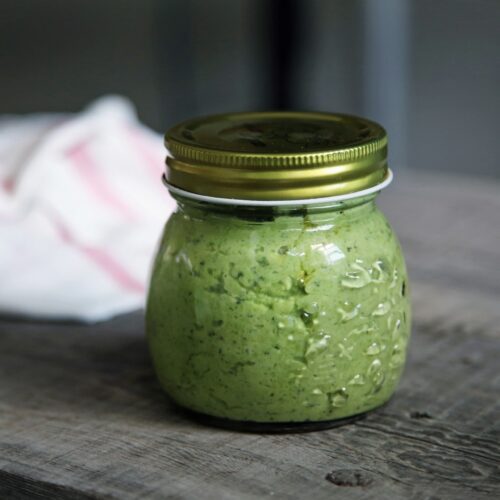
Enjoy the fresh, zesty flavors of summer with Garlic Scape Pesto, featuring young garlic scapes blended with basil, pine nuts, and olive oil for a creamy, versatile sauce.
Prep Time 10 minutes
Course Ingredient
Servings 1.25 cups

Ingredients
  

  • 5 garlic scapes woody ends trimmed and scapes roughly chopped
  • 1/4 cup pine nuts
  • 1 Tbsp fresh lemon juice plus 1 teaspoon grated zest from 1 lemon
  • Kosher salt
  • 1/4 cup grated Parmigiano-Reggiano cheese
  • 1.5 oz basil leaves washed with water still clinging to the leaves
  • 1/2 cup extra-virgin olive oil
  • Freshly ground black pepper

Instructions
 

  • In the bowl of a food processor fitted with a metal blade, combine scapes, pine nuts, and lemon juice and zest, and season with salt. Process, scraping down sides halfway through with a flexible spatula, until scapes and nuts are broken down into small pieces, about 1 minute. 
  • Add cheese and process until incorporated, about 30 seconds. Add basil and pulse until finely minced, about ten 1-second pulses. 
  • Transfer scape mixture to a medium bowl. While stirring continuously, slowly pour olive oil into scape mixture in a thin stream. Season with salt and pepper to taste.
  • Pesto can be used right away, or transferred to a jar or container, covered with a thin  layer of olive oil, and sealed, then stored following the instructions below.

Notes

Storage Note: Garlic scape pesto can be refrigerated in an airtight container for up to 5 days.
This recipe was originally published on the Serious Eats blog
Photo by Caroline Attwood on Unsplash

Summer Panzanella with Squash

Photo of a panzanella salad from Whats4eats

Savor the vibrant flavors of summer with a delightful Summer Panzanella featuring freshly harvested pattypan squash. This garden-to-table recipe celebrates the peak of the season, combining sun-ripened tomatoes, crisp cucumbers, and aromatic basil with the unique, nutty sweetness of pattypan squash. Tossed with rustic, toasted bread cubes that soak up the sherry vinaigrette, each bite is a refreshing symphony of textures and tastes. Perfect for showcasing your garden’s bounty, this panzanella is a light, yet satisfying dish that captures the essence of summer in every mouthful.

Photo of a panzanella salad from Whats4eats

Summer Panzanella with Squash

Jeanine Donofrio
Enjoy the vibrant flavors of summer with Summer Panzanella, featuring fresh pattypan squash, sun-ripened tomatoes, crisp cucumbers, and rustic bread cubes tossed in a light vinaigrette.
Prep Time 10 minutes
Cook Time 5 minutes
Course Salad
Servings 2

Ingredients
  

  • 5-6 pattypan squash cut into 1" pieces
  • olive oil for drizzling
  • 1.5 cups cherry tomatoes cut in half
  • 1 small cucumber cut into 1/2" pieces
  • 1/2 clove garlic minced
  • sherry vinegar for drizzling
  • 1/2 cup mini mozzarella balls cut in half
  • 4-5 slices stale sourdough bread cut into 1" cubes
  • 1/4 cup toasted pine nuts
  • big handful of torn fresh basil leaves
  • generous pinches of sea salt and freshly ground black pepper

Instructions
 

  • Heat a grill pan to medium. Toss the squash pieces with a drizzle of olive oil, and a few pinches of salt and pepper. Place the squash onto the grill pan and grill each side until the squash is tender and char marks form (about 2 minutes per side).
  • Place the cherry tomatoes and cucumbers in a large bowl and toss with a drizzle of olive oil, the minced garlic, a drizzle of sherry vinegar, and a few pinches of salt and pepper. Toss again.
  • When the squash is done, add it to the bowl along with mozzarella, bread, pine nuts, and basil.
  • Add more olive oil, sherry vinegar, salt and pepper as needed.
  • Let the salad sit at room temp for about 15 minutes so that the bread has the chance to soak up the flavorful juices.

Notes

This recipe was originally published on the Love and Lemons blog.

Ratatouille Slab Pie

Photo of ratatouille from Marjan Sadeghi from Unsplash

Discover the rustic charm of our ratatouille slab pie, a flavorful twist on a classic dish. Layers of vibrant vegetables, including zucchini, eggplant, and bell peppers, are nestled in a buttery crust, creating a savory symphony of flavors. Perfect for sharing with loved ones or as a centerpiece for gatherings, this hearty pie celebrates the abundance of summer harvests in every bite.

Photo of ratatouille from Marjan Sadeghi from Unsplash

Ratatouille Slab Pie

Kristen Farmer Hall
Indulge in the rustic charm of Ratatouille Slab Pie, where layers of vibrant vegetables including tomatoes, zucchini, eggplant, and bell peppers are nestled within a flaky pastry crust. This hearty dish offers a symphony of flavors and textures, celebrating the bounty of summer produce in every delicious bite.
Active Time 50 minutes
Total Time 2 hours 30 minutes
Course Main Course
Servings 16 servings

Ingredients
  

  • 1 medium garlic head top 1/2" cut off and discarded
  • 7.5 Tbsp olive oil divided
  • 2 medium eggplants unpeeled, cut into 1/2" pieces (about 8.5 cups)
  • 3 medium-size yellow squash cut into 1/2" pieces (about 6 cups)
  • 3 medium zucchini cut into 1/2" pieces (about 5 cups)
  • 2 Tbsp kosher salt divided, plus more to taste
  • 2.75 tsp black pepper divided, plus more to taste
  • 1 large yellow onion finely chopped (about 2.5 cups)
  • 1 large red or yellow bell pepper finely chopped (about 1.25 cups)
  • 2 14.5oz cans petite diced tomatoes, undrained
  • 3 Tbsp chopped fresh basil
  • 2 tsp chopped fresh thyme
  • 1 tsp crushed red pepper
  • 5 batches All-Purpose Pie Dough (recipe p. 83) shaped into 2 squares and chilled
  • All-purpose flour for work surface
  • 1 large egg beaten

Instructions
 

  • Place oven racks in top third and lower third of oven. Place a large baking stone on lower rack; leave in oven throughout recipe preparation. Preheat oven to 400°F. Drizzle cut side of garlic head with 1/2 Tbsp oil; wrap tightly in aluminum foil. Bake garlic in preheated oven on top rack until garlic cloves are softened, about 45 minutes. Unwrap foil, and set garlic aside.
  • Toss together eggplant, squash, zucchini, 5 Tbsp oil, 4 tsp salt, and 2 tsp black pepper in a large bowl. Divide mixture evenly between 2 rimmed baking sheets, and spread into a single layer. Place baking sheets on top and bottom oven racks. Bake at 400°F until vegetables are just tender, 15-20 minutes, rotating baking sheets after 10 minutes. Set aside to cool for 15 minutes.
  • Heat remaining 2 Tbsp oil in a large Dutch oven over medium heat. Add onion, bell pepper, remaining 2 tsp salt, and remaining 3/4 tsp black pepper; cook, stirring occasionally, until onion mixture is softened, about 10 minutes. Squeeze roasted garlic head to release cloves. Add garlic cloves and tomatoes to onion mixture. Cook, stirring occasionally, until mixture has thickened slightly and tomato juices have mostly evaporated, about 12 minutes. Remove from heat. Stir in basil, thyme, crushed red pepper, and roasted vegetables. Season to taste with salt and black pepper, and let cool completely, about 1 hour.
  • Unwrap 1 chilled pie dough square, and place on a lightly floured work surface; roll into a 24x16" rectangle (about 1/8" thick). Fit dough into a 18x13" rimmed baking sheet (or half sheet pan), allowing excess dough to hang over edges. Trim dough overhang to 1"; discard scraps. Chill, uncovered, at least 15 minutes or up to 1 hour.
  • Unwrap remaining chilled dough square, and roll into a 24x16" rectangle. Cut lengthwise into 1" wide strips. Spread vegetable filling in an even layer in chilled pie shell in baking sheet. Brush edges of dough lightly with some of the beaten egg. Arrange dough strips in a lattice pattern on top of filling, leaving about 1/2" between strips. Trim dough strip overhang to 1", using some of the trimmed longer strips to complete the lattice pattern as needed. Fold bottom dough overhang and lattice strip underhang under, and gently press together on pan edges. Freeze pie, uncovered, 20 minutes. Reduce oven temperature to 375°F.
  • Brush dough lightly with remaining beaten egg. Bake pie on bottom oven rack on top of preheated backing stone until crush is golden brown and filling is bubbly, 1 hour to 1 hour and 15 minutes. Transfer pie to a wire rack. Let cool at least 30 minutes before slicing. Serve warm or at room temperature.

Notes

Note: Filling can be made up to 3 days in advance. Pie dough can be chilled up to 3 days.
This recipe by Kristen Farmer Hall was published in the August 2020 issue of Food & Wine.
This favorite recipe was contributed by a Backyard Eats client! She encourages home cooks to substitute ingredients as needed based their lifestyle or what's growing fresh in their garden.

Zucchini Noodles with Pesto

Photo of pesto pasta from Clara Farras from Unsplash

Delight in the freshness of our zucchini noodles with pesto, a vibrant dish bursting with flavor. Tender zucchini ribbons are tossed in aromatic pesto sauce, creating a light and satisfying meal. Perfect for a quick lunch or a refreshing side, it’s a delicious way to enjoy the flavors of summer in every bite.

Photo of pesto pasta from Clara Farras from Unsplash

Zucchini Noodles with Pesto

Vicki Shanta Retelny
Elevate your pasta game with Zucchini Noodles coated in vibrant Pesto, where tender zucchini ribbons are enrobed in a flavorful basil pesto sauce. This light and refreshing dish offers a healthy twist on traditional pasta, bursting with fresh herbaceous flavors and nutritious goodness.
Course Main Course
Servings 4 (1/2 cup) servings

Ingredients
  

Pesto

  • 2 cups fresh basil leaves loosely packed
  • 1/3 cup pine nuts
  • 2 small garlic cloves
  • 1/2 cup Parmesan cheese grated
  • 1/3 cup extra-virgin olive oil
  • Pinch of salt and freshly ground black pepper

Noodles

  • 2 cups zucchini spirals see Notes
  • 1 Tbsp extra-virgin olive oil

Instructions
 

  • Prepare the pesto: Pulse the basil, pine nuts, garlic, cheese, oil, salt and pepper in a food processor until thoroughly blended. Scrape down the sides and pulse a few more times to mix well.
  • Place the zucchini spirals in a medium saucepan with olive oil. Sauté the zucchini noodles in the pan over medium heat for 2-3 minutes. Drain excess liquid and potion the noodles into bowls- top each with a generous tablespoon of pesto. Gently toss and enjoy.

Notes

Note: Enjoy this recipe with any spiralized vegetable, such as yellow squash, butternut squash, or beets. To make zucchini spirals from scratch, use a handy kitchen gadget called a spiralizer or a small knife. Use washed, unpeeled zucchini to create long, thin "noodles." Also, jarred pesto can be used instead.
This recipe by Vicky Shanta Retelny was published in the July 2020 edition of Costco Connection.
This favorite recipe was contributed by a Backyard Eats client! She encourages home cooks to substitute ingredients as needed based their lifestyle or what's growing fresh in their garden.

Spicy Stir-Fried Tatsoi

Photo of baby bok choy from Chanwei from Unsplash

Kick up the heat with our spicy stir-fried tatsoi, a flavorful twist on a classic dish. The tender tatsoi leaves absorb the bold spices and aromatics, creating a mouthwatering symphony of flavors with each bite. Whether served as a zesty side or a hearty main course, this dish is sure to excite your taste buds and add a delicious kick to your meal.

Photo of baby bok choy from Chanwei from Unsplash

Spicy Stir-Fried Tatsoi

Add some zing to your spring meals with Spicy Stir-Fried Tatsoi, a tantalizing dish featuring tender tatsoi greens stir-fried to perfection with a fiery blend of spices. This vibrant and nutritious dish offers a delightful kick, making it a flavorful addition to any seasonal spread.
Prep Time 15 minutes
Course Salad
Servings 4 servings

Ingredients
  

  • 2 Tbsp olive oil
  • 1/2 tsp whole cumin seeds
  • 1 tsp freshly diced fresh ginger
  • 1 small clove garlic sliced
  • 1 Serrano pepper seeds removed, pepper finely diced
  • 1 medium shallot thinly sliced
  • 4-6 small carrots julienned
  • 1/2 lemon juice and zest of, juice divided
  • 1 small head of tatsoi leaves and stems
  • 2 Tbsp shredded basil leaves
  • Sea salt
  • Water as needed

Instructions
 

  • Heat the oil in a wok over a medium high flare. Add the cumin, and let sizzle for 30 seconds or until the cumin darkens. Add the ginger, garlic and Serrano chili. Cook stirring until garlic starts to color. Add shallots cook stirring 2-3 minutes.
  • Add the carrots. Sprinkle with salt. Stir-fry for 2-3 minutes. Add lemon zest and 1/2 the lemon juice. When it evaporates add 2 Tbsp water. Cook stirring over high heat until the water has almost gone and the carrots have softened, about 5 minutes.
  • Add the tatsoi. Mix into the veggies. Stir-fry for about 2 minutes, then add another tablespoon of water. This will create steam. Cover the wok and lower heat to medium. Cook 1-2 minutes or until the tatsoi stems begin to soften.
  • Remove the lid, raise the heat to medium, and stir-fry until any liquid has evaporated. Add the remaining lemon juice and the basil leaves. Cook 1 minute. Serve immediately.

Notes

This recipe was originally published by the Cook For Your Life blog.
This favorite recipe was contributed by a Backyard Eats client! She encourages home cooks to substitute ingredients as needed based their lifestyle or what's growing fresh in their garden.

Heirloom Tomato Bruschetta

Photo of bruschetta on toast from Lucie Liz from Pexels

Crafting heirloom tomato bruschetta is both effortless and gratifying when using the freshest ingredients. The simplicity of this recipe allows the natural flavors to shine, turning humble ingredients into a burst of vibrant taste. Beyond its culinary pleasures, heirloom tomatoes bring their own medicinal benefits, packed with antioxidants and vitamins that promote overall well-being. Embrace the ease of creating this classic dish and relish in the wholesome goodness it brings to your table.

Photo of bruschetta on toast from Lucie Liz from Pexels

Heirloom Tomato Bruschetta

Simple Scratch
Crafting heirloom tomato bruschetta is both effortless and gratifying when using the freshest ingredients.
Prep Time 10 minutes
Cook Time 8 minutes
Resting Time 2 hours
Total Time 2 hours 18 minutes
Course Appetizer
Servings 10 servings

Ingredients
  

  • 2 lb heirloom tomatoes (cored and diced)
  • 1 tsp kosher salt (plus more for seasoning)
  • 4 cloves fresh garlic (peeled and minced)
  • 1/3 cup extra virgin olive oil (plus more for toasting bread)
  • 20 medium basil leaves (stacked, rolled, and thinly sliced)
  • 1 loaf crusty bread (grilled or toasted in oven)

Instructions
 

  • Place chopped tomatoes in a large colander set into a bowl or sink. Season with salt and gently toss. Let this sit for 2 hours or up to over night, tossing occasionally. (the longer the better)
    Save the tomato liquids to make a vinaigrette or discard.
  • Meanwhile add minced garlic to a small sauté pan with the olive oil. Heat on low, stirring occasionally until the garlic has softened and is fragrant. Remove and let cool completely.
  • Once the tomatoes have sat, transfer to a bowl, pour in garlic oil and slice and add the basil. Toss, taste and season with more salt if desired.
  • Slice bread and drizzle with olive oil or spray with olive oil spray. Grill bread or toast in a 400° oven until golden, about 8 minutes.
  • You can serve the heirloom tomato topping in a bowl alongside the grilled or toasted bread and spoon desired amount onto each piece or prepare each slice with equal amounts of the tomato bruschetta and arrange onto a platter.

Notes

This recipe comes from the Simply Scratch blog.

Mrs. Laguda’s Tomato “Gravy” Recipe

Tomato sauce
A cherished family heirloom, this tomato sauce recipe has been passed down through generations, carrying with it the essence of tradition and the flavors of simplicity. With just a handful of carefully selected ingredients, you can create a tomato sauce that is rich in both taste and history.
Tomato sauce

Mrs. Laguda's Tomato "Gravy" Recipe

Mrs. Laguda from Ambler, PA
We are excited to share this family tomato sauce recipe from a community member!
Prep Time 10 minutes
Cook Time 2 hours
Resting Time 1 hour
Course Ingredient
Cuisine Italian
Servings 8 people

Ingredients
  

  • 4 Tbsp olive oil
  • 25 plum tomatoes (chopped into 1/2" cubes)
  • 3 cloves garlic (finely chopped)
  • 1 yellow onion (chopped into 1/4" pieces)
  • 1/4 cup chopped fresh basil
  • 1 tsp salt
  • 1 tsp pepper
  • 1 tsp sugar
  • 1 Tbsp dried oregano
  • 1 Tbsp dried thyme

Instructions
 

  • Heat olive oil in a pot over medium heat. Add onions and cook until translucent.
  • Add chopped tomatoes and garlic and cook down, stirring occasionally for 2-3 hours or until it reaches a sauce-like consistency.
  • Take sauce off heat and immediately add basil, salt, pepper, sugar, oregano, & thyme.
  • Stir and let sit for at least 1 hour before serving, ideally over night.

Notes

Note: feel free to scale this recipe according to the amount of tomatoes you have.
Because you do not peel or blanch the tomatoes beforehand, there will be some pieces of tomato skin in the final sauce. If you prefer a smoother texture, use an immersion or stand blender to process the cooled sauce in batches.
This family recipe was submitted by Mrs. Laguda, a community member from Laguda Tailors in Ambler, PA. Her “gravy” is praised by clients, friends, and family alike for its simple yet impactful flavor! We are excited to share it with you today.

Eggplant Caprese Stacks

Purple harvested eggplant on wooden ledge

Eggplant Caprese stacks are a delightful and creative twist on the classic Caprese salad, featuring layers of tender eggplant, ripe tomatoes, fresh basil, and creamy mozzarella. With just a few ingredients and simple assembly, you can create a visually appealing and flavorful appetizer or side dish. The grilled or roasted eggplant slices add a smoky flavor, while the juicy tomatoes and fragrant basil complement the creamy mozzarella. Drizzled with balsamic glaze and a sprinkle of salt and pepper, Eggplant Caprese stacks offer a delightful combination of tastes and textures. Embrace the creativity of making these stacks and savor their deliciousness with every delightful bite.

Purple harvested eggplant on wooden ledge

Crispy Eggplant Caprese Stacks

The Comfort of Cooking
Eggplant Caprese stacks are a delightful and creative twist on the classic Caprese salad, featuring layers of tender eggplant, ripe tomatoes, fresh basil, and creamy mozzarella.
Course Main Course
Servings 2 servings

Ingredients
  

Eggplant Stacks

  • 2 ripe tomatoes
  • 1 8 oz ball fresh mozarella
  • 6-8 leaves fresh basil
  • 1 Tbsp olive oil (for skillet)
  • 6 eggplant slices (1/4" thick)
  • 1/4 cup flour
  • 1 egg (lightly beaten)
  • 1/2 cup Panko breadcrumbs

Dressing

  • 2 Tbsp olive oil
  • 1 Tbsp balsamic vinegar
  • Salt and freshly ground pepper, to taste

Instructions
 

  • Slice tomatoes and mozzarella about 1/4-inch thick. Rinse and pat basil dry (you can keep it whole or tear into smaller pieces). Set aside.
  • Preheat a large skillet to medium heat and add 1 Tbsp. olive oil. Prepare eggplant slices by coating lightly in flour, then egg (shaking off excess), and then panko, all in separate dishes. Once skillet is hot, add eggplant slices and fry, in batches, about 3 minutes per side until golden brown. Remove to a paper-towel lined plate.
  • Combine dressing ingredients in a small bowl and whisk until well-combined. Taste and adjust seasonings as needed.
  • On serving plates, build stacks by alternating tomato, mozzarella, eggplant, and basil. Repeat until you have 2 equal-sized stacks. Drizzle with dressing.
  • Enjoy!

Notes

This recipe came from the Comfort of Cooking blog.

Fig and Arugula Salad with Pecans, Basil and Goat Cheese

Photo of salad with figs from Triv.rao from Wikimedia Commons

Fig and arugula salad with pecans, basil, and goat cheese is a delightful and flavorful dish that combines the sweetness of figs with the peppery bite of arugula and the richness of goat cheese. With minimal effort and a handful of ingredients, you can create a refreshing salad that is both visually appealing and delicious. The juicy figs, crunchy pecans, fragrant basil, and creamy goat cheese come together in a harmonious blend of flavors and textures. Whether enjoyed as a light lunch or a side dish, this salad offers a delightful balance of tastes that will elevate your taste buds. Embrace the simplicity of making this salad and savor its deliciousness with every mouthwatering bite.

Photo of salad with figs from Triv.rao from Wikimedia Commons

Fig and Arugula Salad w/ Pecans, Basil and Goat Cheese

Sylvia Fontaine from Feasting At Home
Fig and arugula salad with pecans, basil, and goat cheese is a delightful and flavorful dish that combines the sweetness of figs with the peppery bite of arugula and the richness of goat cheese.
Prep Time 20 minutes
Total Time 20 minutes
Course Salad

Ingredients
  

Salad Base

  • 1/4 cup red onion (thinly sliced)
  • 1/2 cup toasted pecans
  • 5 oz baby arugula (about 6-7 cups)
  • 6-8 figs (stems removed, quartered)
  • 10-15 basil leaves (torn)
  • 1/2 cup firm goat cheese, crumbled (use the kind in a log, or try gorgonzola)

Fig Salad Dressing

  • 3 Tbsp olive oil
  • 2.5 Tbsp balsamic vinegar
  • 1-2 tsp maple syrup
  • 1/2 tsp salt
  • 1/2 tsp pepper
  • 1/4 tsp vanilla (optional)

Instructions
 

  • If sensitive to red onions, thinly slice and soak in salted water for 15 minutes.
  • Toast pecans in a dry skillet over medium heat, stirring occasionally until fragrant and lightly toasted, about 5-6 minutes.
  • Place arugula, pecans, drained onions, and torn basil leaves in a large bowl. (At this point you could refrigerate until serving, placing figs and goat cheese overtop of the greens).
  • Drizzle the dressing ingredients into the salad bowl (or feel free to mix dressing together in a small jar or bowl first) tossing the salad until all the leaves are lightly coated. Add the figs and goat cheese, and lightly toss to incorporate.
  • Taste, adjust vinegar and maple to your liking, adding more if you prefer. Serve immediately!

Notes

It helps to use very cold goat cheese or chevre here- makes it much easier to crumble- so leave it the fridge until the last possible moment. You can also place it in the freezer while you prep the salad.
Feel free to sub toasted walnuts– although I think pecans actually do taste better here!
Feel free to swap out gorgonzola cheese for the goat cheese.
This recipe came from Sylvia Fontaine from the  Feasting at Home blog.

Asparagus Risotto

Photo of asparagus risotto from Katrin Morenz from Wikimedia Commons

Asparagus risotto is a creamy and flavorful dish that showcases the vibrant taste of asparagus in a comforting way. With a handful of ingredients and simple cooking techniques, you can create a delightful risotto that is both satisfying and indulgent. The tender asparagus spears, combined with the creamy Arborio rice, create a harmonious blend of textures and flavors. Whether enjoyed as a main course or as a side dish, asparagus risotto offers a delightful balance of earthy asparagus and creamy rice, resulting in a luxurious dish that will please your taste buds. Embrace the process of making this risotto and savor its deliciousness with every luscious spoonful.

Photo of asparagus risotto from Katrin Morenz from Wikimedia Commons

Asparagus Risotto

Love and Lemons
Asparagus risotto offers a delightful balance of earthy asparagus and creamy rice, resulting in a luxurious dish that will please your taste buds.
Prep Time 10 minutes
Cook Time 28 minutes
Total Time 38 minutes
Course Main Course, Side Dish
Servings 4 servings

Ingredients
  

  • 1 Tbsp extra-virgin olive oil
  • 2 cups chopped leeks
  • 1/2 tsp sea salt (or to taste)
  • 2 cloves garlic (minced)
  • 1 cup uncooked Arborio rice (rinsed)
  • 1/2 cup dry white wine
  • 4 cups vegetable broth (room temperature)
  • 1 bunch asparagus (tough ends trimmed, stalks chopped into small pieces)
  • 1 Tbsp fresh lemon juice
  • 2 Tbsp chopped chives
  • 1/4 cup fresh herbs (parsley, basil, tarragon, and/or dill, plus more for garnish)
  • Lemon zest (for garnish)
  • Grated pecorino cheese (optional)
  • Freshly ground black pepper (for garnish)

Instructions
 

  • Heat the olive oil in a large skillet or medium Dutch oven over medium heat. Add the leeks and season with the salt and a few grinds of pepper. Cook, stirring occasionally, for 4 to 5 minutes, or until soft. Add the garlic and stir to incorporate. Stir in the rice and let it cook for 1 minute. Stir in the wine and cook for another 1 to 2 minutes, or until the wine cooks down.
  • Add the broth, ¾ cup at a time, stirring continuously between each addition. Allow each addition of broth to be absorbed by the rice before adding the next. Add the asparagus with the last addition of the broth. Cook until the rice is al dente. The risotto should be soft and creamy.
  • Add the lemon juice, chives, and mixed herbs and season to taste. Garnish with the lemon zest and more herbs. Serve with grated cheese, if desired.

Notes

This recipe came from the Love and Lemons blog.