Currant Lemonade

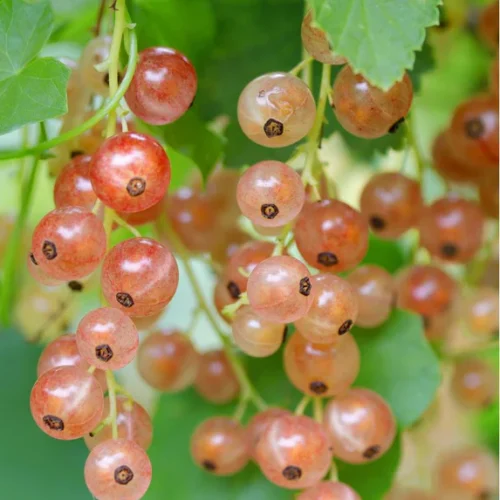
A fresh take on a classic lemonade that uses black, red, or champagne currants to create a floral and tangy drink. Use this recipe for cocktails, mixers, or the perfect cooldown on those hot summer days.

Currant Lemonade

Quick, four-ingredient lemonade made with red, black, or our personal favorite, pink champagne currants!
Prep Time 5 minutes
Cook Time 5 minutes
Total Time 1 hour 10 minutes
Course Drinks
Servings 2 People

Equipment

  • Sieve or tight mesh strainer straining seeds
  • Large spoon or muddler (crushing berries)
  • Large bowl
  • Drink Container Mason jars, pitcher with lid, etc.

Ingredients
  

Currant Simple Syrup

  • 2 cups Ripe, fresh currants
  • 1 1/2 cup Granulated sugar

Lemonade

  • 4 cups Water
  • 1 cup Lemon Juice About 8 lemons

Instructions
 

Simple Syrup

  • Wash your currants with water, and remove any leftover leaves or stems from the berries, and place them in a bowl.
    2 cups Ripe, fresh currants
  • Add the sugar to the bowl and mix well to ensure all the berries are coated. (This step makes harvesting the juice easier!)
    1 1/2 cup Granulated sugar
  • Cover the bowl and let it rest in the refrigerator for 1 hour.

Simple Syrup

  • After resting, remove the currant and strawberry blend from the refrigerator and pour into a tight mesh sieve. Leave the bowl underneath to catch the juice.
  • Take the back of a large spoon, or muddler, and mash the currants through the sieve. Be sure to scrape the bottom of the sieve as you go; the syrup is thick and will likely stick to the underside.
  • You should have 1 full cup of currant syrup!

Make the Lemonade

  • Combine the currant syrup, lemon juice, and water in your designated drink storage container and mix well. Voila! You're done!
    4 cups Water, 1 cup Lemon Juice

Garnishes and Additions

  • Garnish with fresh berries, a sprig of mint, or basil for an herbaceous flavor addition
  • Use as a mixer for a summertime cocktail
  • Replace water with sparkling water, seltzer, or tonic for a twist on classic lemonade

Vegetarian 5-Bean Soup Mix

Mixed beans

This vegetarian soup mix combines layers of pinto, black, and kidney beans with split peas and northern beans, creating a hearty, colorful blend. Aromatic spices infuse the soup with a warm, savory flavor. Beautifully packaged in Mason jars, it’s a nourishing, ready-to-cook gift. Just add tomatoes and water to enjoy a flavorful, homemade soup perfect for cozy, comforting meals.

Mixed beans

Vegetarian 5-Bean Soup Mix

P. Allen Smith
Just add tomatoes and water to enjoy a flavorful, homemade soup perfect for cozy, comforting meals.
Prep Time 1 hour
Cook Time 2 hours
Total Time 3 hours
Course Soup

Ingredients
  

  • 1 lb pinto beans
  • 1 lb split green peas
  • 1 lb great northern beans
  • 1 lb black beans
  • 1 lb kidney beans
  • 1 Tbsp black pepper
  • 1 Tbsp paprika
  • 1 Tbsp dry mustard
  • 2 Tbsp dehydrated onion or 1 fresh onion, diced
  • 2 Tbsp sea salt
  • 2 Tbsp garlic powder
  • 2 Tbsp dried oregano
  • 1 tsp dried rosemary
  • 8 bay leaves
  • 4 vegetable bouillon cubes (or 6 cups broth)
  • 1 14 oz can diced tomatoes

Instructions
 

  • Rinse beans and place in large stockpot, cover in 1 inch of water. Bring to a boil over high heat, cover, remove from heat and let soak for one hour. Drain and rinse.
  • Return beans to the pot and add in spice envelope, one 14-ounce can of diced tomatoes and 6 cups of water. 
  • Bring to a boil, reduce heat and simmer for two hours until beans are tender and soup is thick. Remove bay leaves before serving.

Notes

This recipe was originally published on the HGTV website.
Photo by Vanessa Loring on Pexels.

Slow-Roasted Oregano Chicken With Buttered Tomatoes

A photo of roast chicken from Harry Dona from Pexels

This Slow-Roasted Oregano Chicken with Buttered Tomatoes is a delicious, herb-forward dish perfect for showcasing tomatoes at any stage of the season. Juicy chicken is slowly roasted with fragrant oregano and garlic, resulting in a rich, savory meal where the chicken truly shines. The buttered tomatoes, whether midsummer ripe or end-of-season, soften and caramelize, adding a sweet, tangy accent without overwhelming the dish. The combination of tender chicken, fresh herbs, and lightly cooked tomatoes creates a balanced and flavorful meal.

This meal was suggested by a Backyard Eats employee who said it was a hit at one of their dinner parties!

A photo of roast chicken from Harry Dona from Pexels

Slow-Roasted Oregano Chicken With Buttered Tomatoes

Alison Roman
With just a few ingredients you can make a rich and savory dish for your next dinner party.
Prep Time 20 minutes
Cook Time 3 hours
Course Main Course
Servings 6 servings

Ingredients
  

  • 1 whole (3.5-4 lb) chicken
  • Kosher salt
  • Freshly ground black pepper
  • 1/4 cup olive oil
  • 1.5 Tbsp fennel seeds crushed in a mortar and pestle or spice mill, or chopped with a knife
  • 1 bunch fresh oregano
  • 1.5 lb small vine-ripened tomatoes (about 6) halved lengthwise
  • 2 heads garlic halved crosswise (it's fine to leave the skin on)
  • 2 Tbsp unsalted butter cut into pieces
  • 2 Tbsp red wine vinegar or white wine vinegar
  • 6 slices (1-inch-thick) slices of good country bread, such as country loaf or sourdough toasted (optional)

Instructions
 

  • Heat the oven to 325 degrees. Season the chicken with salt and pepper. (If you can do this in advance, please do.) Drizzle it with the olive oil and sprinkle with the fennel seeds.
  • Stuff the cavity with half the oregano and place in a large baking dish. Scatter the tomatoes, garlic, butter and remaining oregano around the chicken.
  • Roast until the chicken is golden brown and completely cooked through, and the tomatoes are nice and jammy, 2 1/2 to 3 hours.
  • Add the vinegar to the tomatoes and let the chicken rest in the baking dish for 10 minutes.
  • Place toast, if using, on serving platter and spoon the jammy tomatoes over or around the toast. Carve the chicken and place on top of the toast to catch the juices.

Notes

Tip: The chicken can be roasted a few hours ahead; it’s very good at room temperature.
This recipe is originally from Alison Roman's cookbook "Nothing Fancy" (Clarkson Potter, 2019) and can be found online here
Photo by Hary Dona on Unsplash

Peach Red Pepper Salsa

Photo of tacos from Roman Odintsov from Pexels

Peach and red pepper salsa is a vibrant and refreshing mix of juicy peaches, sweet red peppers, and a hint of heat, perfect for adding a fruity twist to your summer dishes. This salsa takes advantage of peak-season peaches, which are at their juiciest and most flavorful in mid to late summer, and pairs them with the crispness of fresh red peppers. The combination of sweet and slightly spicy elements creates a dynamic flavor profile that’s both refreshing and tantalizing. It’s an ideal accompaniment for grilled meats, tacos, or simply enjoyed with tortilla chips as a summertime appetizer.

These recipes are brought to you through a collaboration with Vetri Community Partnership, a Philadelphia-based nonprofit that nourishes minds, bodies, and communities with nutrition education through cooking. Through hands-on cooking classes and creative demonstrations, Vetri Community Partnership is inspiring people across Philadelphia and Camden to build their culinary confidence through hands-on education. Backyard Eats is proud to partner with Vetri Community Partnership to bring you some of the same nutritious, delicious recipes that they teach in the culinary classroom.

If you also feel passionately about ensuring that everyone has the knowledge and skills in order to find joy in cooking, you belong at Vetri Community Partnership. Take a moment to learn more about how to support their work here.

Photo of tacos from Roman Odintsov from Pexels

Peach & Red Pepper Salsa

Vetri Community Partnership
Peach and red pepper salsa is a vibrant and refreshing mix of juicy peaches, sweet red peppers, and a hint of heat, perfect for adding a fruity twist to your summer dishes.
Prep Time 15 minutes
Course Side Dish
Servings 4

Ingredients
  

  • 3 medium peaches diced small
  • 1/2 bunch fresh mint
  • 1/2 medium red onion diced small
  • 1 medium red bell pepper diced small
  • Juice of 1 lime
  • 1 tsp red chili powder
  • Salt and pepper to taste

Instructions
 

  • Combine peaches, red bell pepper, and onion in a medium mixing bowl.
  • Tear or cut mint leaves into small pieces and add to bowl with other ingredients.
  • Add lime juice, chili powder, salt, and pepper. Mix to combine and adjust seasoning if desired.
  • For best results, allow salsa to sit for 15 minutes to marinate. Enjoy!

Notes

This recipe was originally published by Vetri Community Partnership. You can view the original recipe here.


Sweet Pepper Slaw

Photo of cold noodle salad from Correen from Unsplash


Sweet pepper slaw is a crisp and colorful blend of shredded cabbage and sweet peppers, dressed in a tangy vinaigrette for a refreshing side dish. This slaw shines in late summer when bell peppers are at their sweetest and most abundant, providing a vibrant array of colors and a natural sweetness. The crunchy texture of the cabbage combined with the tender peppers creates a delightful contrast, while the tangy vinaigrette adds a zesty kick. Perfect for picnics and barbecues, sweet pepper slaw complements a variety of main dishes and brings a burst of garden-fresh flavor to your plate.

These recipes are brought to you through a collaboration with Vetri Community Partnership, a Philadelphia-based nonprofit that nourishes minds, bodies, and communities with nutrition education through cooking. Through hands-on cooking classes and creative demonstrations, Vetri Community Partnership is inspiring people across Philadelphia and Camden to build their culinary confidence through hands-on education. Backyard Eats is proud to partner with Vetri Community Partnership to bring you some of the same nutritious, delicious recipes that they teach in the culinary classroom.

If you also feel passionately about ensuring that everyone has the knowledge and skills in order to find joy in cooking, you belong at Vetri Community Partnership. Take a moment to learn more about how to support their work here.

Photo of cold noodle salad from Correen from Unsplash

Sweet Pepper Slaw

Vetri Community Parnership
Sweet pepper slaw is a crisp and colorful blend of shredded cabbage and sweet peppers, dressed in a tangy vinaigrette for a refreshing side dish.
Prep Time 10 minutes
Course Side Dish
Servings 6

Ingredients
  

For the Salad

  • 3-4 bell peppers various colors, sliced thin
  • 1/4 head cabbage (green or red) sliced thin
  • 2 cucumbers sliced thin
  • 1 bunch scallions chopped small
  • 1/2 red onion sliced thin

For the Vinaigrette

  • 1/4 cup apple cider vinegar
  • 1/4 cup olive oil
  • 1 Tbsp honey or sugar
  • 1/2 tsp salt
  • 1 tsp black pepper
  • Juice of 1/2 lemon

Instructions
 

  • Combine all vinaigrette ingredients in a small bowl and whisk together until well combined (or until honey and sugar is dissolved).
  • In a large bowl, combine peppers, cabbage, cucumbers, scallions, and red onion.
  • Pour the vinaigrette over the pepper slaw and toss to combine. Taste and adjust seasoning.
  • Let sit for 5 minutes to marinate or store in the fridge for up to 3 days. Enjoy!

Notes

This recipe was originally published by Vetri Community Partnership. You can view the original recipe here.

Garlicky Eggplant

Photo of sliced and roasted eggplant from Lucian Alexe from Unplash


Garlicky eggplant is a savory dish featuring tender eggplant slices sautéed with garlic and herbs, offering a rich and aromatic flavor. Eggplants reach their prime in late summer, making this the perfect time to enjoy their rich taste. The addition of garlic infuses the dish with a robust, aromatic quality that enhances the natural flavor of the eggplant. This versatile dish can be served as a side, incorporated into pasta, or even used as a topping for bruschetta, making it a delicious and flexible option for seasonal cooking.

These recipes are brought to you through a collaboration with Vetri Community Partnership, a Philadelphia-based nonprofit that nourishes minds, bodies, and communities with nutrition education through cooking. Through hands-on cooking classes and creative demonstrations, Vetri Community Partnership is inspiring people across Philadelphia and Camden to build their culinary confidence through hands-on education. Backyard Eats is proud to partner with Vetri Community Partnership to bring you some of the same nutritious, delicious recipes that they teach in the culinary classroom.

If you also feel passionately about ensuring that everyone has the knowledge and skills in order to find joy in cooking, you belong at Vetri Community Partnership. Take a moment to learn more about how to support their work here.

Photo of sliced and roasted eggplant from Lucian Alexe from Unplash

Garlicky Eggplant

Vetri Community Partnership
Garlicky eggplant is a savory dish featuring tender eggplant slices sautéed with garlic and herbs, offering a rich and aromatic flavor.
Prep Time 5 minutes
Cook Time 10 minutes
Course Side Dish
Servings 4

Ingredients
  

  • 1.5 lb eggplant cut into bite-sized pieces
  • 3 Tbsp olive oil
  • 3 cloves garlic grated or finely minced
  • 1/2 tsp dried oregano
  • Salt and black pepper to taste
  • Pinch red pepper flakes
  • 1.5 Tbsp lemon juice or white wine vinegar
  • 1/4 cup parsley roughly chopped

Instructions
 

  • Heat the olive oil in a large skillet over medium-high heat. Once the oil is hot, add the eggplant, preferable cut-side down.
  • Cook, stirring occasionally, until golden brown and soft. (If there isn't enough room in your skillet for one even layer, work in batches.)
  • Once the eggplant is softened, add the garlic, dried oregano, red pepper flakes, salt and pepper. Toss to combine and cook for 1-2 minutes or until garlic is aromatic and just starting to brown.
  • Turn off the heat and add in the lemon juice or vinegar. Garnish with the chopped parsley. Enjoy!

Notes

This recipe was originally published by Vetri Community Partnership. You can view the original recipe here.

Garlic Scape Pesto

Photo of pesto in a glass jay from Caroline Attwood from Unsplash

Embrace the unique flavors of the season with Garlic Scape Pesto, a vibrant twist on the classic sauce that highlights the fresh, mildly garlicky taste of young garlic scapes from your garden. Blended with fragrant basil, toasted pine nuts, and a generous splash of olive oil, this pesto offers a creamy, zesty burst of summer in every spoonful. Perfect for tossing with pasta, spreading on sandwiches, or using as a dip, this versatile recipe celebrates the fleeting but fantastic flavors of early summer harvests.

Photo of pesto in a glass jay from Caroline Attwood from Unsplash

Garlic Scape Pesto

Kristina Razon
Enjoy the fresh, zesty flavors of summer with Garlic Scape Pesto, featuring young garlic scapes blended with basil, pine nuts, and olive oil for a creamy, versatile sauce.
Prep Time 10 minutes
Course Ingredient
Servings 1.25 cups

Ingredients
  

  • 5 garlic scapes woody ends trimmed and scapes roughly chopped
  • 1/4 cup pine nuts
  • 1 Tbsp fresh lemon juice plus 1 teaspoon grated zest from 1 lemon
  • Kosher salt
  • 1/4 cup grated Parmigiano-Reggiano cheese
  • 1.5 oz basil leaves washed with water still clinging to the leaves
  • 1/2 cup extra-virgin olive oil
  • Freshly ground black pepper

Instructions
 

  • In the bowl of a food processor fitted with a metal blade, combine scapes, pine nuts, and lemon juice and zest, and season with salt. Process, scraping down sides halfway through with a flexible spatula, until scapes and nuts are broken down into small pieces, about 1 minute. 
  • Add cheese and process until incorporated, about 30 seconds. Add basil and pulse until finely minced, about ten 1-second pulses. 
  • Transfer scape mixture to a medium bowl. While stirring continuously, slowly pour olive oil into scape mixture in a thin stream. Season with salt and pepper to taste.
  • Pesto can be used right away, or transferred to a jar or container, covered with a thin  layer of olive oil, and sealed, then stored following the instructions below.

Notes

Storage Note: Garlic scape pesto can be refrigerated in an airtight container for up to 5 days.
This recipe was originally published on the Serious Eats blog
Photo by Caroline Attwood on Unsplash

Summer Panzanella with Squash

Photo of a panzanella salad from Whats4eats

Savor the vibrant flavors of summer with a delightful Summer Panzanella featuring freshly harvested pattypan squash. This garden-to-table recipe celebrates the peak of the season, combining sun-ripened tomatoes, crisp cucumbers, and aromatic basil with the unique, nutty sweetness of pattypan squash. Tossed with rustic, toasted bread cubes that soak up the sherry vinaigrette, each bite is a refreshing symphony of textures and tastes. Perfect for showcasing your garden’s bounty, this panzanella is a light, yet satisfying dish that captures the essence of summer in every mouthful.

Photo of a panzanella salad from Whats4eats

Summer Panzanella with Squash

Jeanine Donofrio
Enjoy the vibrant flavors of summer with Summer Panzanella, featuring fresh pattypan squash, sun-ripened tomatoes, crisp cucumbers, and rustic bread cubes tossed in a light vinaigrette.
Prep Time 10 minutes
Cook Time 5 minutes
Course Salad
Servings 2

Ingredients
  

  • 5-6 pattypan squash cut into 1" pieces
  • olive oil for drizzling
  • 1.5 cups cherry tomatoes cut in half
  • 1 small cucumber cut into 1/2" pieces
  • 1/2 clove garlic minced
  • sherry vinegar for drizzling
  • 1/2 cup mini mozzarella balls cut in half
  • 4-5 slices stale sourdough bread cut into 1" cubes
  • 1/4 cup toasted pine nuts
  • big handful of torn fresh basil leaves
  • generous pinches of sea salt and freshly ground black pepper

Instructions
 

  • Heat a grill pan to medium. Toss the squash pieces with a drizzle of olive oil, and a few pinches of salt and pepper. Place the squash onto the grill pan and grill each side until the squash is tender and char marks form (about 2 minutes per side).
  • Place the cherry tomatoes and cucumbers in a large bowl and toss with a drizzle of olive oil, the minced garlic, a drizzle of sherry vinegar, and a few pinches of salt and pepper. Toss again.
  • When the squash is done, add it to the bowl along with mozzarella, bread, pine nuts, and basil.
  • Add more olive oil, sherry vinegar, salt and pepper as needed.
  • Let the salad sit at room temp for about 15 minutes so that the bread has the chance to soak up the flavorful juices.

Notes

This recipe was originally published on the Love and Lemons blog.

Ratatouille Slab Pie

Photo of ratatouille from Marjan Sadeghi from Unsplash

Discover the rustic charm of our ratatouille slab pie, a flavorful twist on a classic dish. Layers of vibrant vegetables, including zucchini, eggplant, and bell peppers, are nestled in a buttery crust, creating a savory symphony of flavors. Perfect for sharing with loved ones or as a centerpiece for gatherings, this hearty pie celebrates the abundance of summer harvests in every bite.

Photo of ratatouille from Marjan Sadeghi from Unsplash

Ratatouille Slab Pie

Kristen Farmer Hall
Indulge in the rustic charm of Ratatouille Slab Pie, where layers of vibrant vegetables including tomatoes, zucchini, eggplant, and bell peppers are nestled within a flaky pastry crust. This hearty dish offers a symphony of flavors and textures, celebrating the bounty of summer produce in every delicious bite.
Active Time 50 minutes
Total Time 2 hours 30 minutes
Course Main Course
Servings 16 servings

Ingredients
  

  • 1 medium garlic head top 1/2" cut off and discarded
  • 7.5 Tbsp olive oil divided
  • 2 medium eggplants unpeeled, cut into 1/2" pieces (about 8.5 cups)
  • 3 medium-size yellow squash cut into 1/2" pieces (about 6 cups)
  • 3 medium zucchini cut into 1/2" pieces (about 5 cups)
  • 2 Tbsp kosher salt divided, plus more to taste
  • 2.75 tsp black pepper divided, plus more to taste
  • 1 large yellow onion finely chopped (about 2.5 cups)
  • 1 large red or yellow bell pepper finely chopped (about 1.25 cups)
  • 2 14.5oz cans petite diced tomatoes, undrained
  • 3 Tbsp chopped fresh basil
  • 2 tsp chopped fresh thyme
  • 1 tsp crushed red pepper
  • 5 batches All-Purpose Pie Dough (recipe p. 83) shaped into 2 squares and chilled
  • All-purpose flour for work surface
  • 1 large egg beaten

Instructions
 

  • Place oven racks in top third and lower third of oven. Place a large baking stone on lower rack; leave in oven throughout recipe preparation. Preheat oven to 400°F. Drizzle cut side of garlic head with 1/2 Tbsp oil; wrap tightly in aluminum foil. Bake garlic in preheated oven on top rack until garlic cloves are softened, about 45 minutes. Unwrap foil, and set garlic aside.
  • Toss together eggplant, squash, zucchini, 5 Tbsp oil, 4 tsp salt, and 2 tsp black pepper in a large bowl. Divide mixture evenly between 2 rimmed baking sheets, and spread into a single layer. Place baking sheets on top and bottom oven racks. Bake at 400°F until vegetables are just tender, 15-20 minutes, rotating baking sheets after 10 minutes. Set aside to cool for 15 minutes.
  • Heat remaining 2 Tbsp oil in a large Dutch oven over medium heat. Add onion, bell pepper, remaining 2 tsp salt, and remaining 3/4 tsp black pepper; cook, stirring occasionally, until onion mixture is softened, about 10 minutes. Squeeze roasted garlic head to release cloves. Add garlic cloves and tomatoes to onion mixture. Cook, stirring occasionally, until mixture has thickened slightly and tomato juices have mostly evaporated, about 12 minutes. Remove from heat. Stir in basil, thyme, crushed red pepper, and roasted vegetables. Season to taste with salt and black pepper, and let cool completely, about 1 hour.
  • Unwrap 1 chilled pie dough square, and place on a lightly floured work surface; roll into a 24x16" rectangle (about 1/8" thick). Fit dough into a 18x13" rimmed baking sheet (or half sheet pan), allowing excess dough to hang over edges. Trim dough overhang to 1"; discard scraps. Chill, uncovered, at least 15 minutes or up to 1 hour.
  • Unwrap remaining chilled dough square, and roll into a 24x16" rectangle. Cut lengthwise into 1" wide strips. Spread vegetable filling in an even layer in chilled pie shell in baking sheet. Brush edges of dough lightly with some of the beaten egg. Arrange dough strips in a lattice pattern on top of filling, leaving about 1/2" between strips. Trim dough strip overhang to 1", using some of the trimmed longer strips to complete the lattice pattern as needed. Fold bottom dough overhang and lattice strip underhang under, and gently press together on pan edges. Freeze pie, uncovered, 20 minutes. Reduce oven temperature to 375°F.
  • Brush dough lightly with remaining beaten egg. Bake pie on bottom oven rack on top of preheated backing stone until crush is golden brown and filling is bubbly, 1 hour to 1 hour and 15 minutes. Transfer pie to a wire rack. Let cool at least 30 minutes before slicing. Serve warm or at room temperature.

Notes

Note: Filling can be made up to 3 days in advance. Pie dough can be chilled up to 3 days.
This recipe by Kristen Farmer Hall was published in the August 2020 issue of Food & Wine.
This favorite recipe was contributed by a Backyard Eats client! She encourages home cooks to substitute ingredients as needed based their lifestyle or what's growing fresh in their garden.

Chocolate Zucchini Cupcakes with Chocolate Cream Cheese Frosting

Photo of chocolate frosted cupcake from Mike Meeks from Unsplash

Experience the decadence of our chocolate zucchini cupcakes, a delightful treat that balances richness and freshness. Moist and chocolaty, each bite is infused with the subtle sweetness of grated zucchini. Topped with creamy frosting, they’re a perfect indulgence for any occasion, combining the goodness of vegetables with the irresistible allure of chocolate.

Photo of chocolate frosted cupcake from Mike Meeks from Unsplash

Chocolate Zucchini Cupcakes with Chocolate Cream Cheese Frosting

Costco Connection
Treat yourself to decadent Chocolate Zucchini Cupcakes, where moist and chocolatey cake is infused with grated zucchini for a delightful hint of freshness and topped with creamy frosting. These indulgent cupcakes offer a perfect balance of rich cocoa flavor and subtle sweetness, making them a delightful treat for any chocolate lover.
Course Dessert
Servings 24 cupcakes

Ingredients
  

Chocolate Zucchini Cupcakes

  • 2 cups zucchini shredded
  • 3 eggs
  • 2 cups sugar
  • 3/4 cup vegetable oil
  • 2 tsp vanilla
  • 2 cups all-purpose flour
  • 2/3 cup unsweetened cocoa powder
  • 1 tsp baking soda
  • 1/2 tsp baking powder
  • 1 tsp salt

Chocolate Cream Cheese Frosting

  • 8 oz cream cheese room temperature
  • 1/2 cup unsalted butter room temperature
  • 3 cups powdered sugar
  • 1/2 cup unsweetened cocoa powder
  • 1/4 tsp salt
  • 1 tsp vanilla

Instructions
 

  • Preheat oven to 325°F. Line 24 standard muffin cups with liners or spray with nonstick cooking spray and set aside.
  • In a large bowl, mix together zucchini, eggs, sugar, oil, and vanilla. Add flour, cocoa powder, baking soda, baking powder, and salt, and mix to incorporate.
  • Spoon the batter into the prepared cups, filling each about half full. Bake for 25 minutes or until an inserted toothpick comes out clean. Cool cupcakes completely on wire racks.
  • Prepare the frosting: In a large bowl, beat the cream cheese and butter until creamy. Add powdered sugar, cocoa powder, salt and vanilla. Continue beating until smooth and whipped. Frost the cupcakes.

Notes

This recipe was originally published in the August 2021 issue of Costco Connection.
This favorite recipe was contributed by a Backyard Eats client! She encourages home cooks to substitute ingredients as needed based their lifestyle or what's growing fresh in their garden.